With the growing trend of e-commerce, online shopping has become a daily routine for many. Although it is convenient, sometimes the shopping process can be a bit tedious. Luckily, WooCommerce has a feature that can make shopping easier. By automating the product addition to the cart, you can save time and effort. In this article, we will discuss how you can use the auto-add products to cart feature to streamline your shopping experience.
Make Shopping a Breeze: Auto-Add Products to Cart in WooCommerce
Imagine visiting an online store, and all the products you need are automatically added to your cart. This is what the auto-add feature in WooCommerce offers. With just a click of a button, you can add multiple products to your cart without having to navigate through the store. This feature is especially helpful when you would like to provide gift products to your customers. The gift products will be auto add to the cart when customers purchase a special product or spend a specific money on your store.
WooCommerce Auto Add Products to Cart Plugin
WooCommerce Auto Add Products to Cart Plugin is an easy-to-use plugin that is an add-on for the Discount Rules and Dynamic Pricing plugin. You can use this plugin to give gift products, or auto-add products to the cart based on cart conditions.
Install Auto Add Products to Cart
In this article we are using Advanced Discounts plugin to create BOGO Deals, Auto Add Products by Cart Conditions, URL Coupons.
Installing the plugins are as easy as installing other WordPress plugins. You can upload the archive files and then install them.
BOGO Deals
BOGO (Buy One Get One) deals are a popular promotion for online stores. The good news is that you can set up BOGO deals in WooCommerce with the help of a plugin. One such plugin is “Discount Rules and Dynamic Pricing” This plugin enables you to create and apply BOGO deals easily. You can set up various types of BOGO deals, such as “Buy One Get One Free“, “Buy One Get One 50% Off”, “Buy 2 Get 1 Free“, “Buy 3 Get 1 Free” and so on. Once you’ve set up the deals, the plugin will automatically add the free or discounted product to the cart when the customer adds the qualifying product.
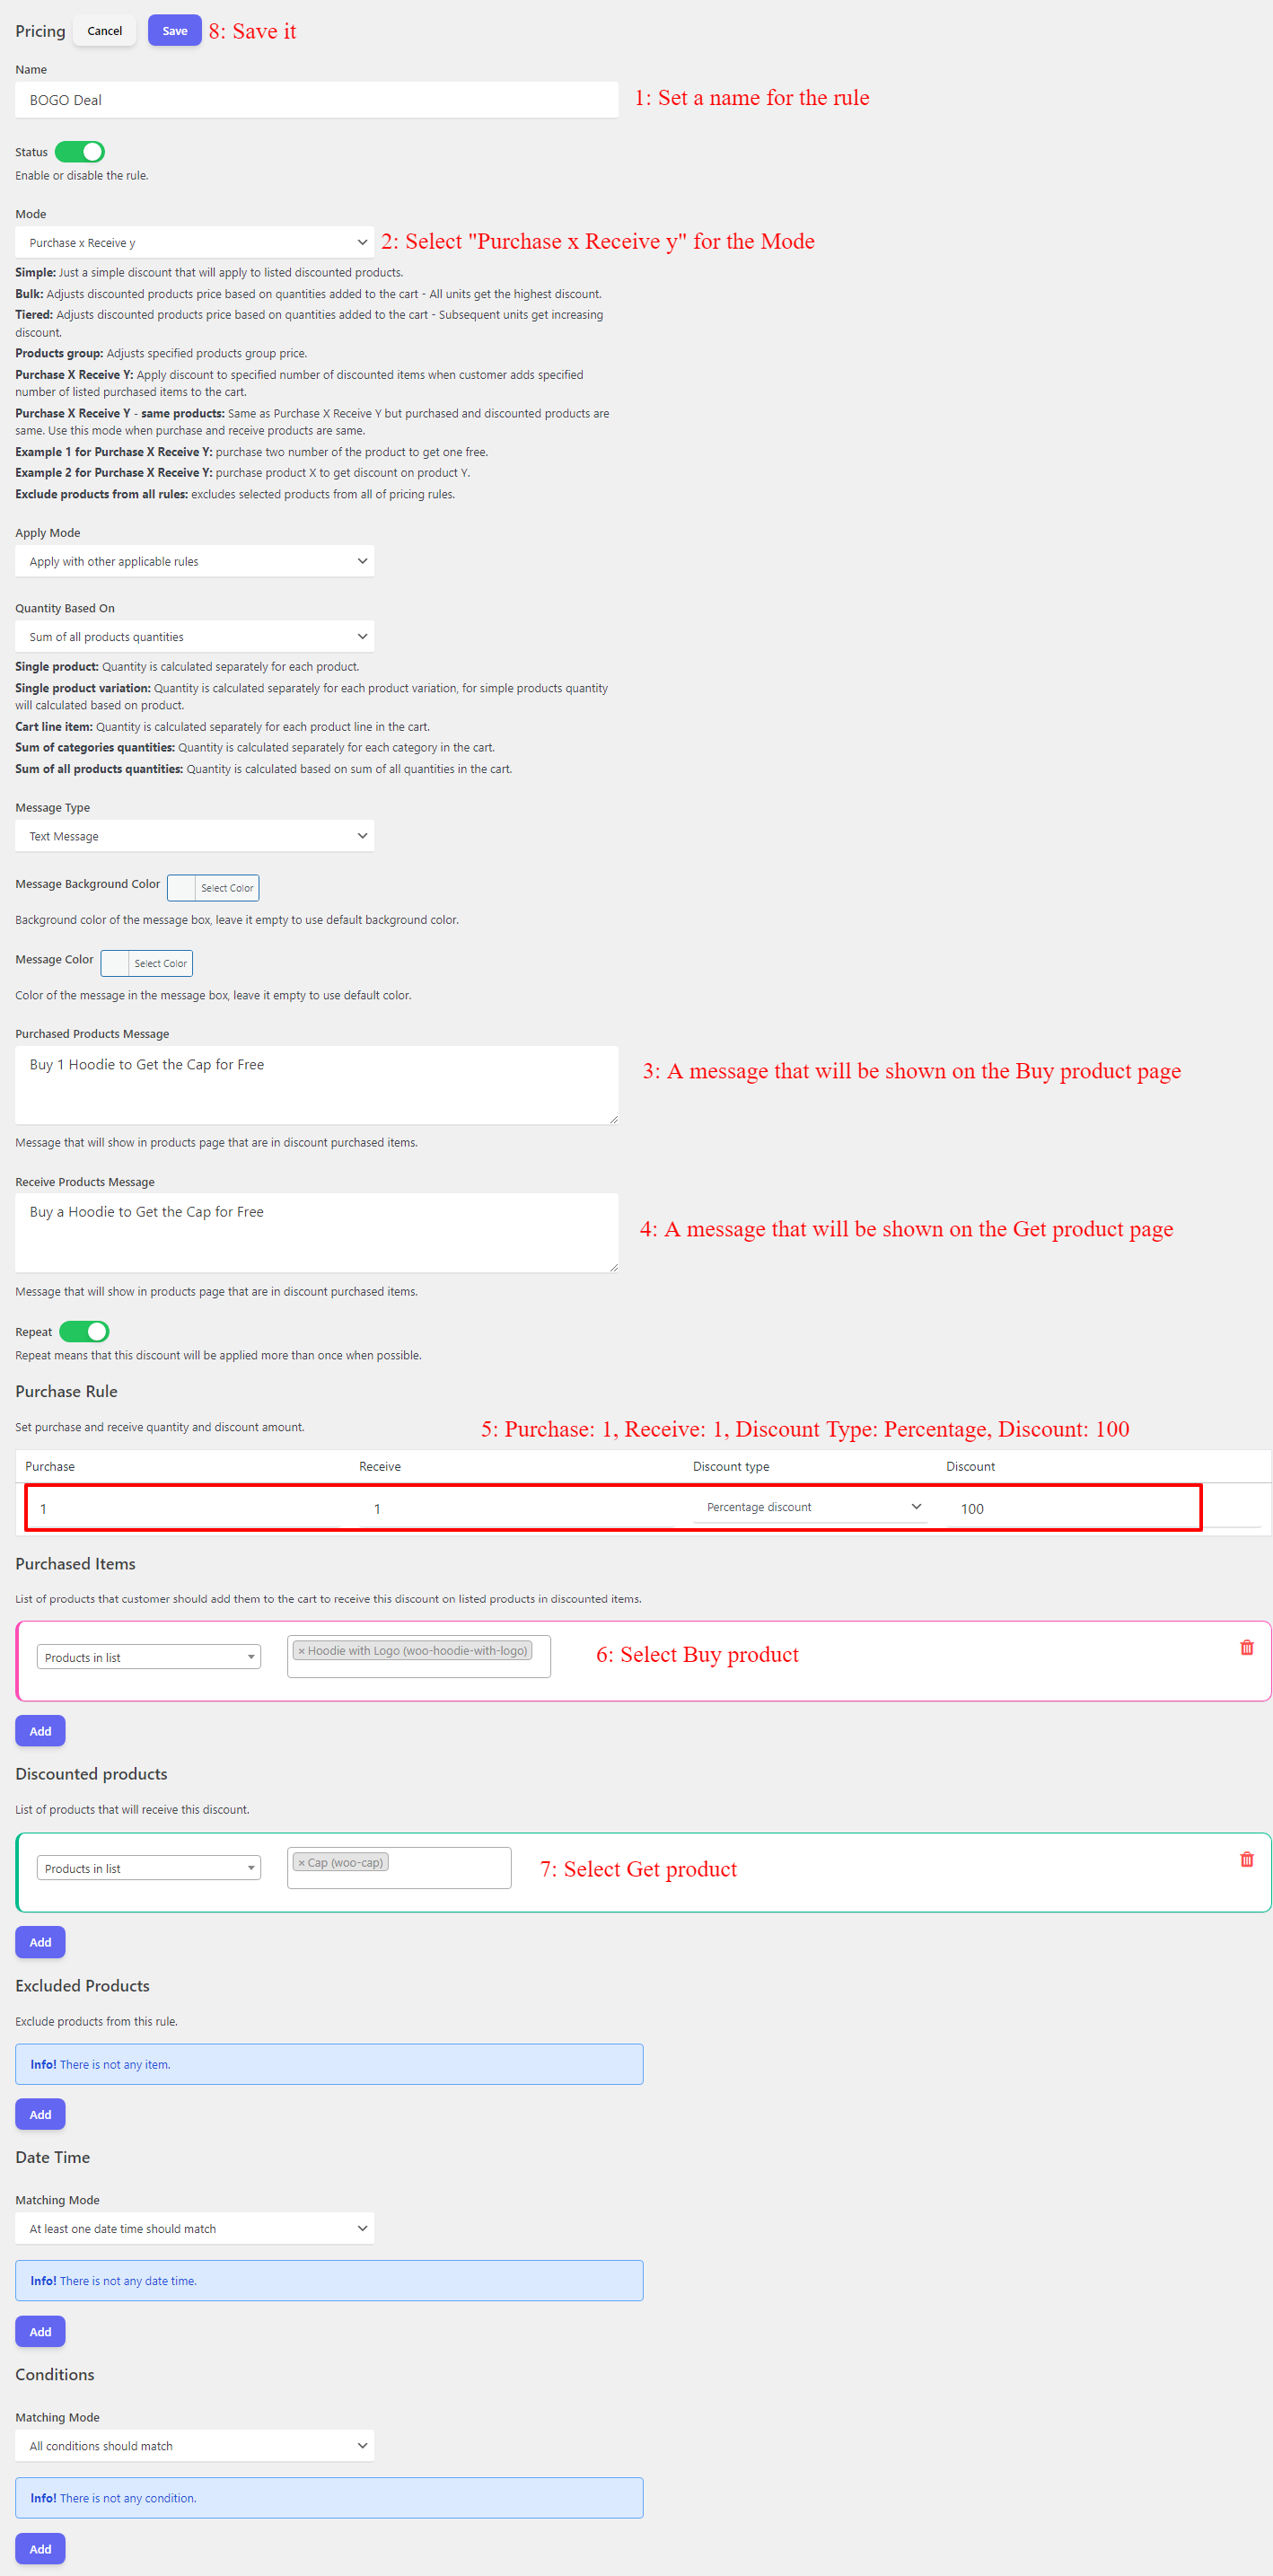
In this tutorial, we will explain a simple type of BOGO deal (Buy product A and Get product B for free) and you can read more here.
1. Create a Pricing Rule
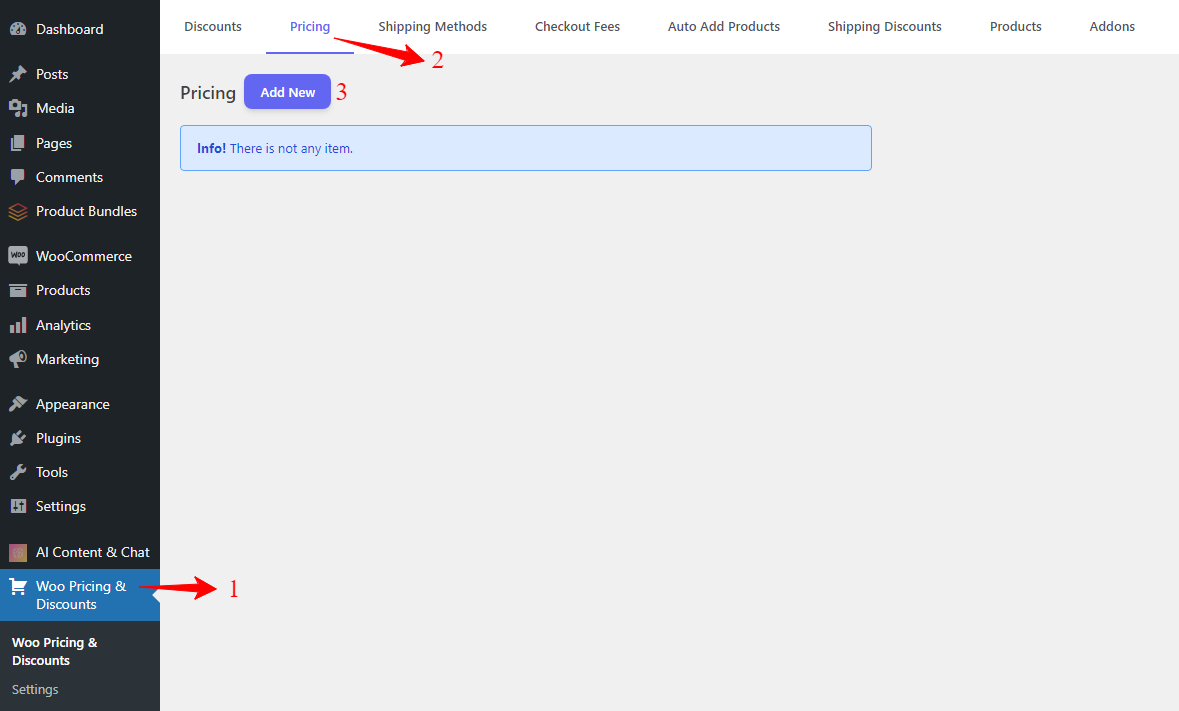
Navigate to the Pricing tab in the plugin and create a pricing rule like the below image.
2. Add Buy Product to the Cart
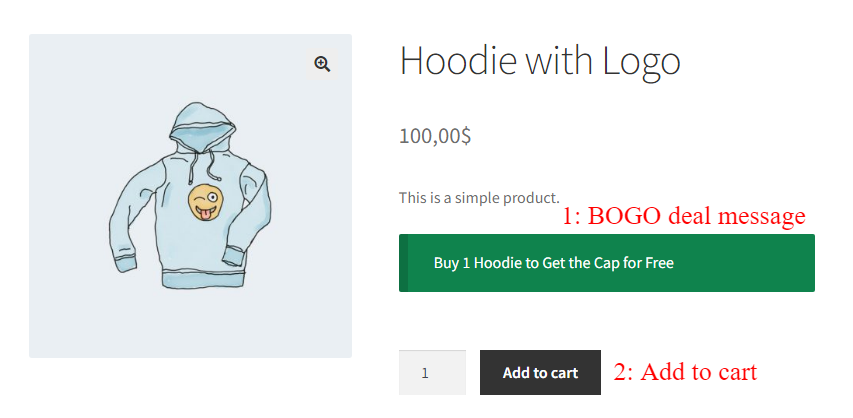
Now open the buy product page. You will see the purchase message on the product page. Add the product to the cart.
3. Get the Free Product Automatically
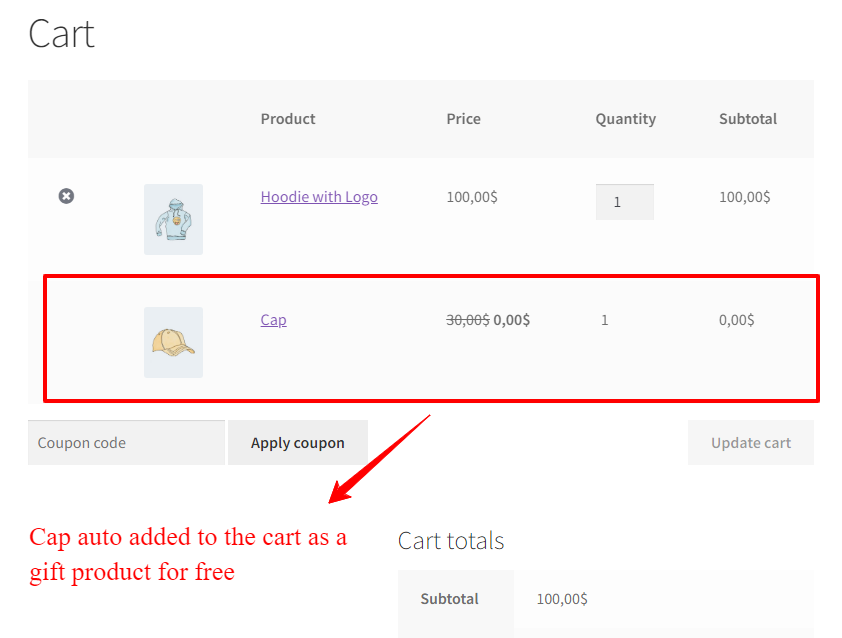
Open the cart page and you will see the free gift product in the cart. the gift product is automatically added to the cart.
Auto Add Products by Cart Conditions
What if you want to offer a free product or a discount on a product when the customer adds a certain number of products to the cart? You can achieve this with the help of the “Auto Add Products to Cart” plugin. This plugin enables you to set up rules based on the cart contents and different conditions, such as the number of items, total price, product category, money spent, purchase history, specific items in the cart, and so on. Once you’ve set up the rules, the plugin will automatically add the free or discounted product to the cart when the cart meets the conditions.
To auto-add products to the cart based on cart conditions follow the below instructions.
1. Create an Auto Add Product rule
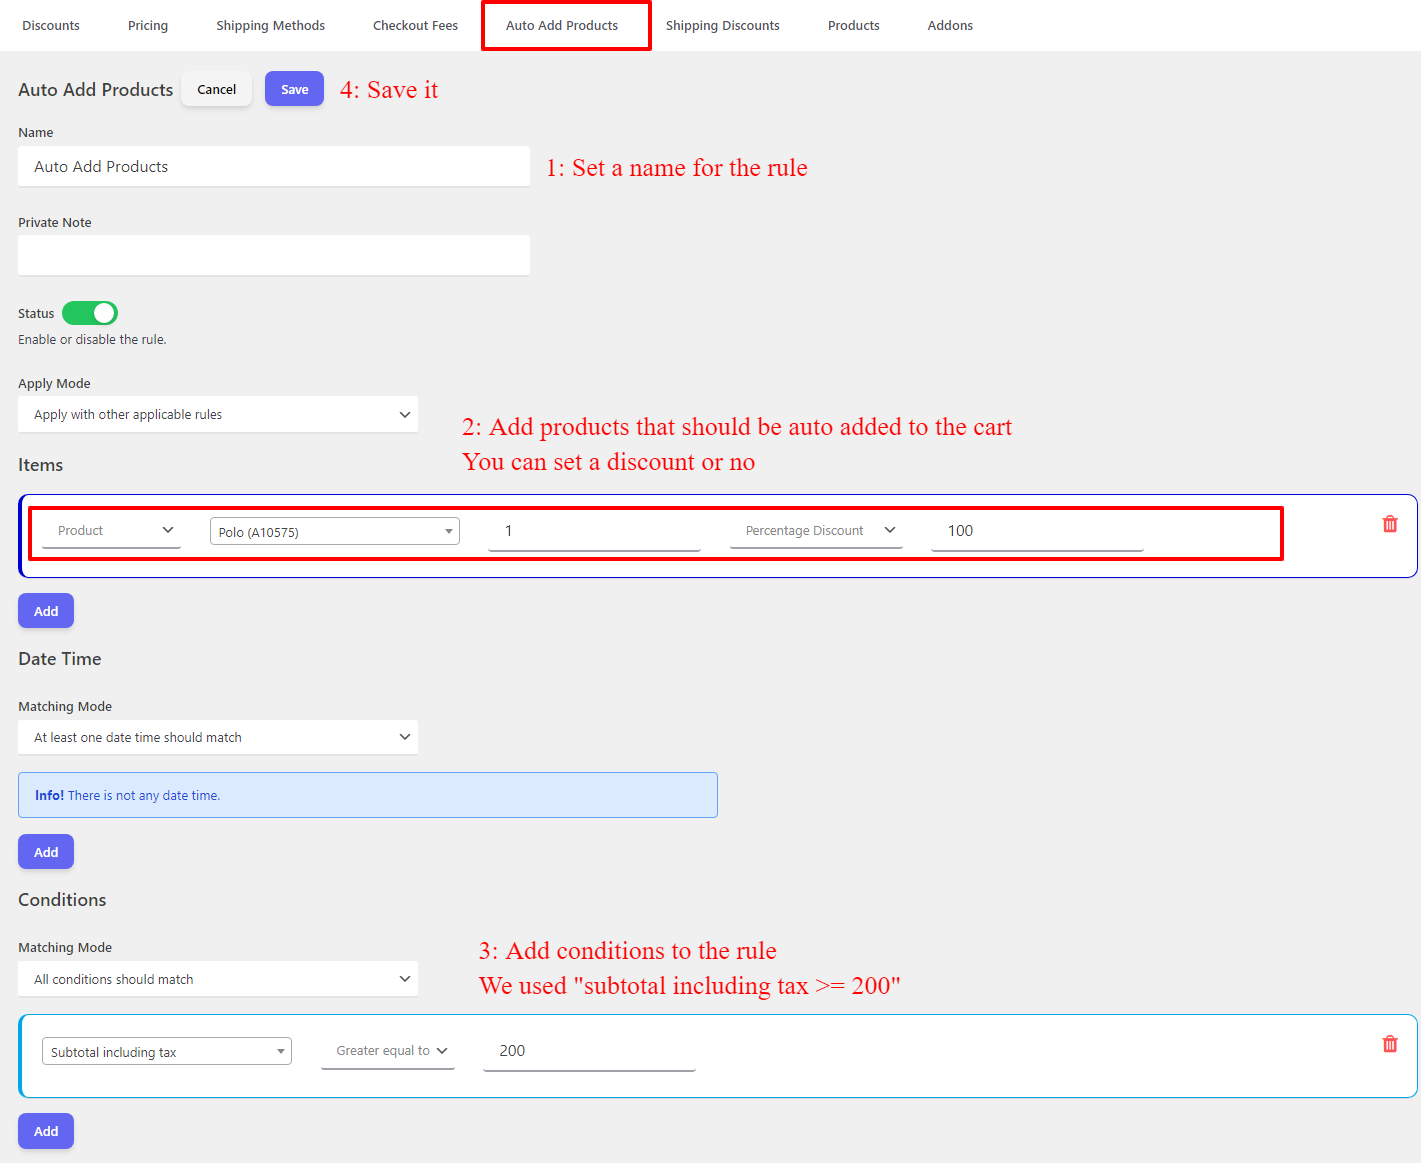
In this example, we will create an auto-add product rule based on the cart subtotal.
To create the rule navigate to the Auto Add Products tab and then add a rule like the below image.
2. Check the Cart for Auto-Added Product
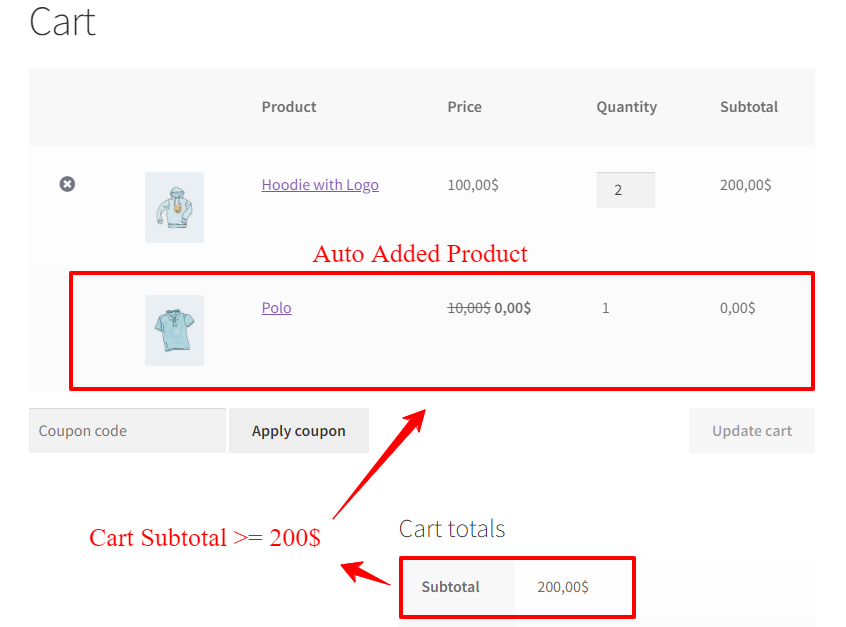
Now we add some products to the cart to meet the rule requirements (subtotal >= 200), and the auto-add product is automatically added to the cart.
Auto Add Products with a Link
Finally, you can also auto-add products to the cart with a link. This method is handy when you want to offer a promotion or discount to a specific group of customers, such as email subscribers or social media followers. To implement this method, you need to install and activate “URL Coupons for WooCommmerce” plugin and create a URL coupon in WooCommerce. Then, you can share the URL with your target audience. When they click on the link, the product will be added to their cart automatically.
To create a URL Coupon in WooCommerce follow the below steps.
1. Create a URL Coupon with Auto Add Products in WooCommerce
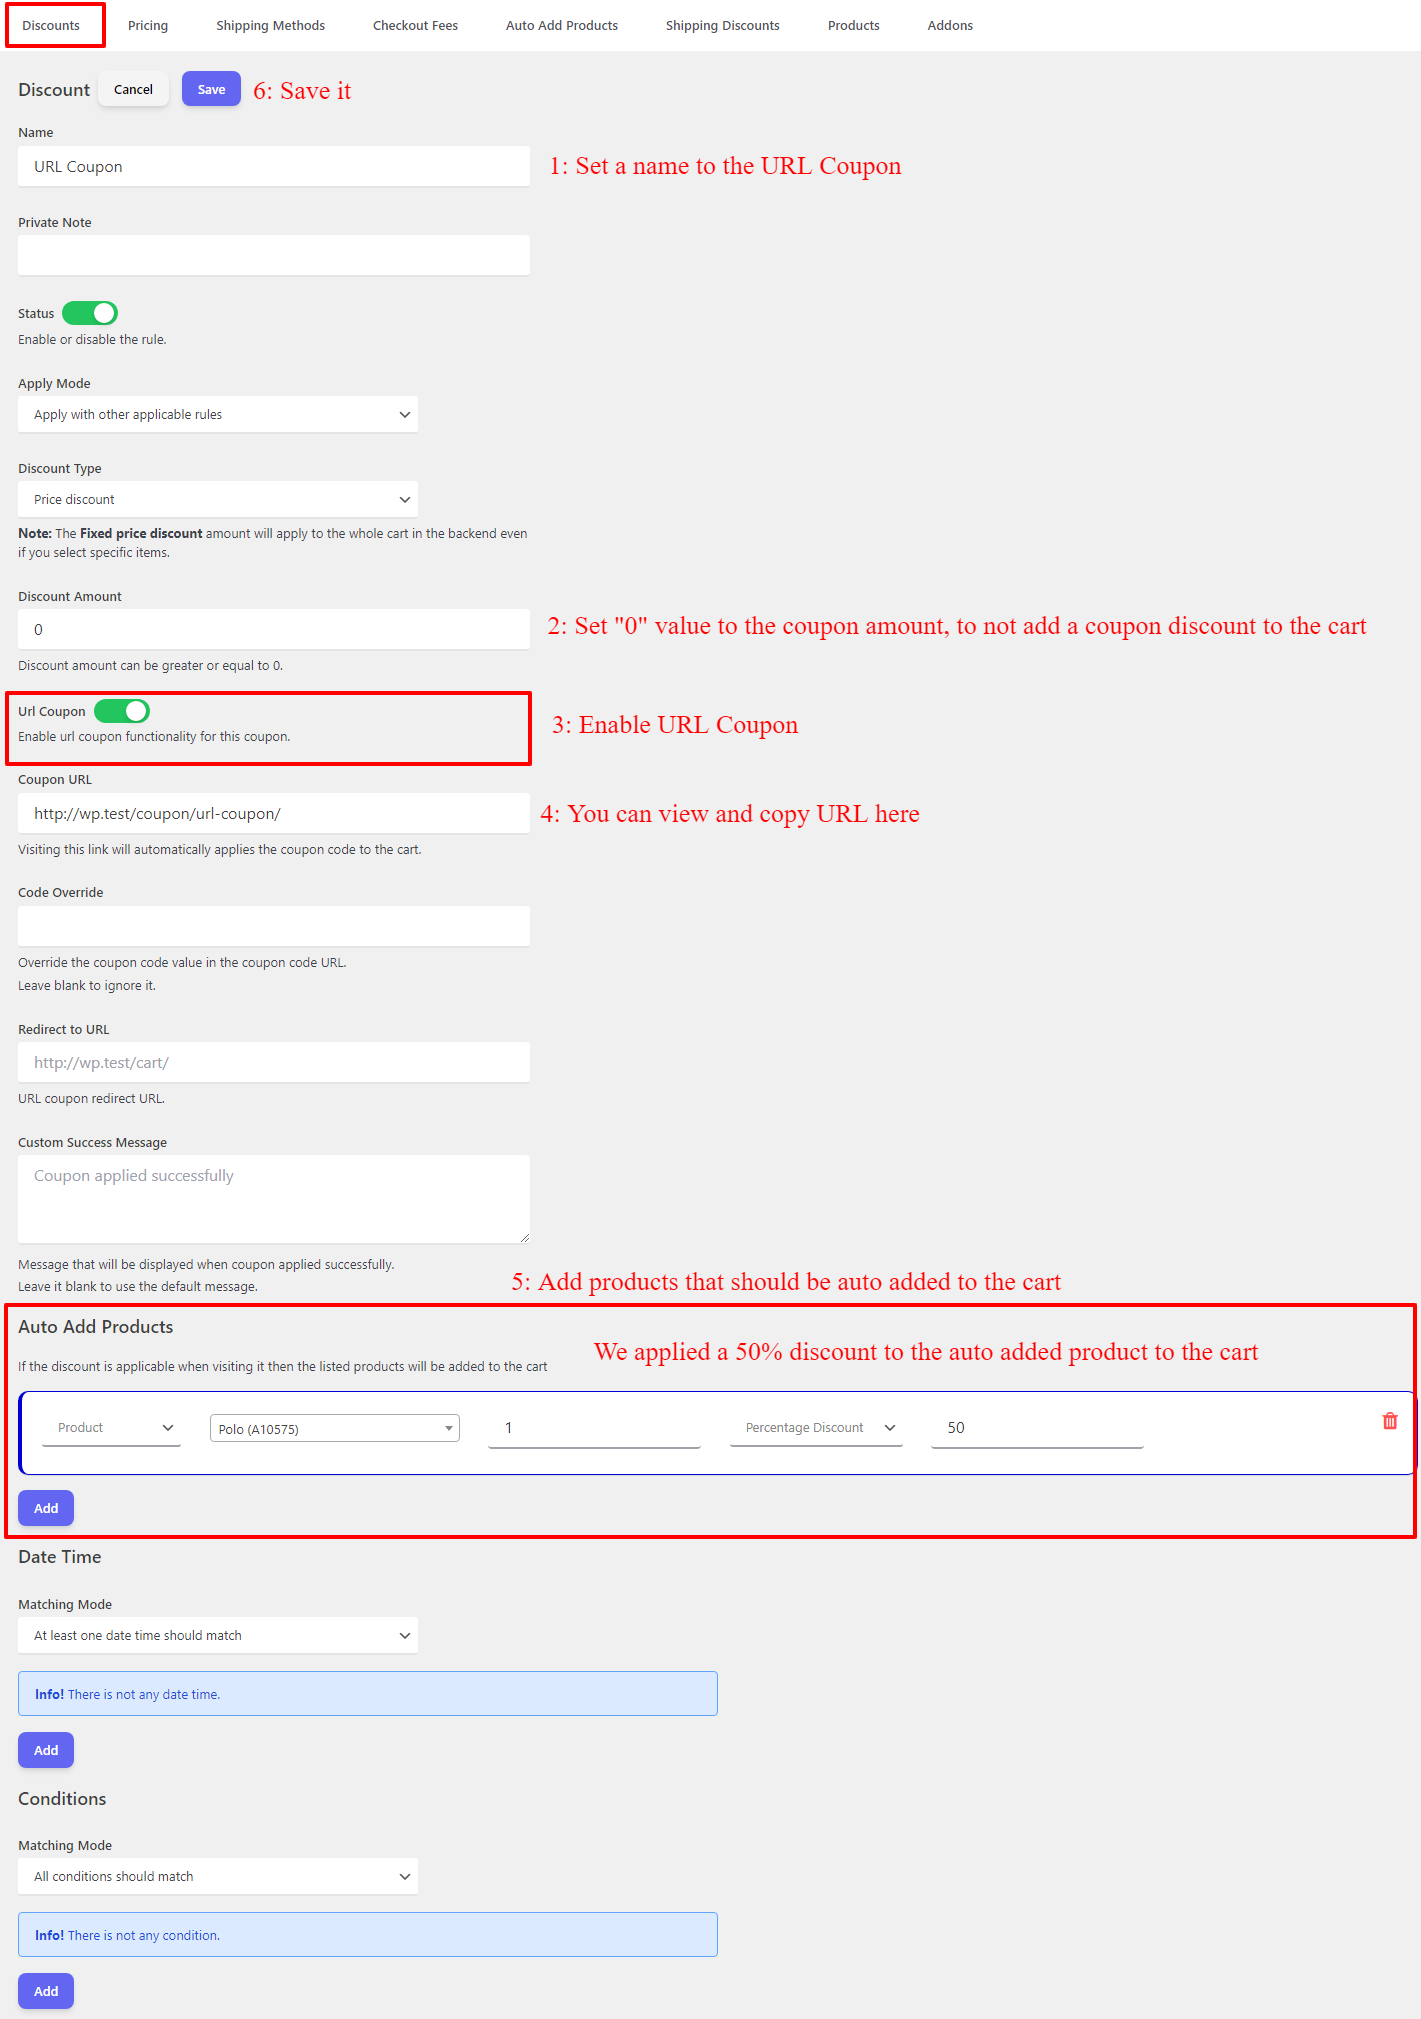
Navigate to the Discounts tab, and create a URL couopn rule like the below image.
2. Open URL Coupon link
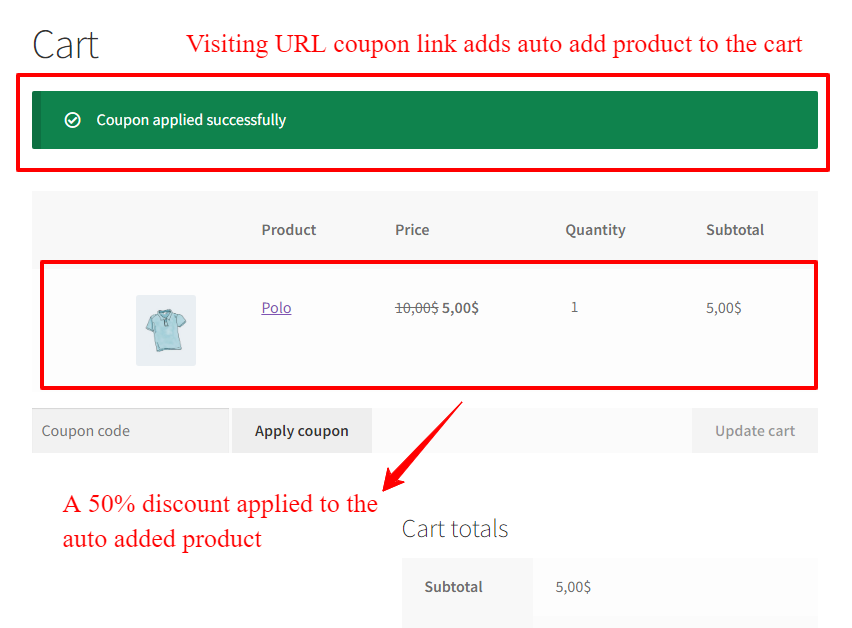
If you open the URL coupon link the auto add product will be automatically add to the cart.
In this example we applied a 50% discount on the auto add product.
3. Share URL Coupon link
You can share the URL coupon link with your target audience.
Conclusion
Automating the process of adding products to the cart is a great way to improve the shopping experience for your customers. With the three methods we’ve discussed in this article, you can offer BOGO deals, set up cart conditions, and provide targeted promotions with ease. So, go ahead and try these methods in your WooCommerce store and see the difference it makes!
