In this guide, we’ll guide you step-by-step on incorporating a sales countdown timer into your WooCommerce product listings. Explore the dynamic feature of countdown timers and their potential to create a sense of urgency and excitement among your customers. Learn how to strategically use countdown timers to promote limited-time sales, special offers, or exclusive deals, enhancing your online store’s overall appeal. Whether aiming to boost sales, increase customer engagement, or add an interactive element to your product pages, this tutorial provides comprehensive insights. Join us to empower your WooCommerce store with the impactful addition of sales countdown timers and elevate the shopping experience for your customers.
Video Tutorial
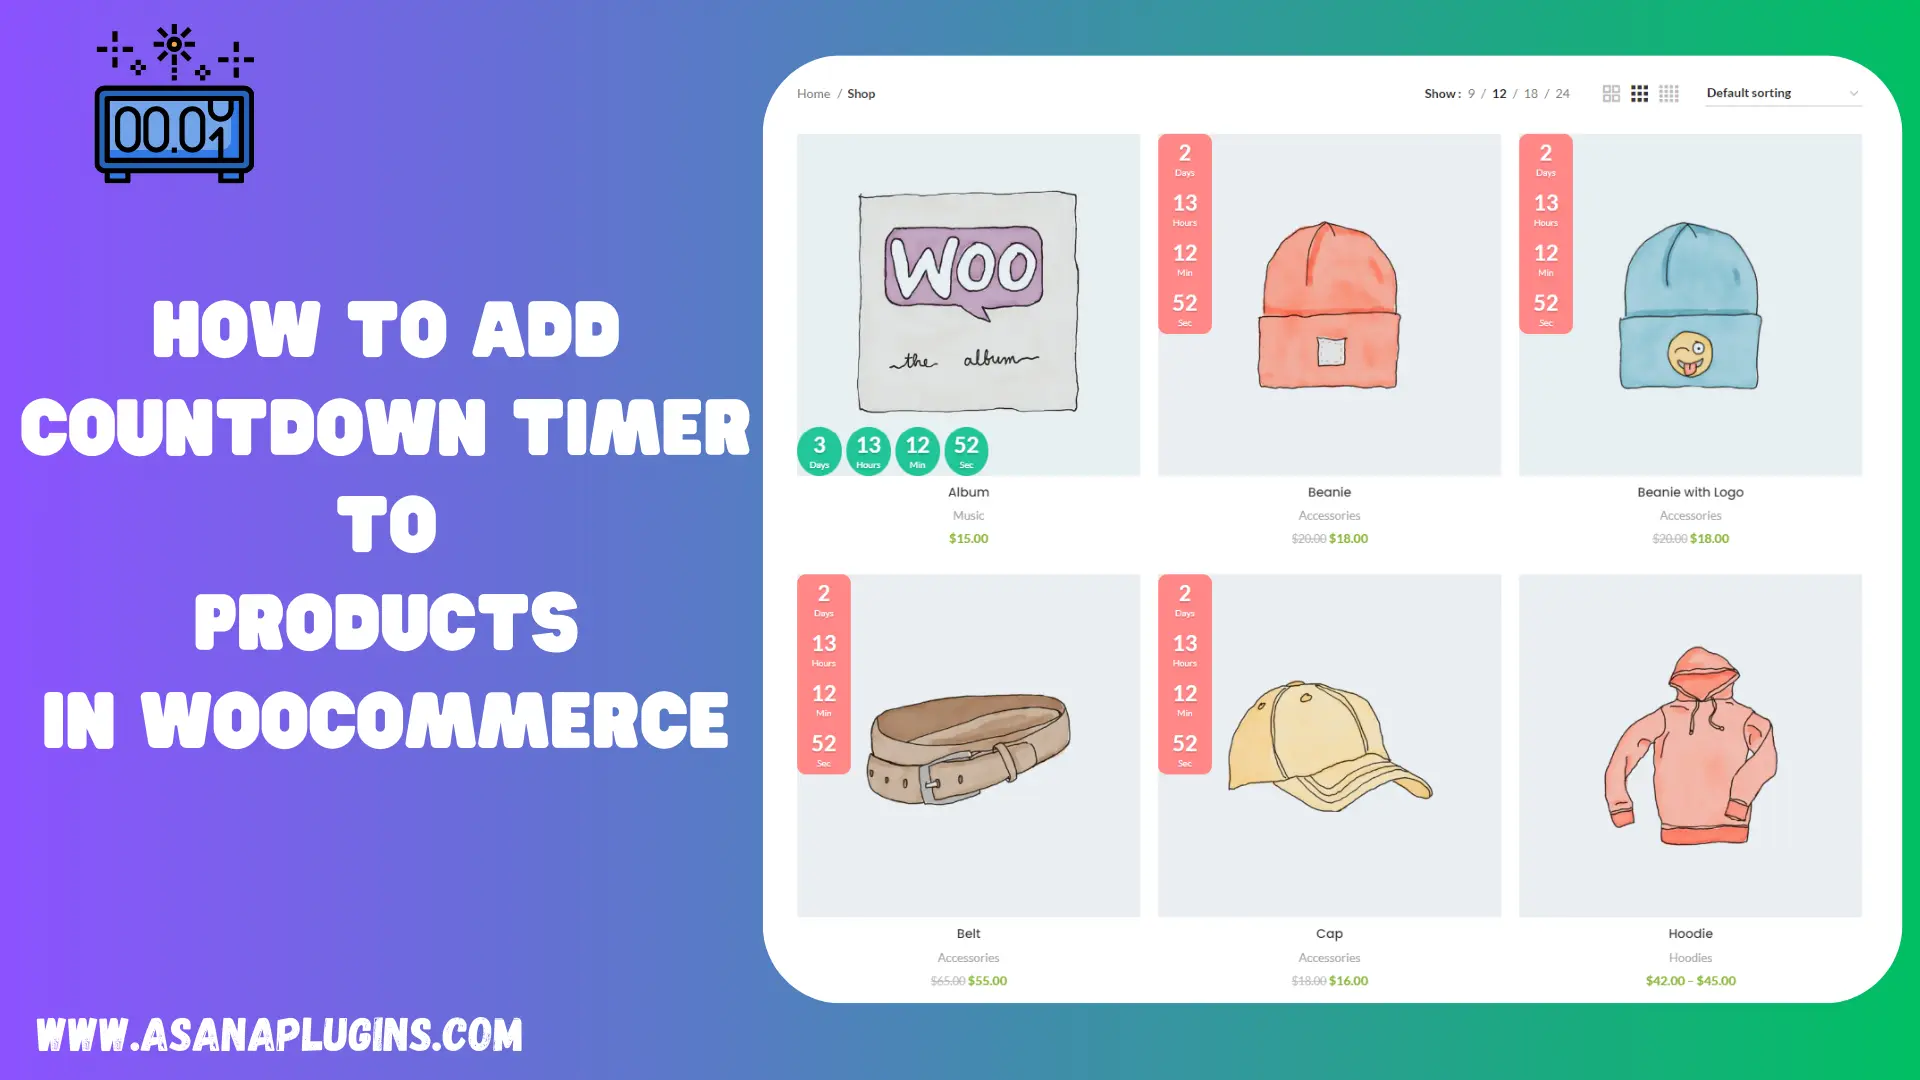
What is a Sales Countdown Timer for Products?
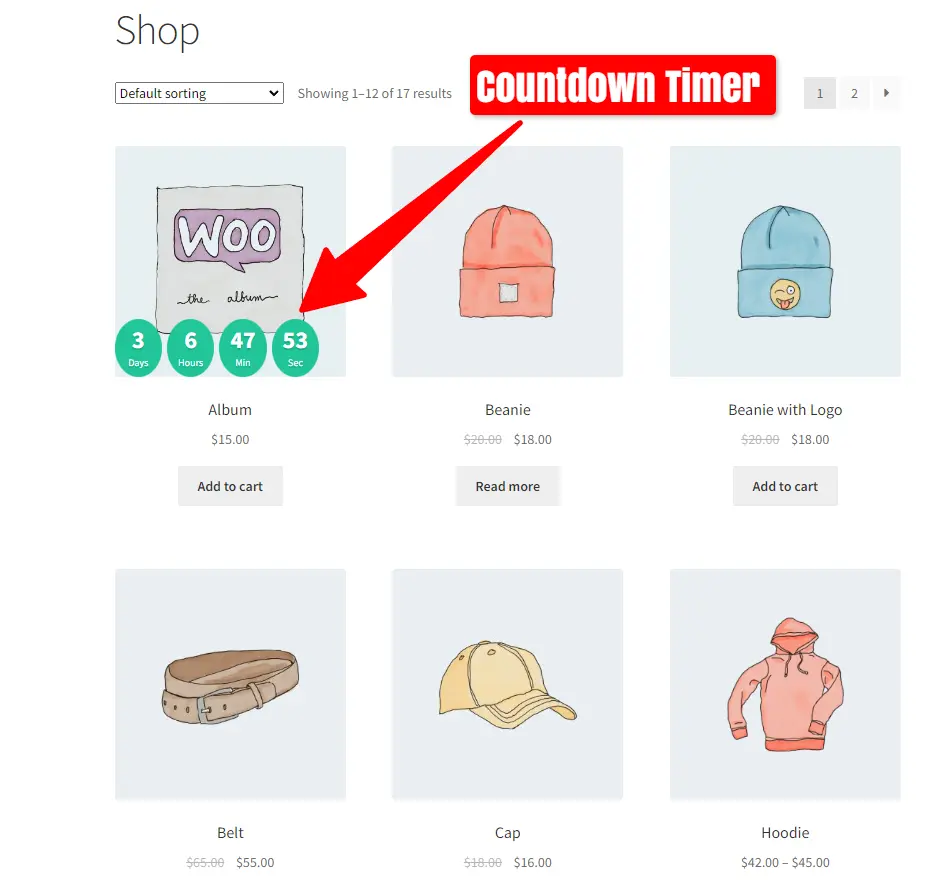
A Countdown Timer for Products is a marketing tool that creates a sense of urgency and encourages potential customers to purchase within a specific time frame. Additionally, it involves displaying a timer on a product or promotional page that counts down to a predetermined deadline. The timer is often accompanied by messages such as “Limited-time offer” or “Sale ends soon,” aiming to motivate customers to take immediate action.
What are the benefits of a Sales Countdown Timer for Products?
The use of a Sales Countdown Timer for Products offers several benefits for businesses looking to boost sales and engage customers:
Urgency and Scarcity: Countdown timers create a sense of urgency and scarcity by highlighting that a special offer or promotion is available for a limited time. This can prompt customers to make quicker purchasing decisions, fearing they might miss out on a good deal.
Increased Conversion Rates: Additionally, the psychological impact of a timer often leads to increased conversion rates. When customers perceive a time constraint, they are more likely to take immediate action and complete their purchase, contributing to higher conversion rates.
Promotion Reinforcement: Moreover, countdown timers serve as a visual and dynamic reinforcement of promotional messages. They draw attention to ongoing sales, discounts, or product launches, ensuring that customers are aware of the limited-time nature of the offer.
Customer Engagement: Furthermore, the dynamic and visually appealing nature of countdown timers can capture the attention of website visitors. This engagement is valuable for retaining interest and encouraging visitors to explore the promoted products or offers.
Brand Perception: Using countdown timers strategically can enhance the perception of your brand as dynamic and innovative. It shows that your business is proactive in providing value to customers and creates a positive association with time-limited opportunities.
Promotion of Special Events: Countdown timers are effective for building anticipation and excitement around special events, such as product launches or flash sales. The ticking clock creates a sense of anticipation, motivating customers to be part of the event.
In summary, a Timer for Products is a powerful marketing tool that leverages psychological triggers to drive sales, engage customers, and enhance the overall effectiveness of promotional efforts.
How to Add Sales Countdown Timer to Products in WooCommerce
In this article, we will provide you with a detailed guide to adding Sales Countdown Timers to Woocommerce All Products and specific Products and Categories and Is On Sale and Stock Out Of Stock and Backorder.
Are you ready? Let’s dive in.
Install Sale Badges and Product Labels for WooCommerce
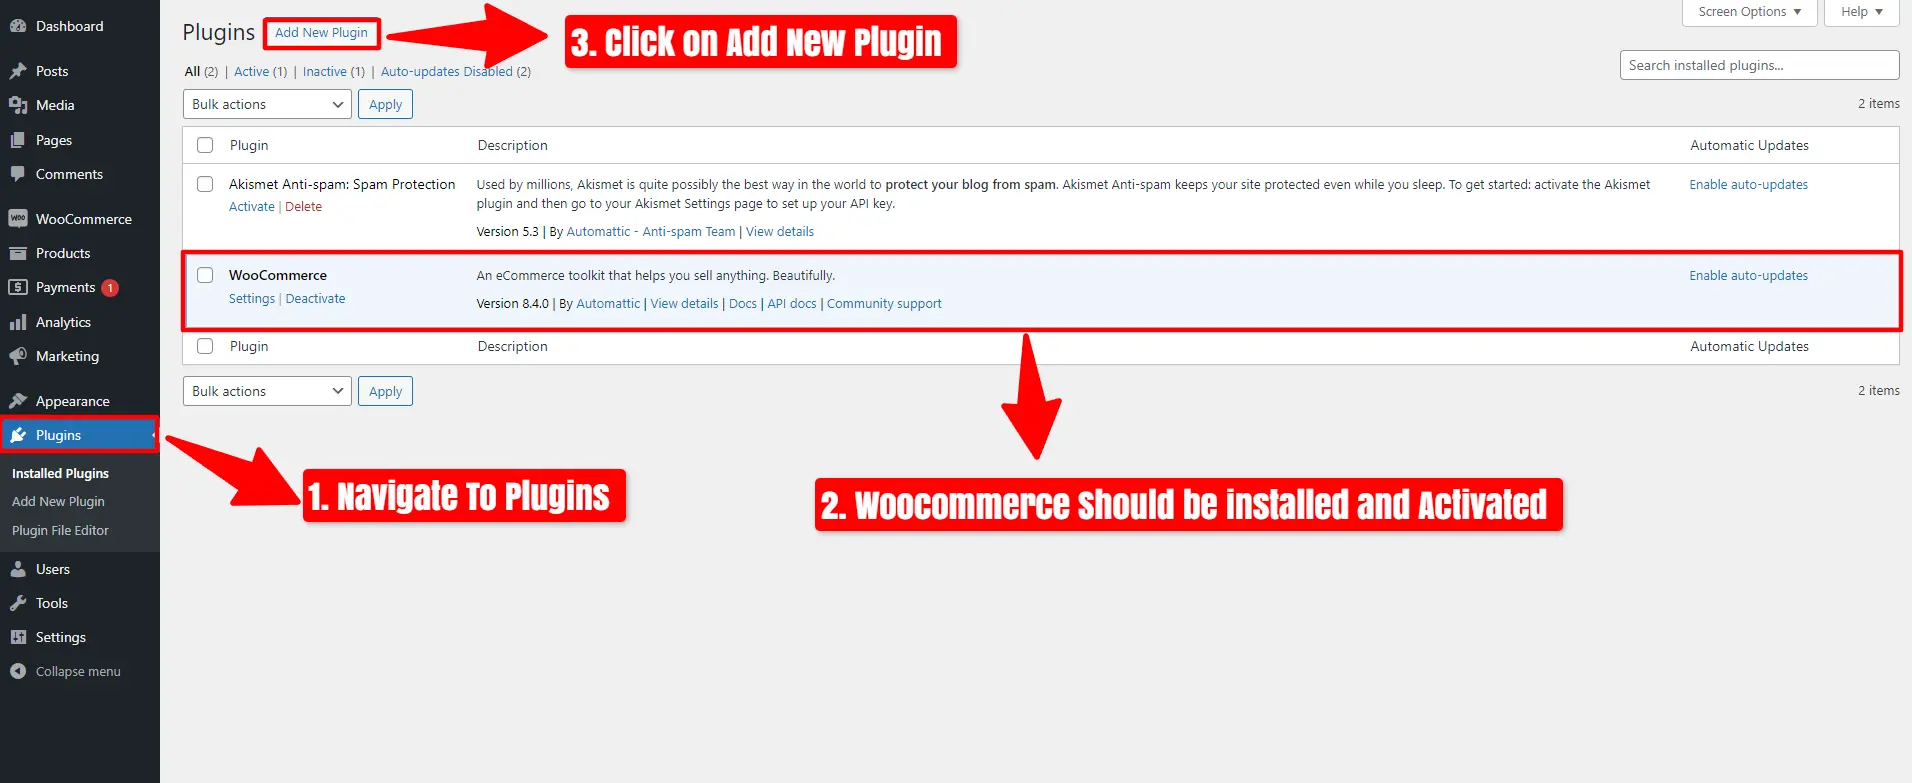
Follow these steps to install the Sale Badges and Product Labels for the WooCommerce plugin.
- Navigate To Plugins.
- Woocommerce Should be installed and Activated.
- Click on Add New Plugin.
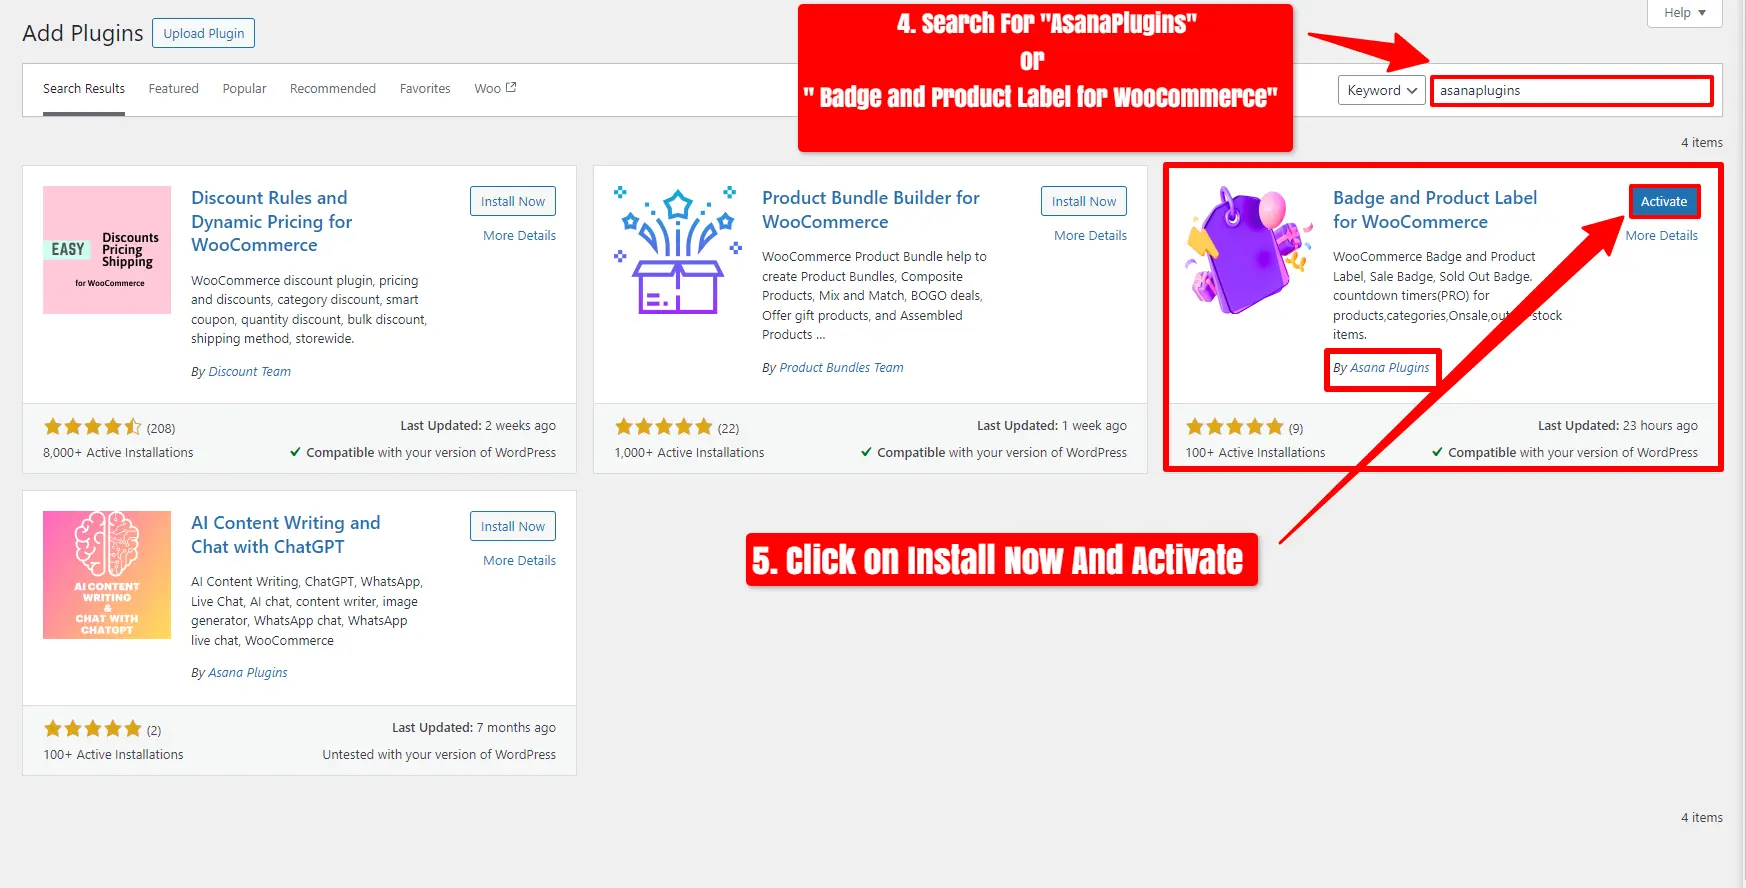
- Search For ‘Asanaplugins‘ or ‘Badges and Product Labels for WooCommerce‘.
- After seeing the plugin, click on “Install Now” and activate it.
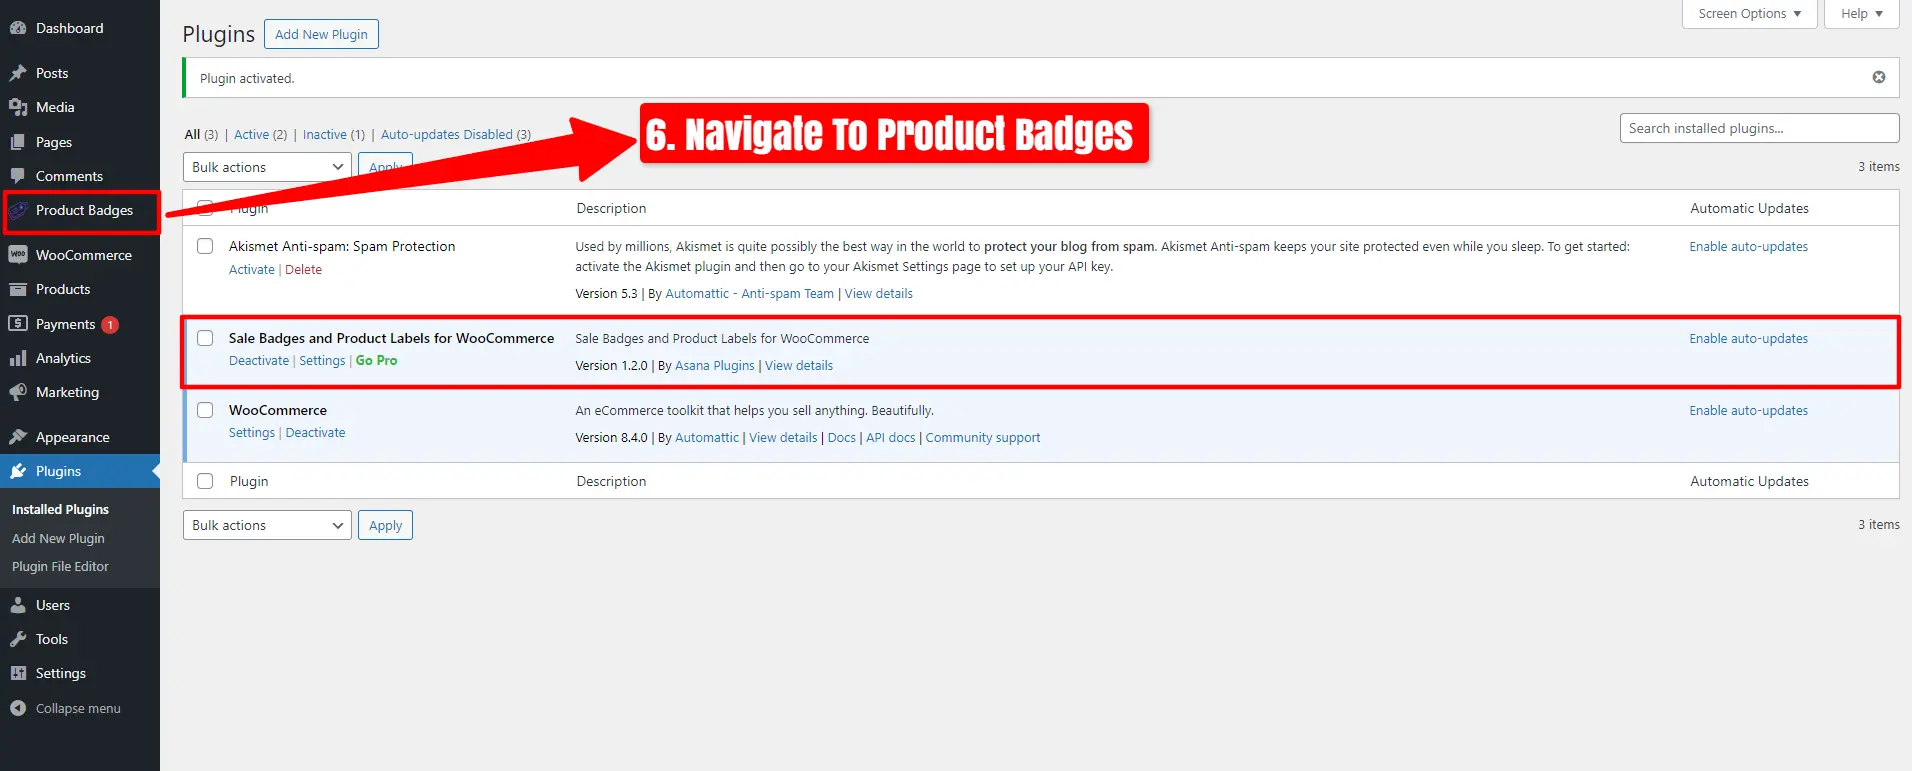
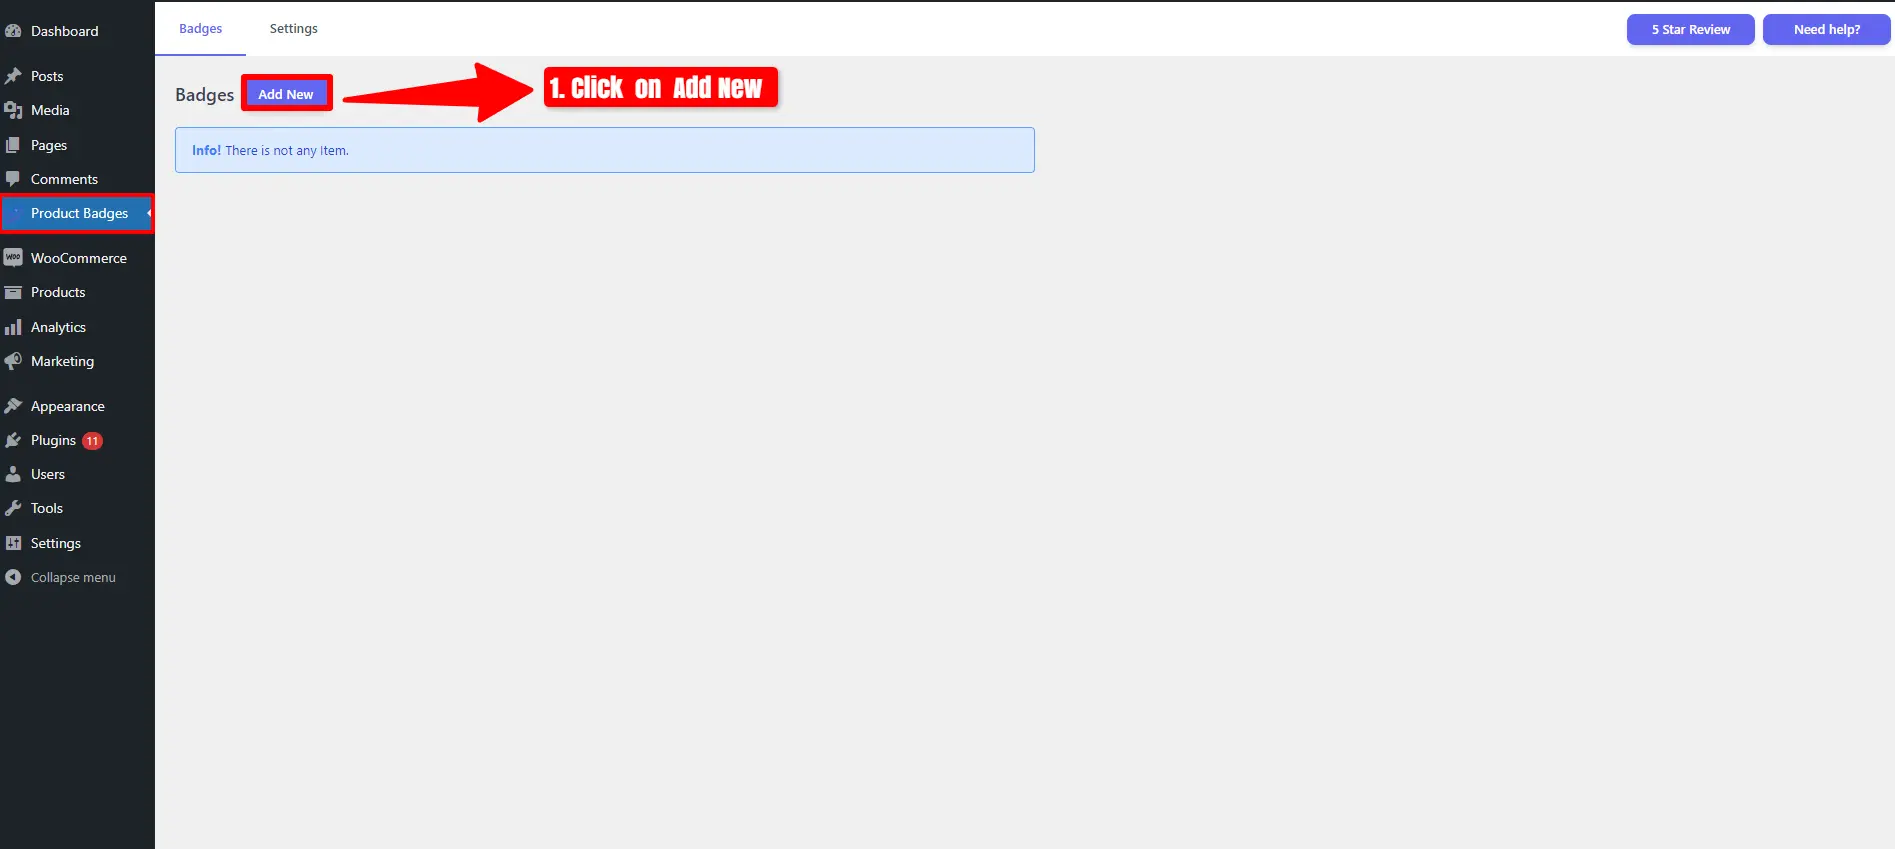
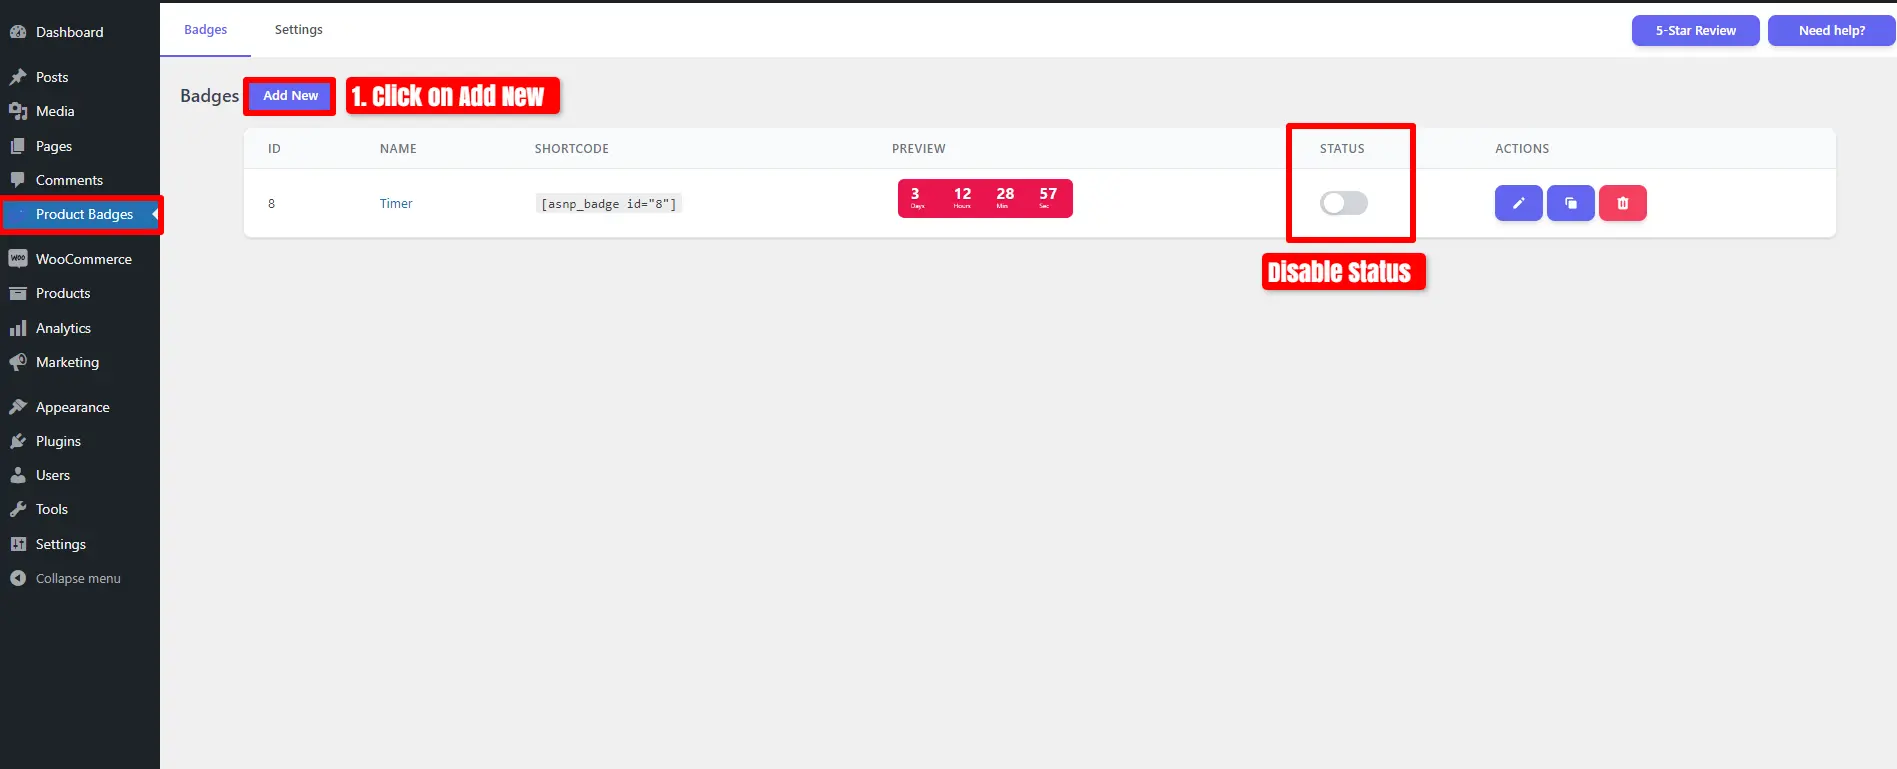
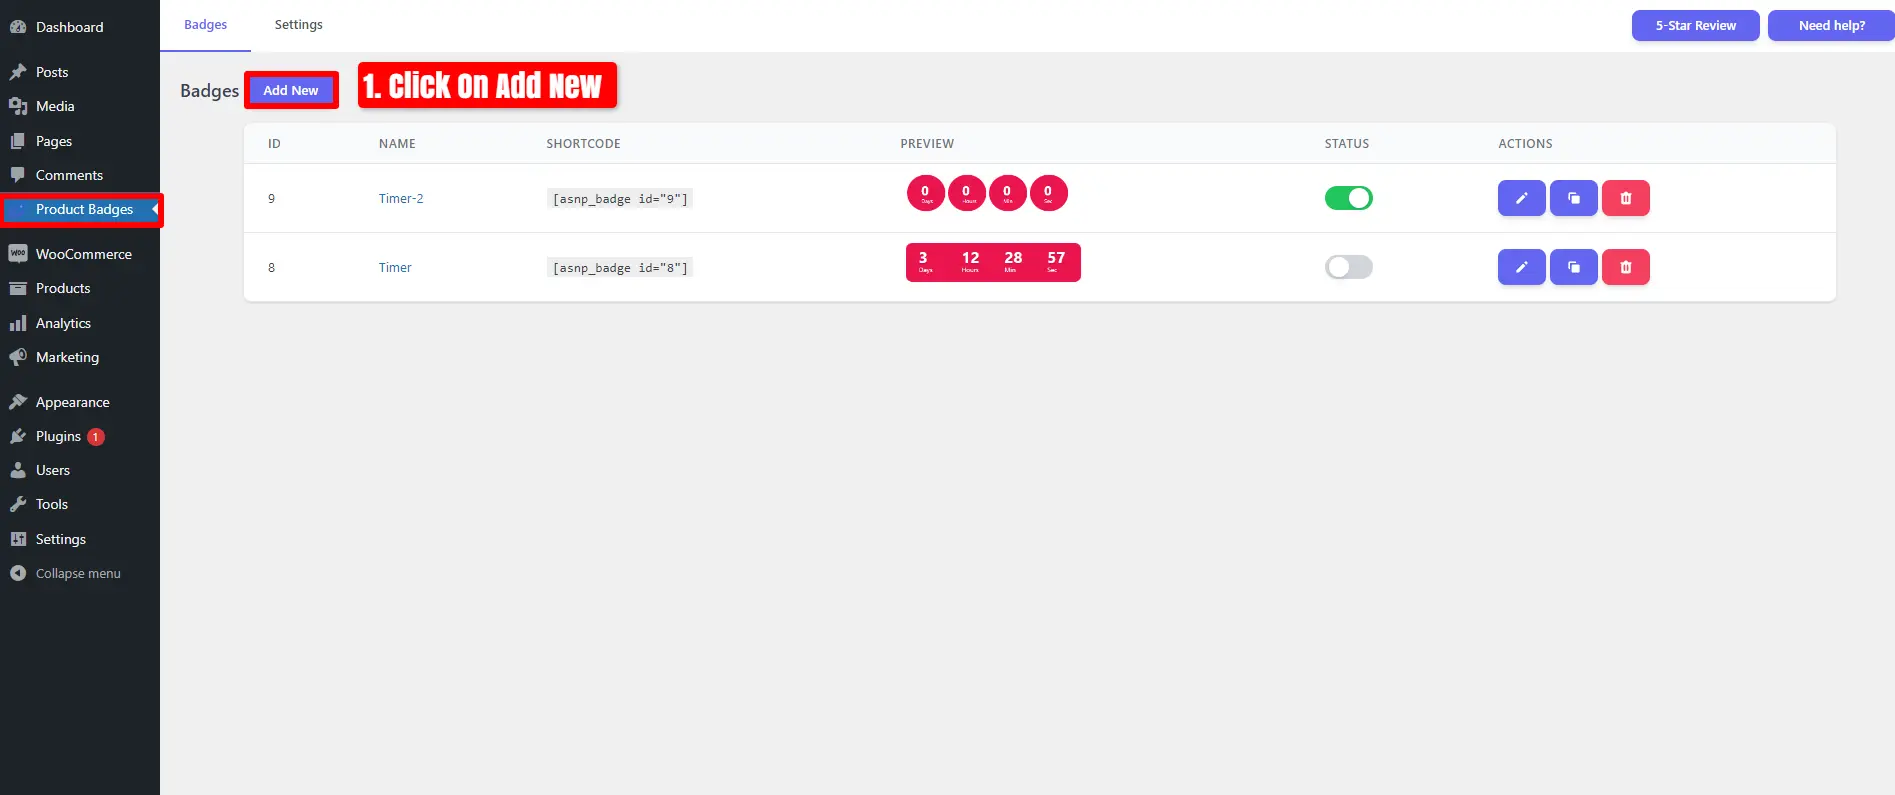
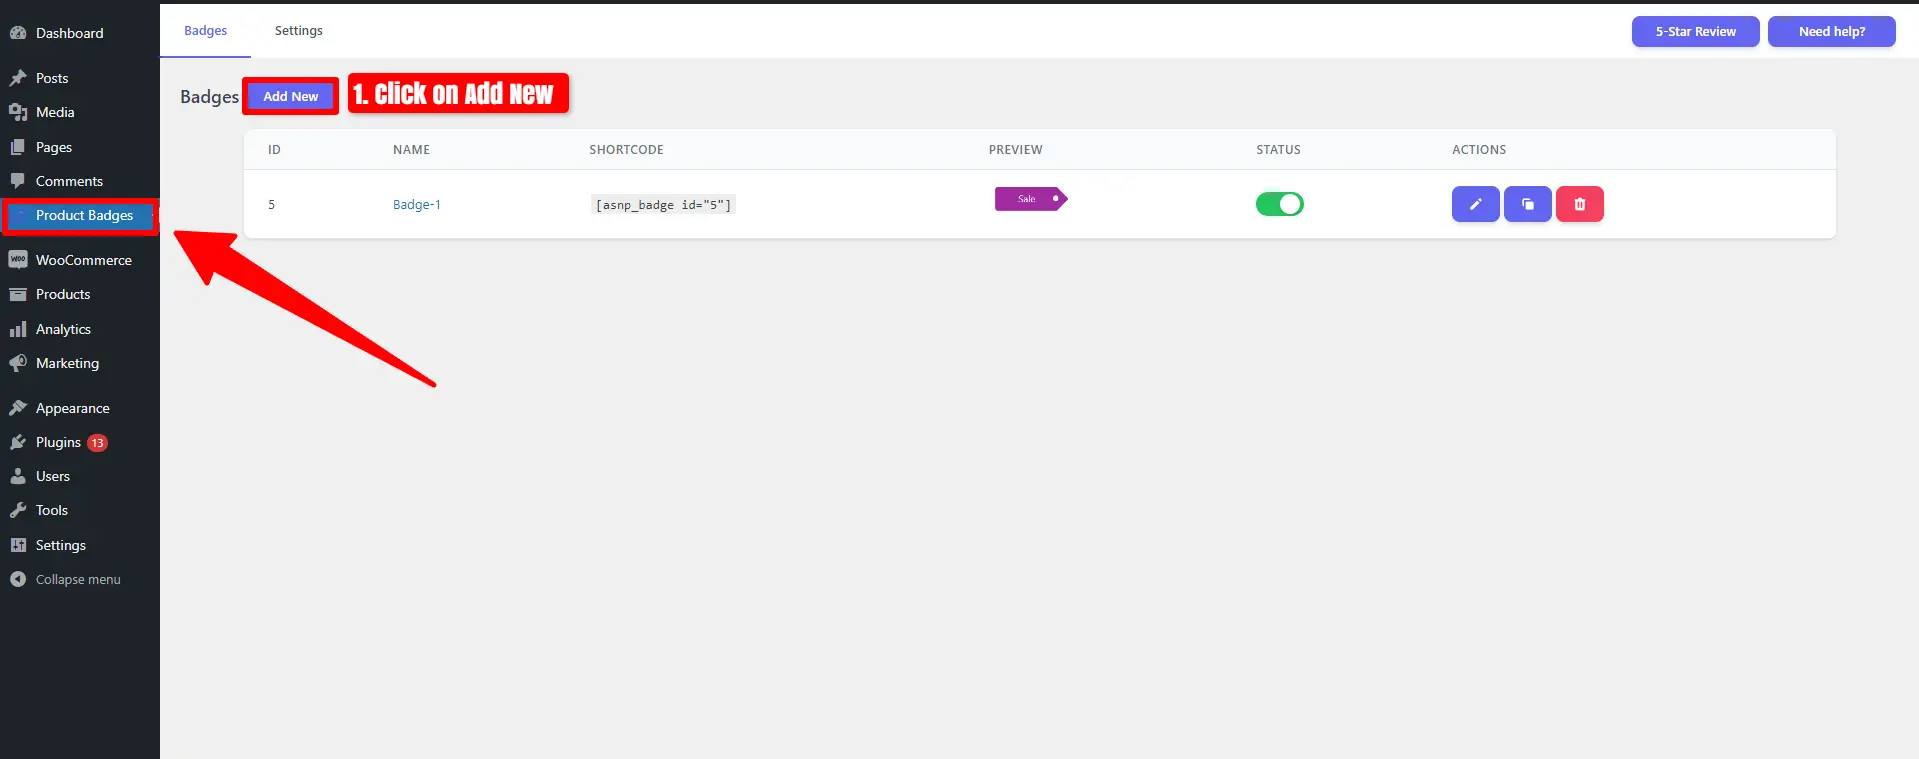
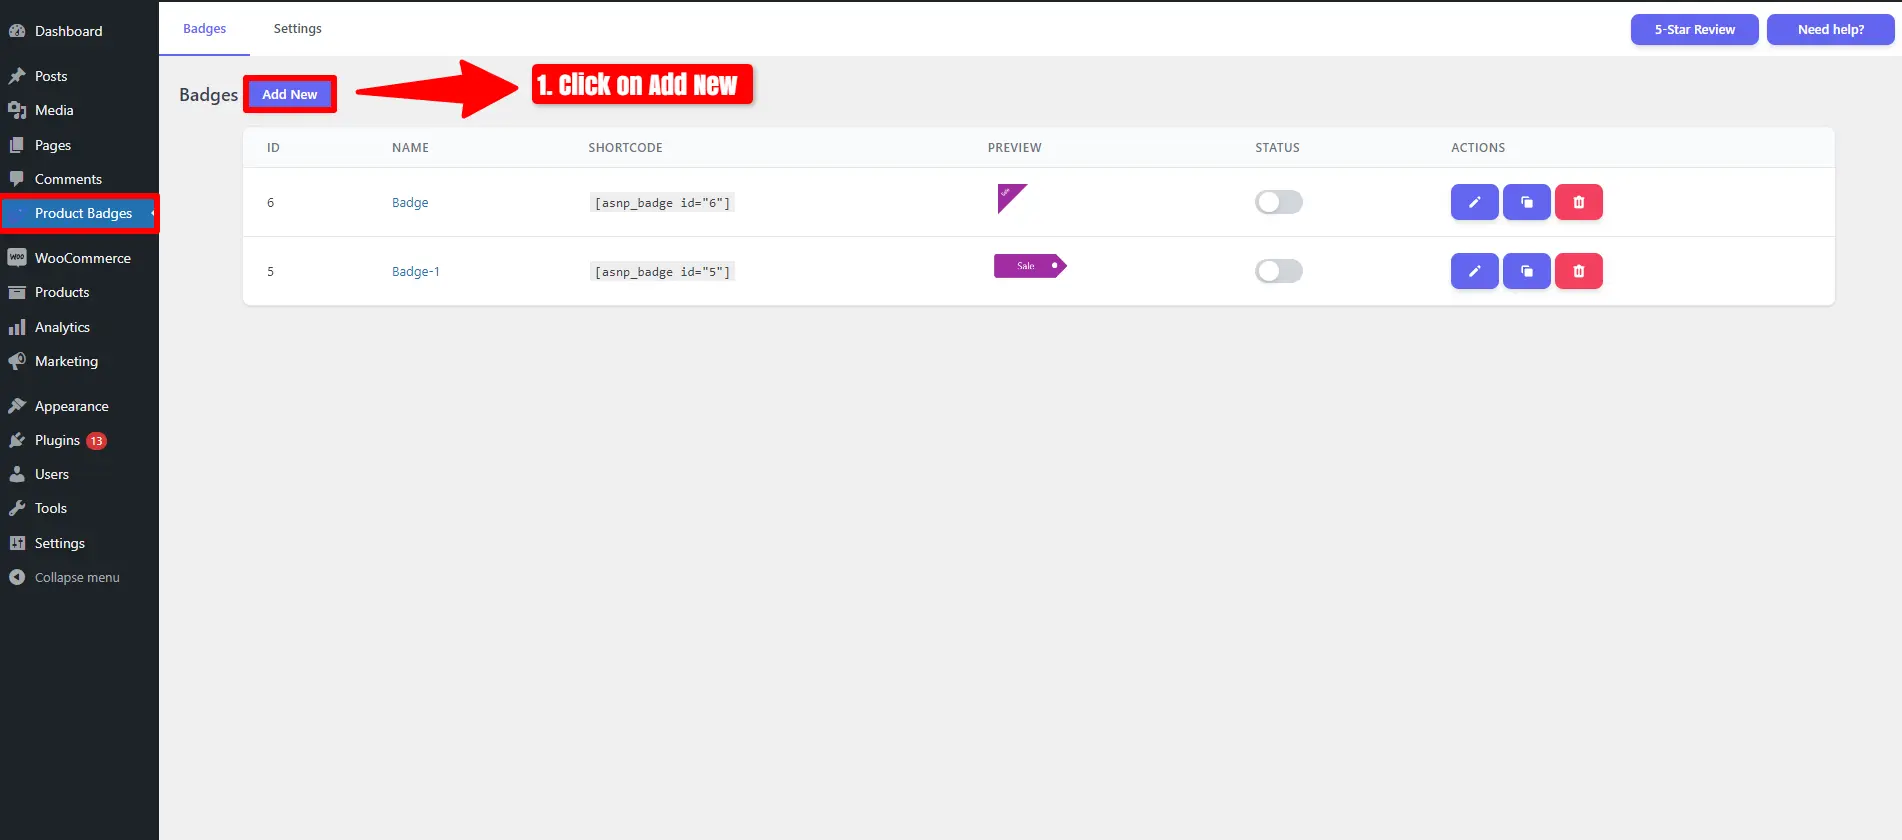
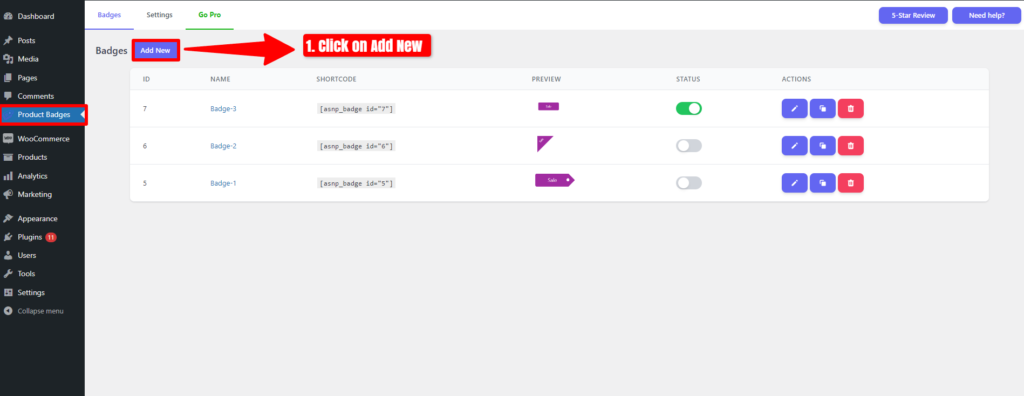
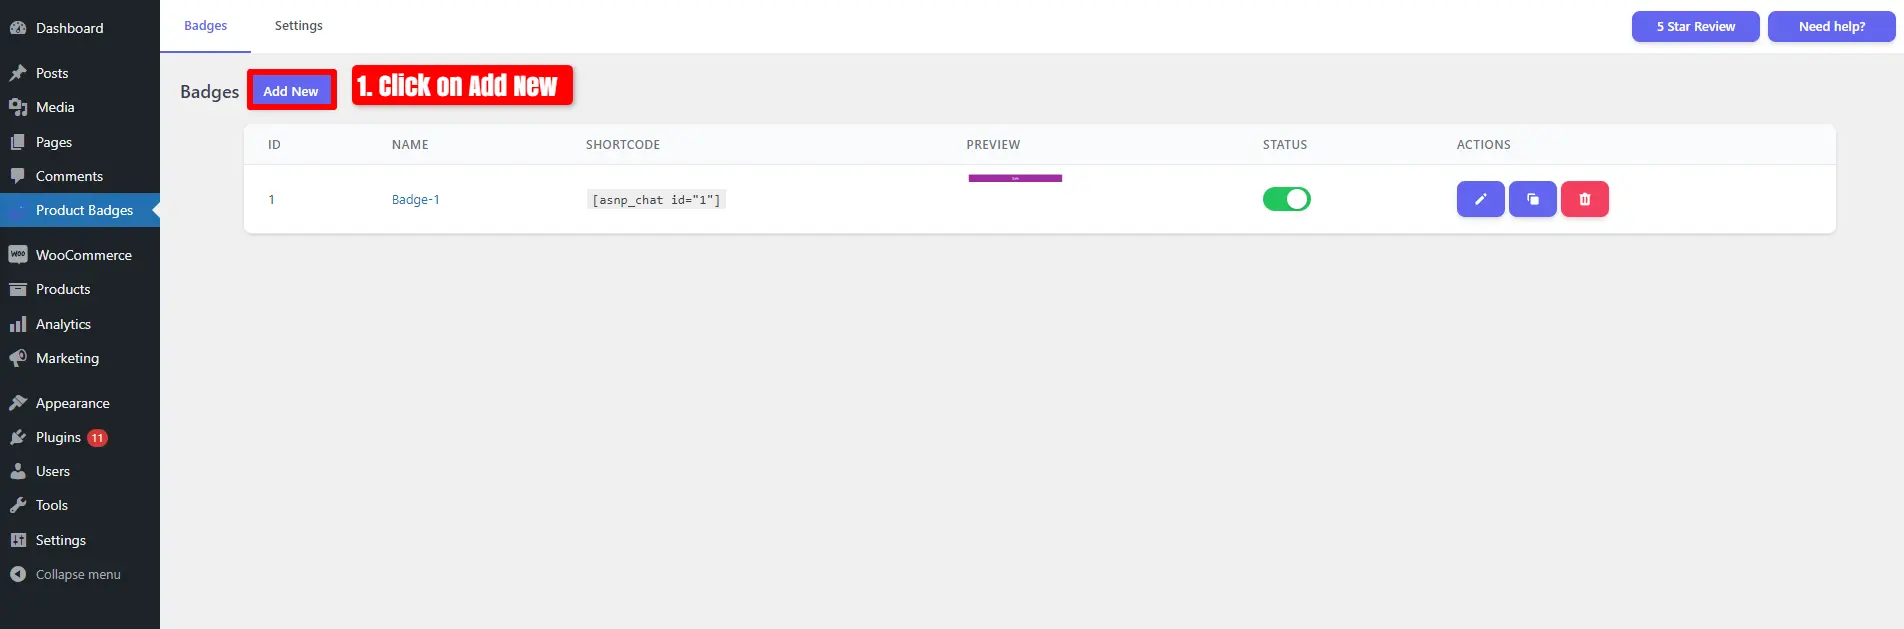
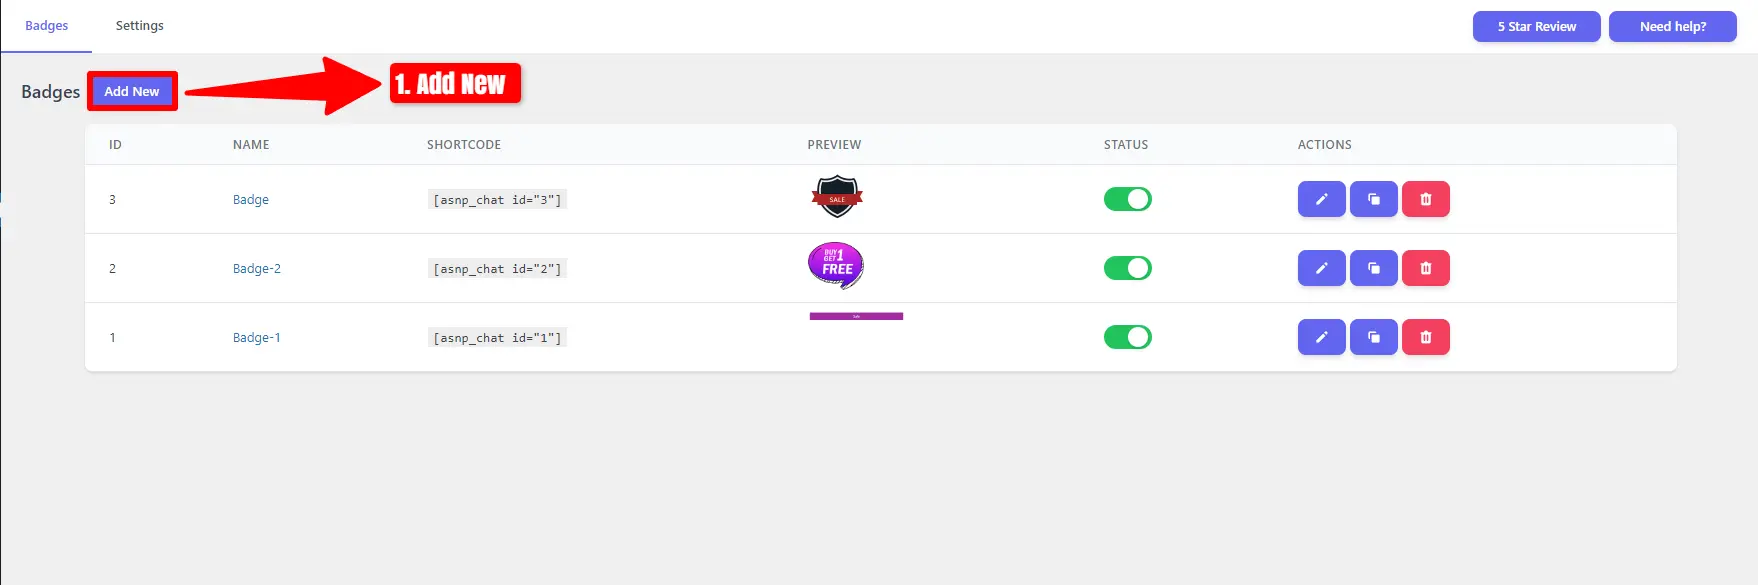
Now, Sale Badges and Product Labels for WooCommerce have been installed. Navigate to the Product Badges.
Add Countdown Timer to All Products in WooCommerce
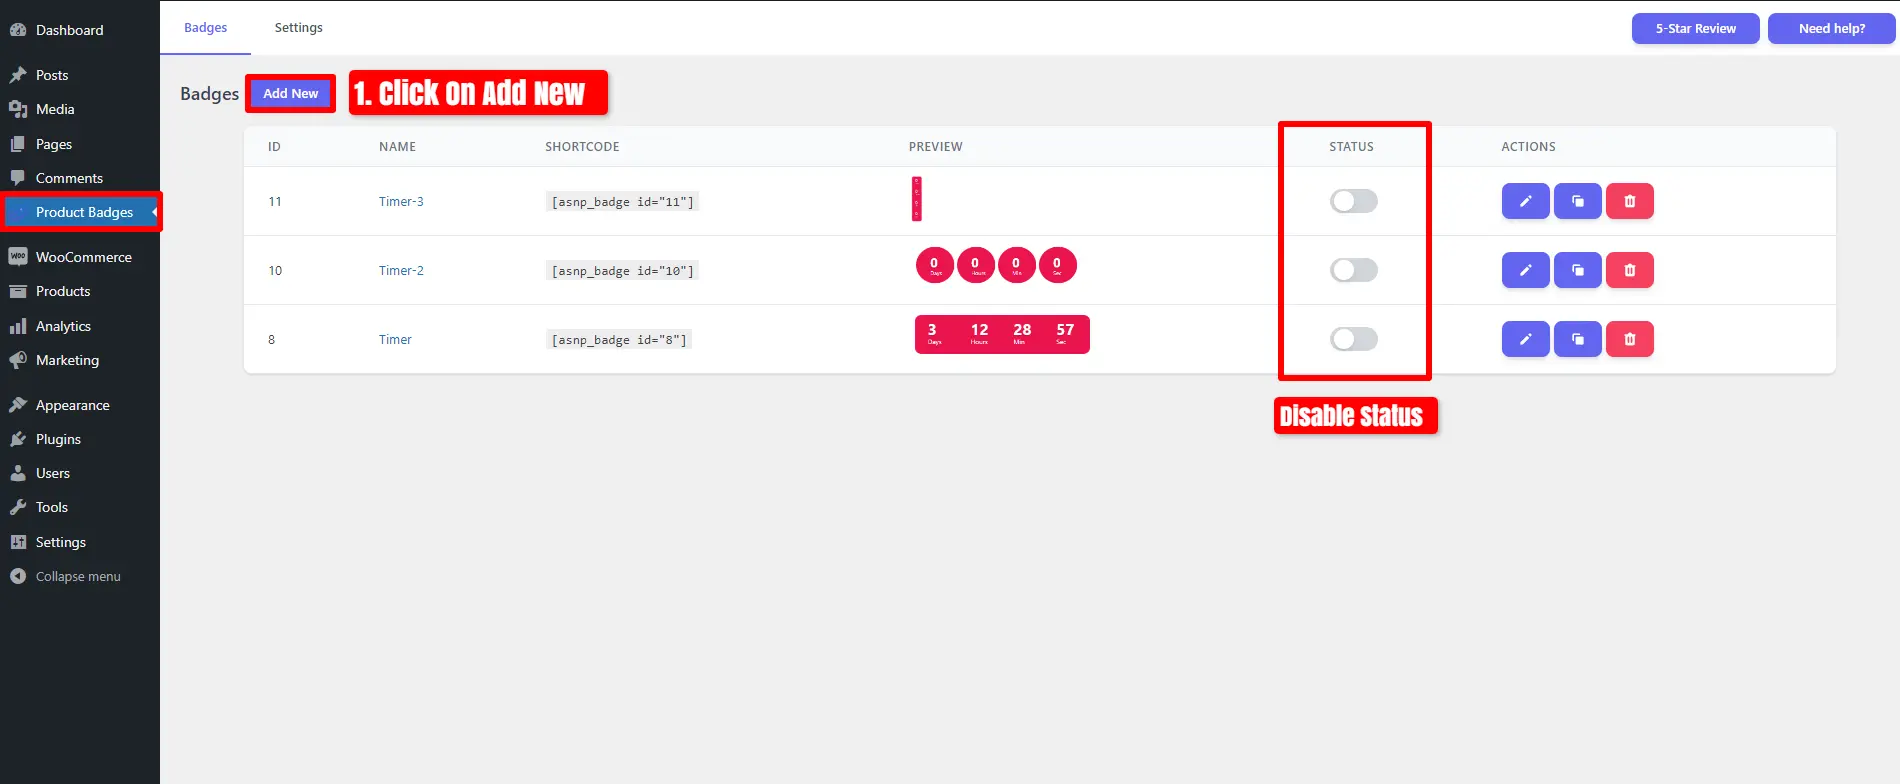
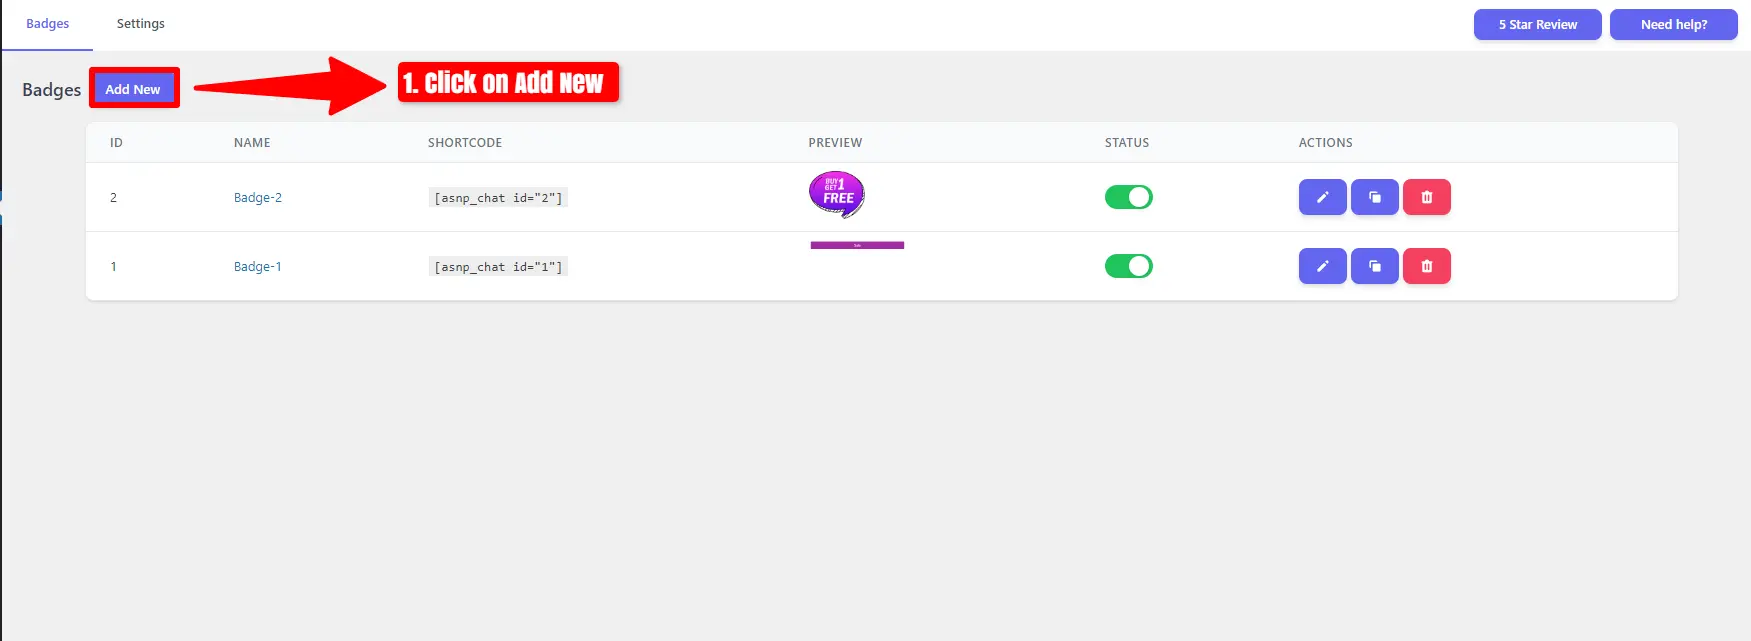
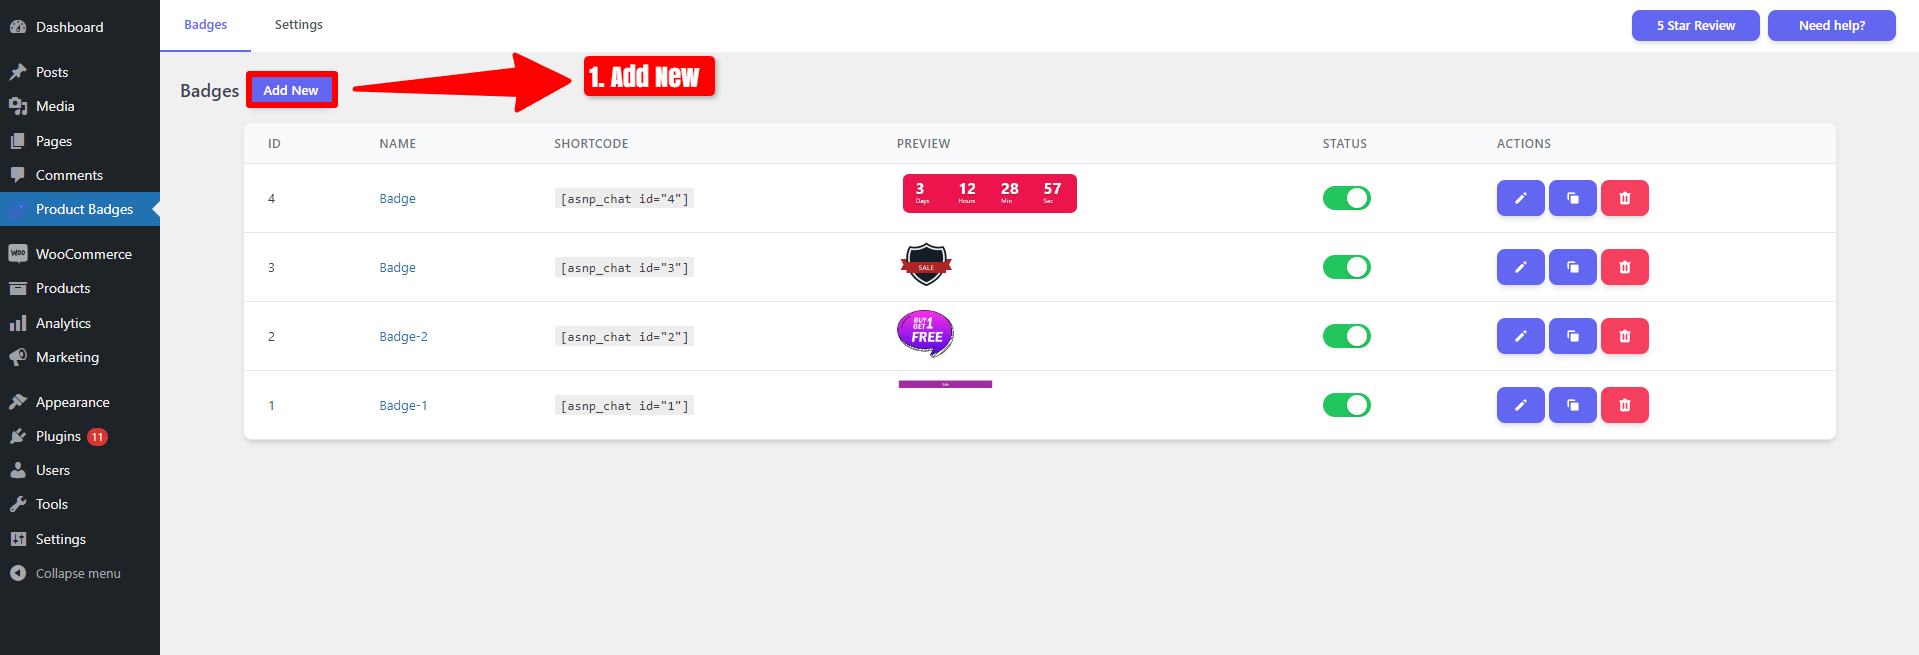
- Click on Add New
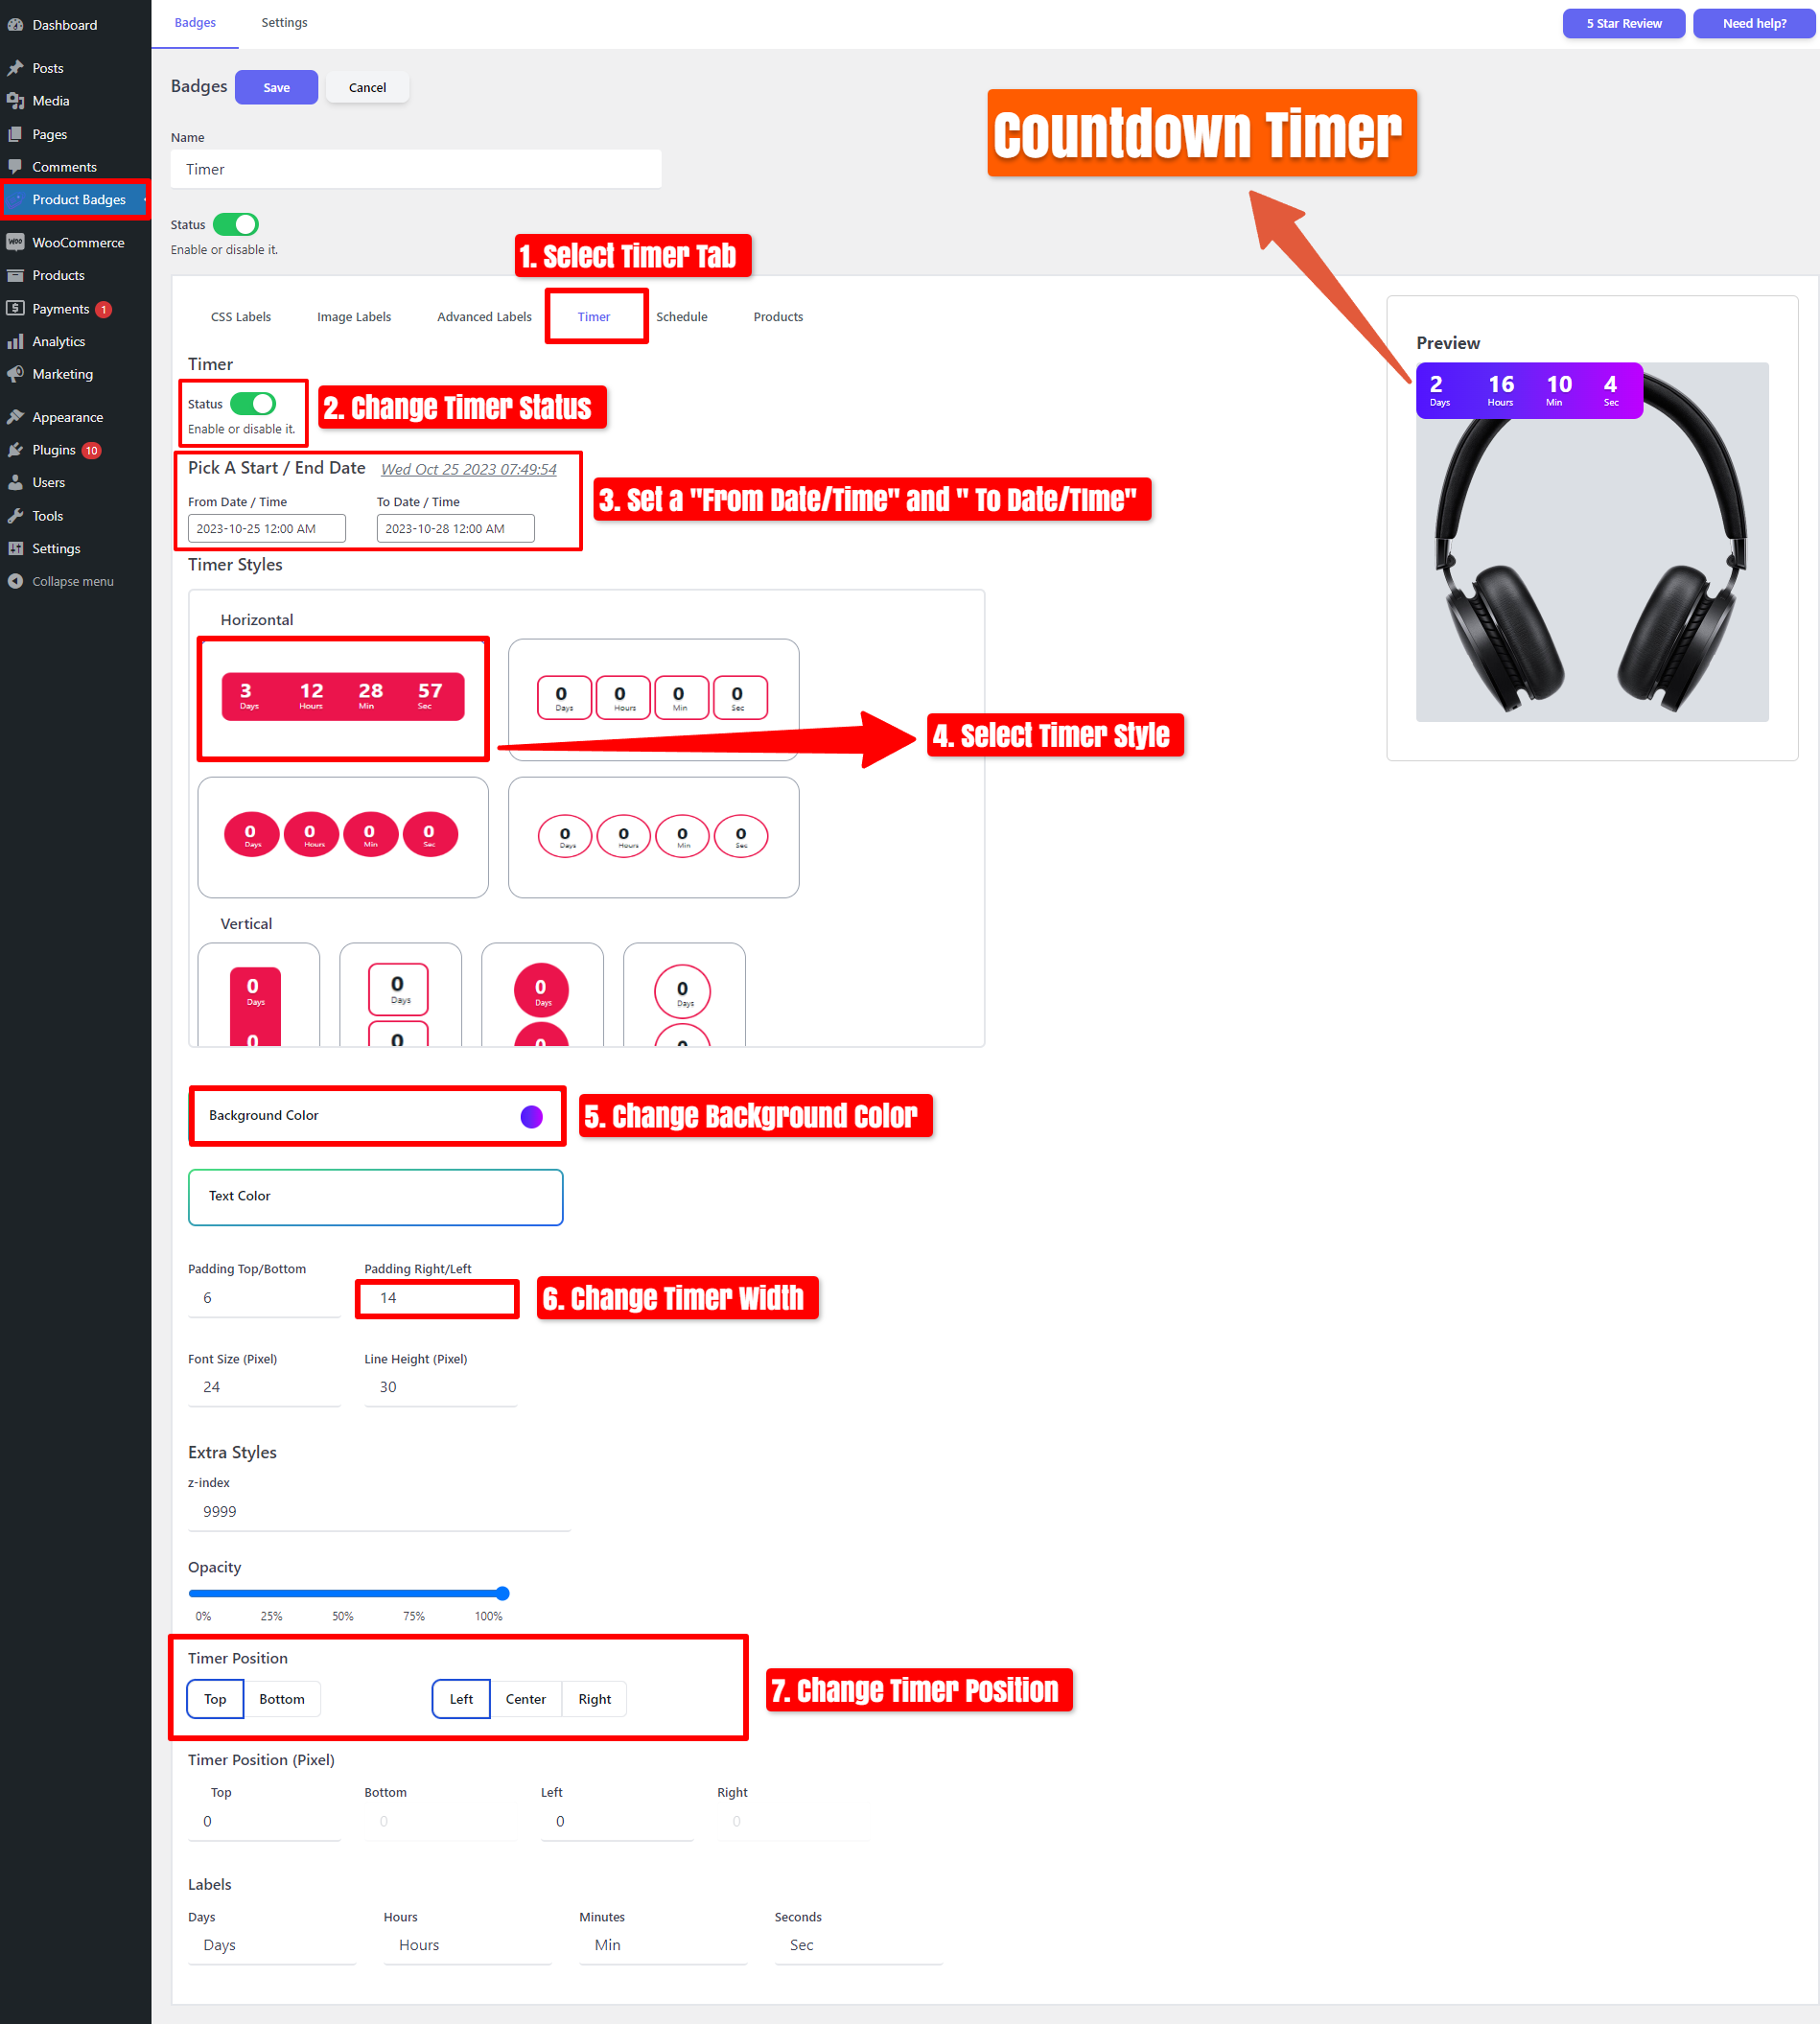
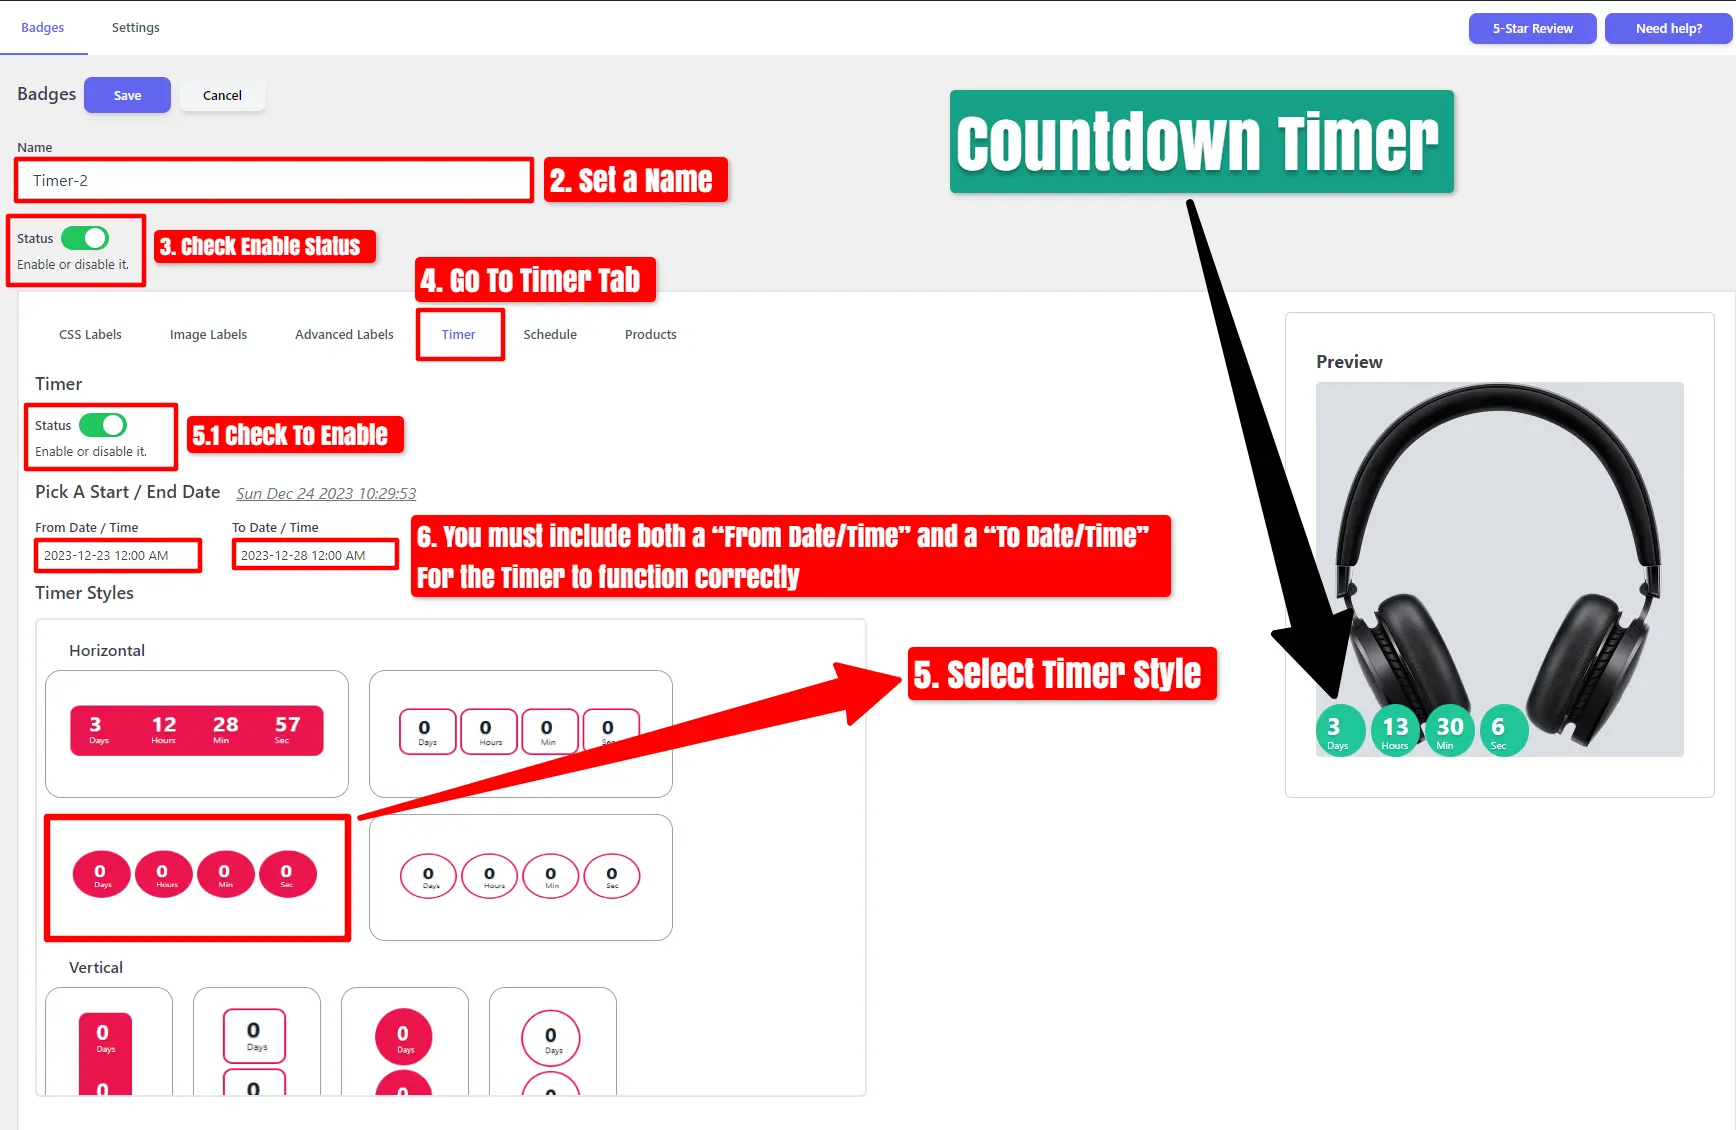
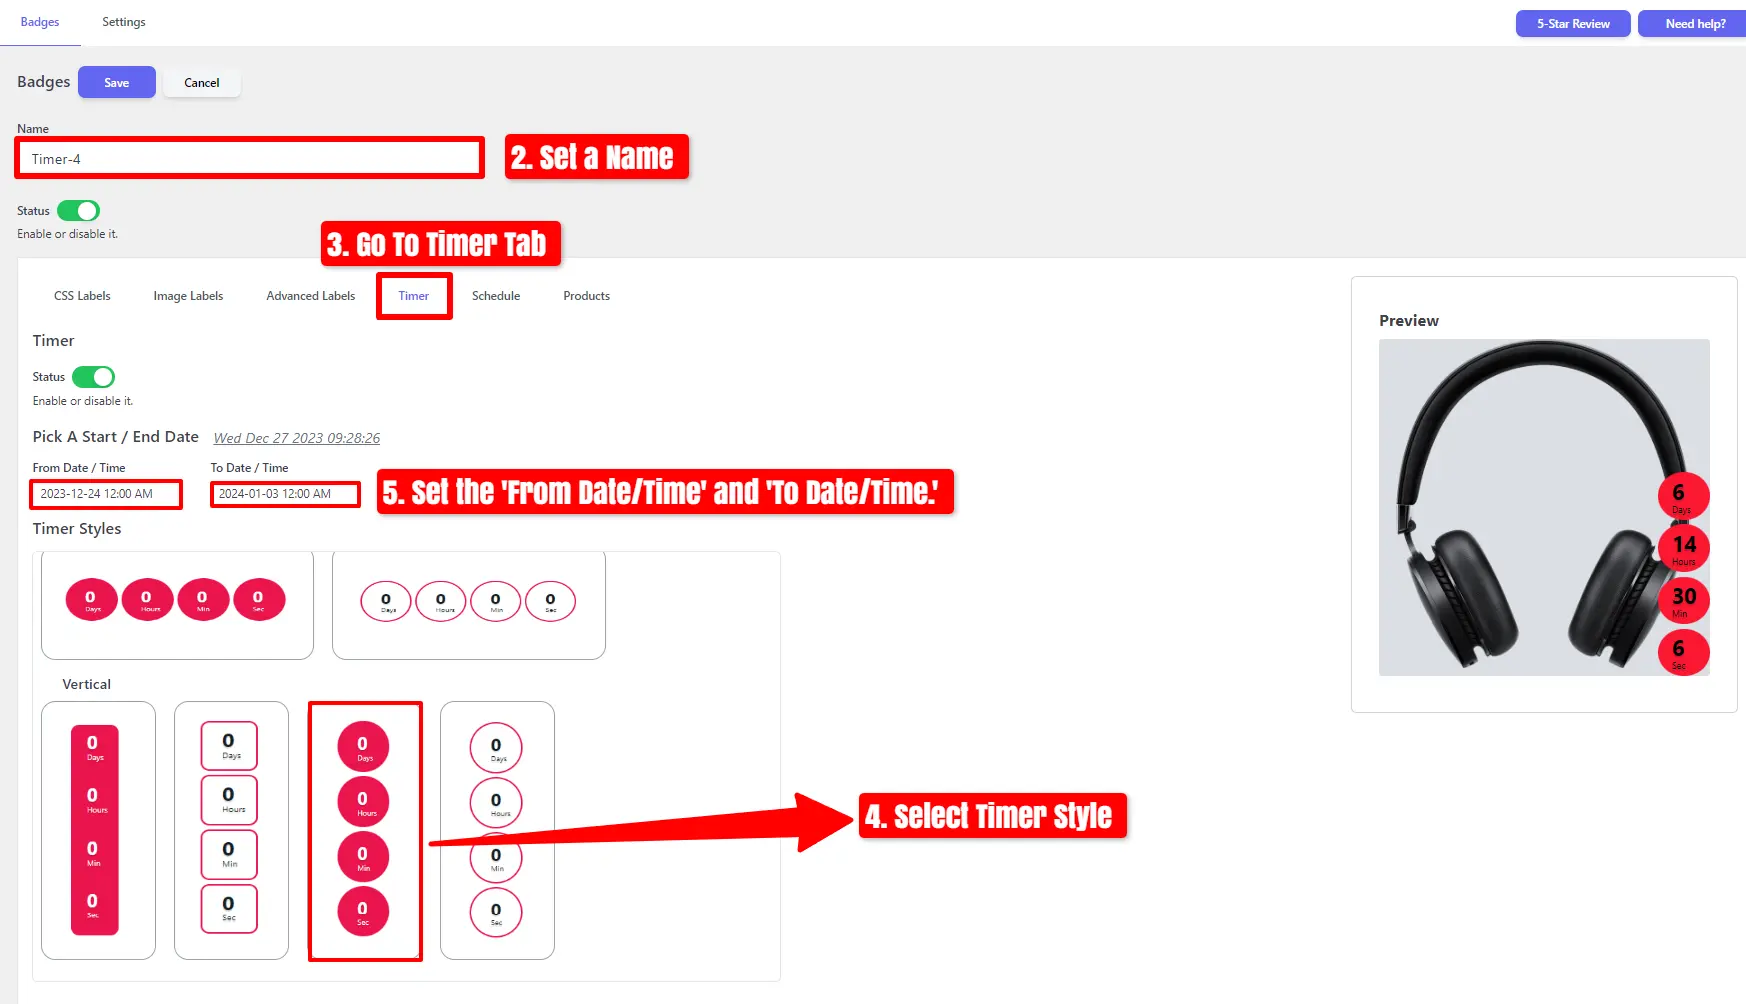
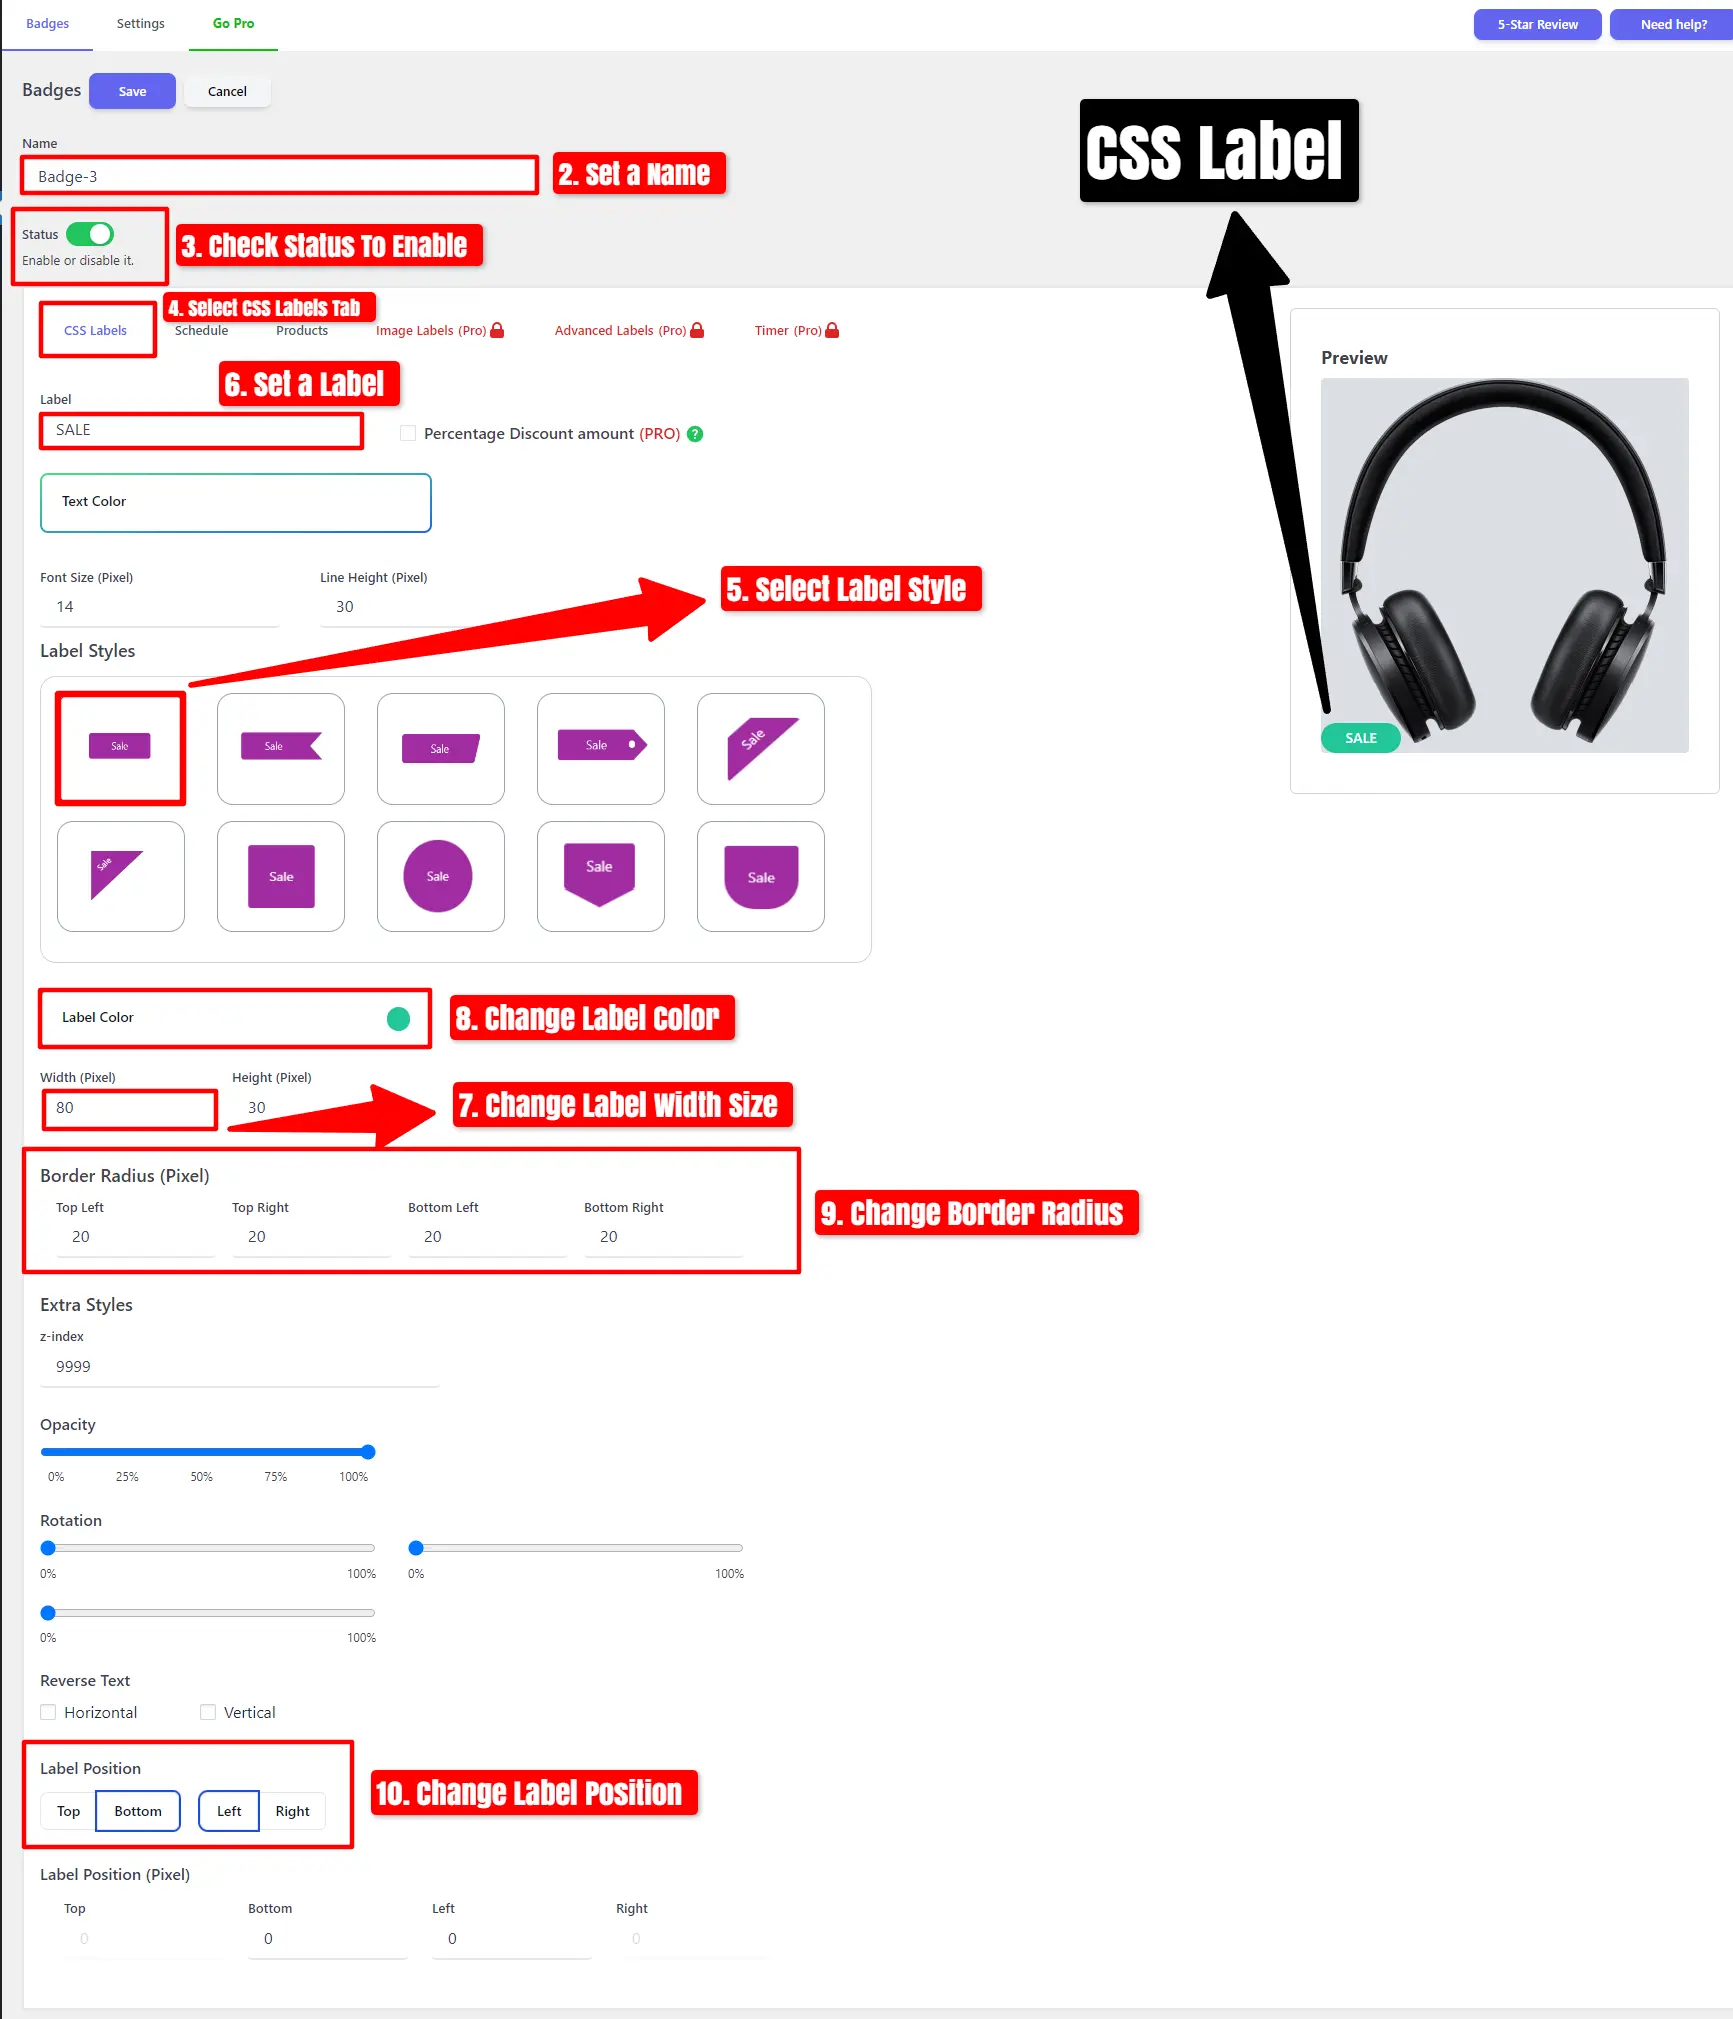
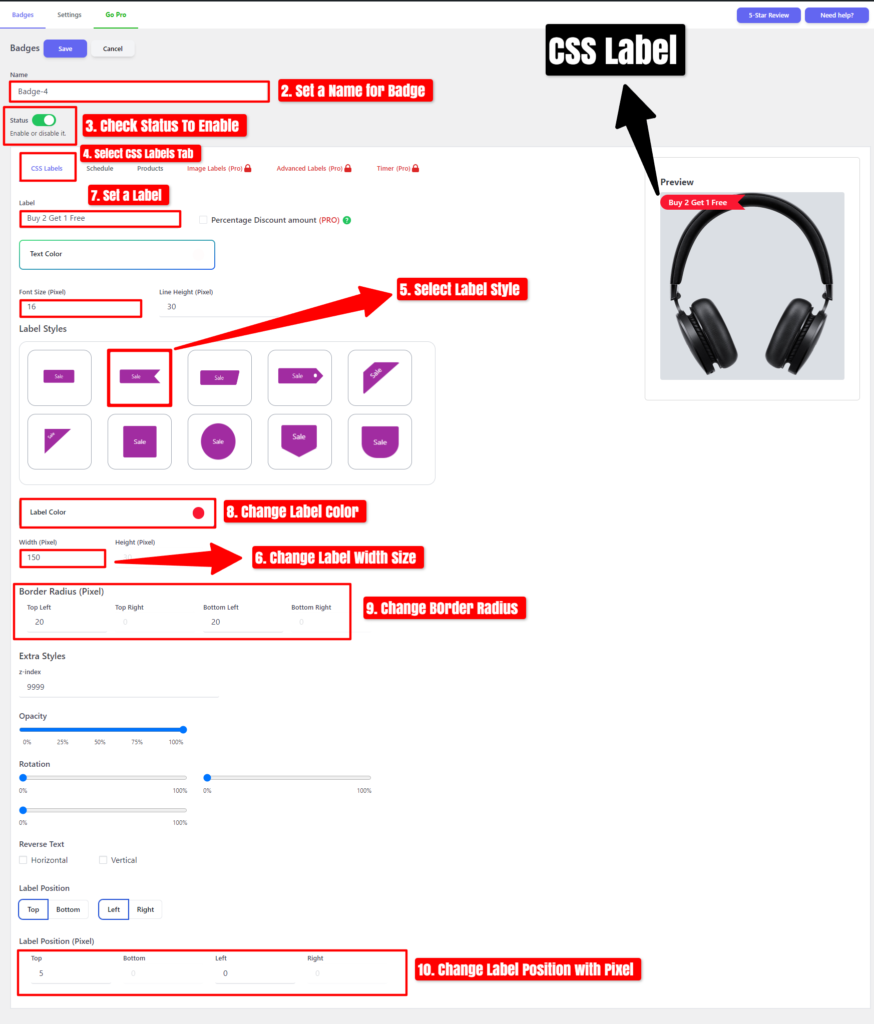
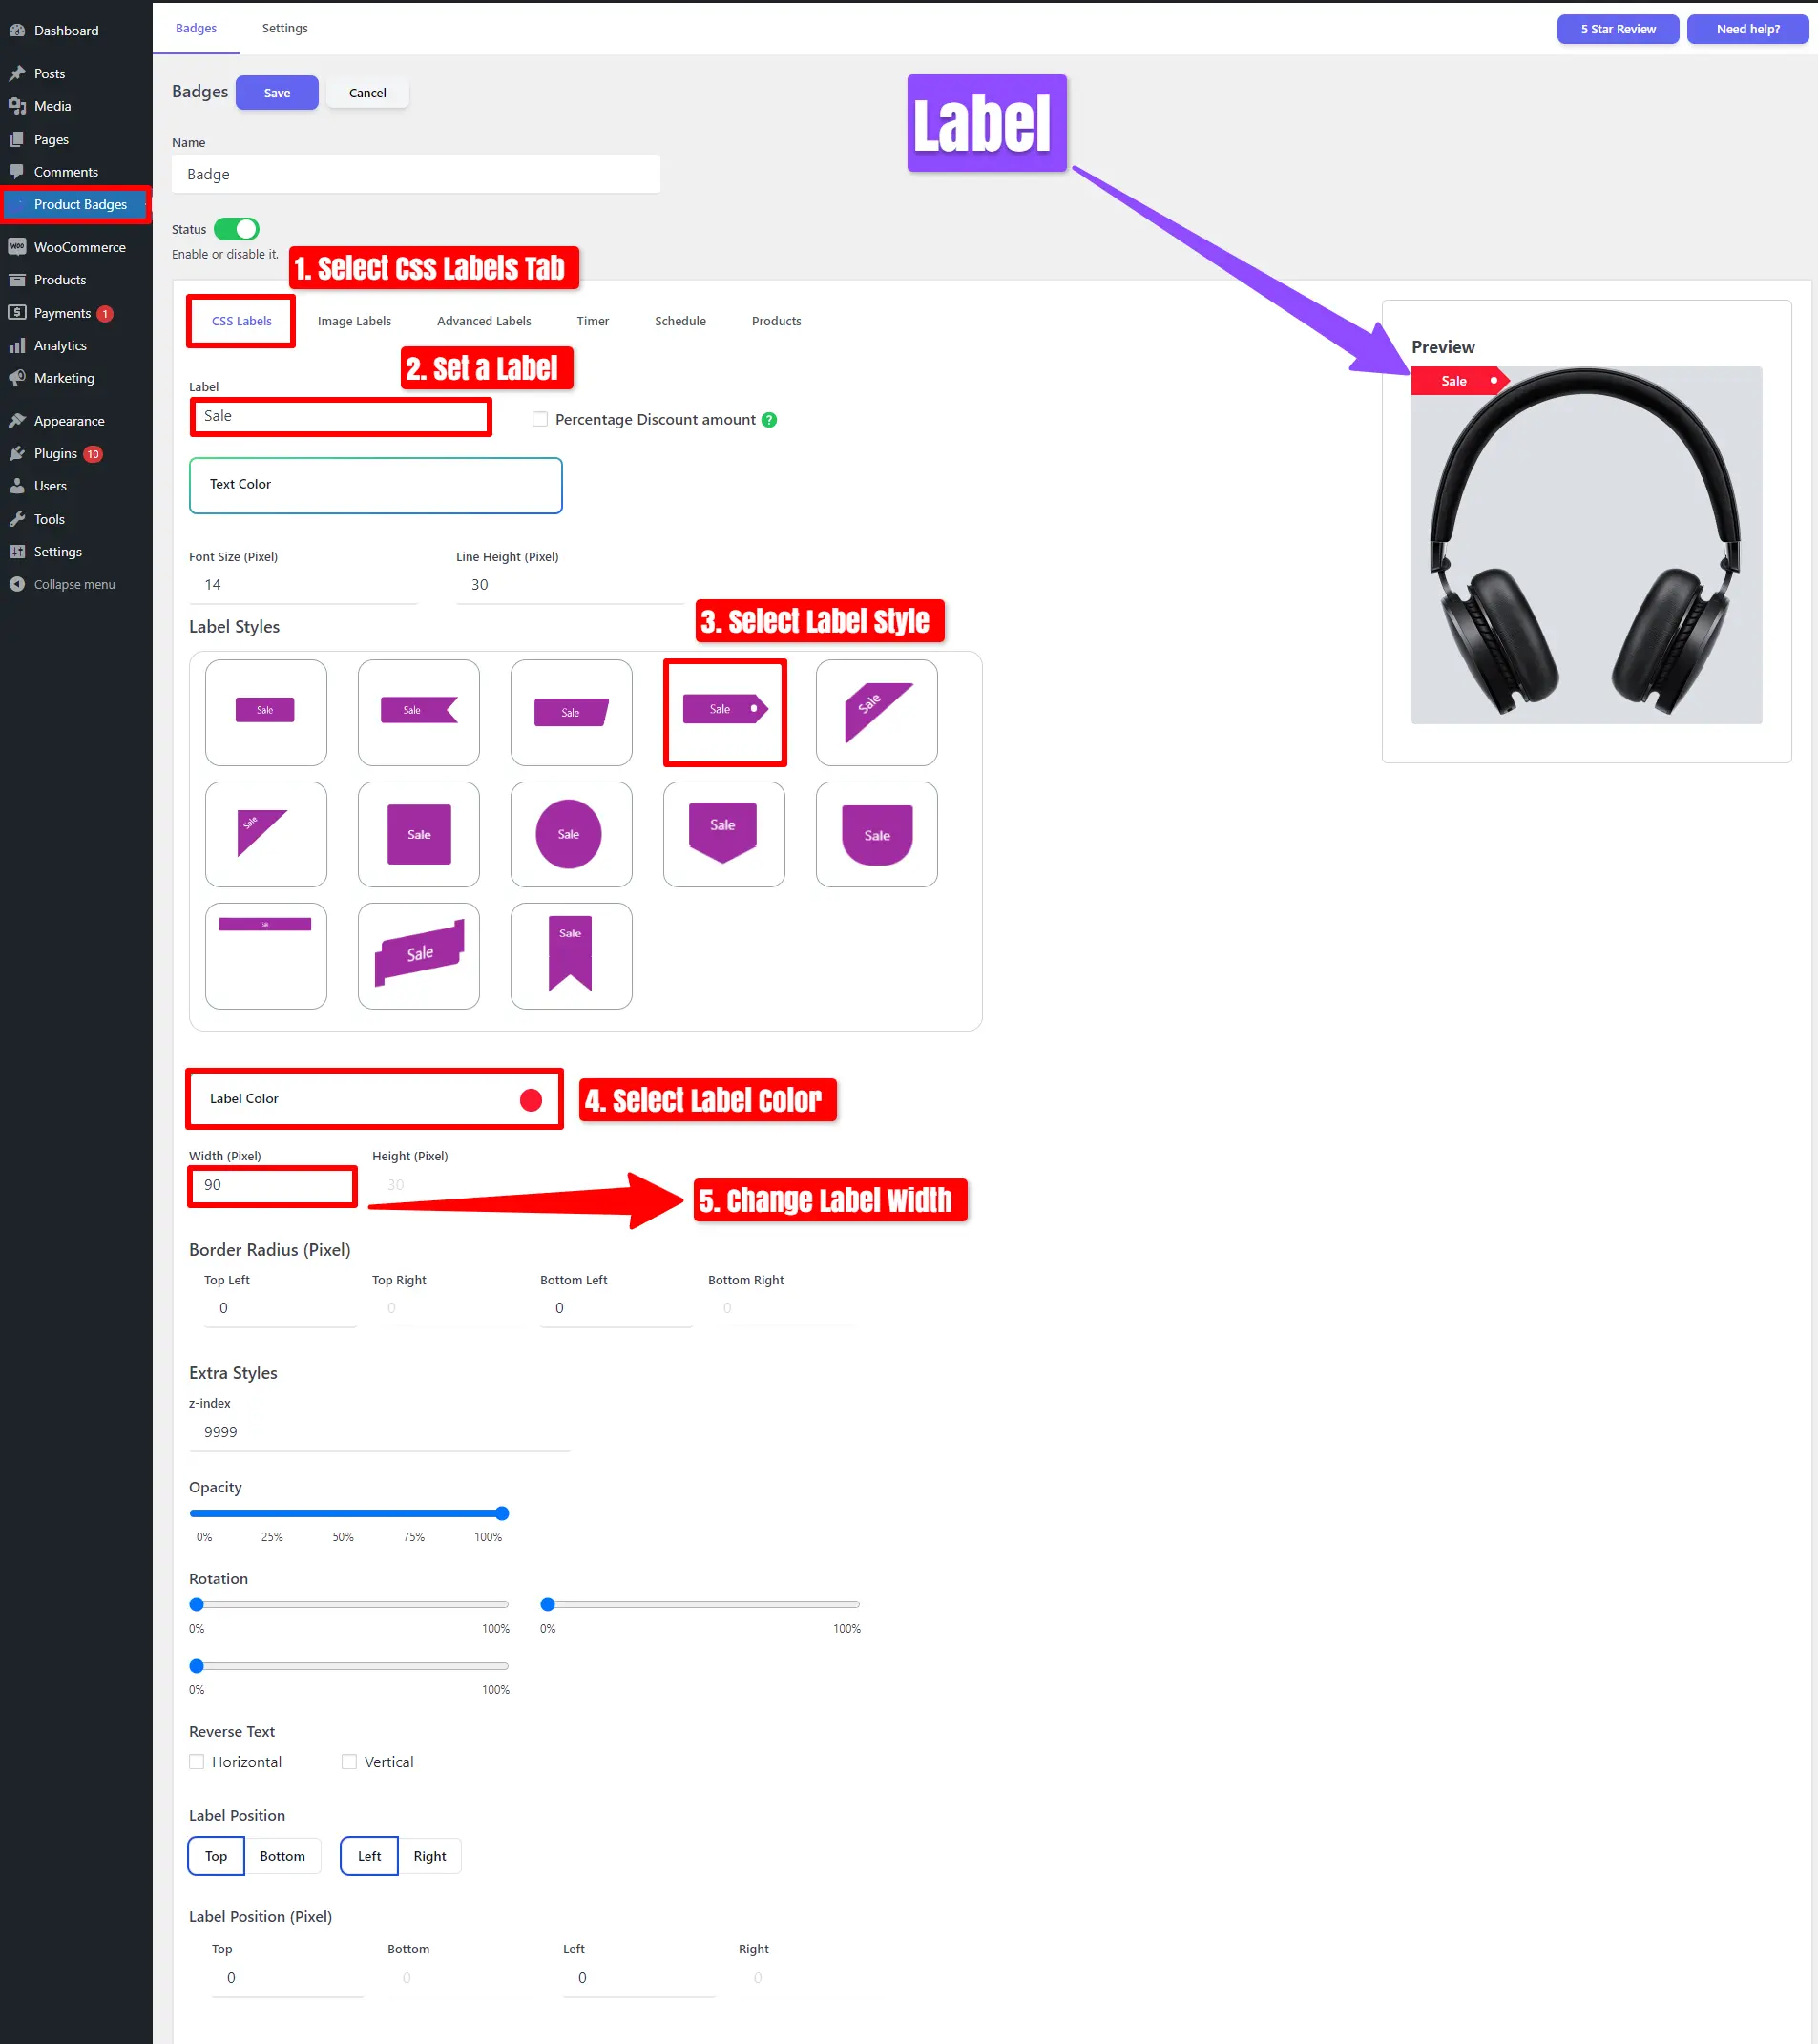
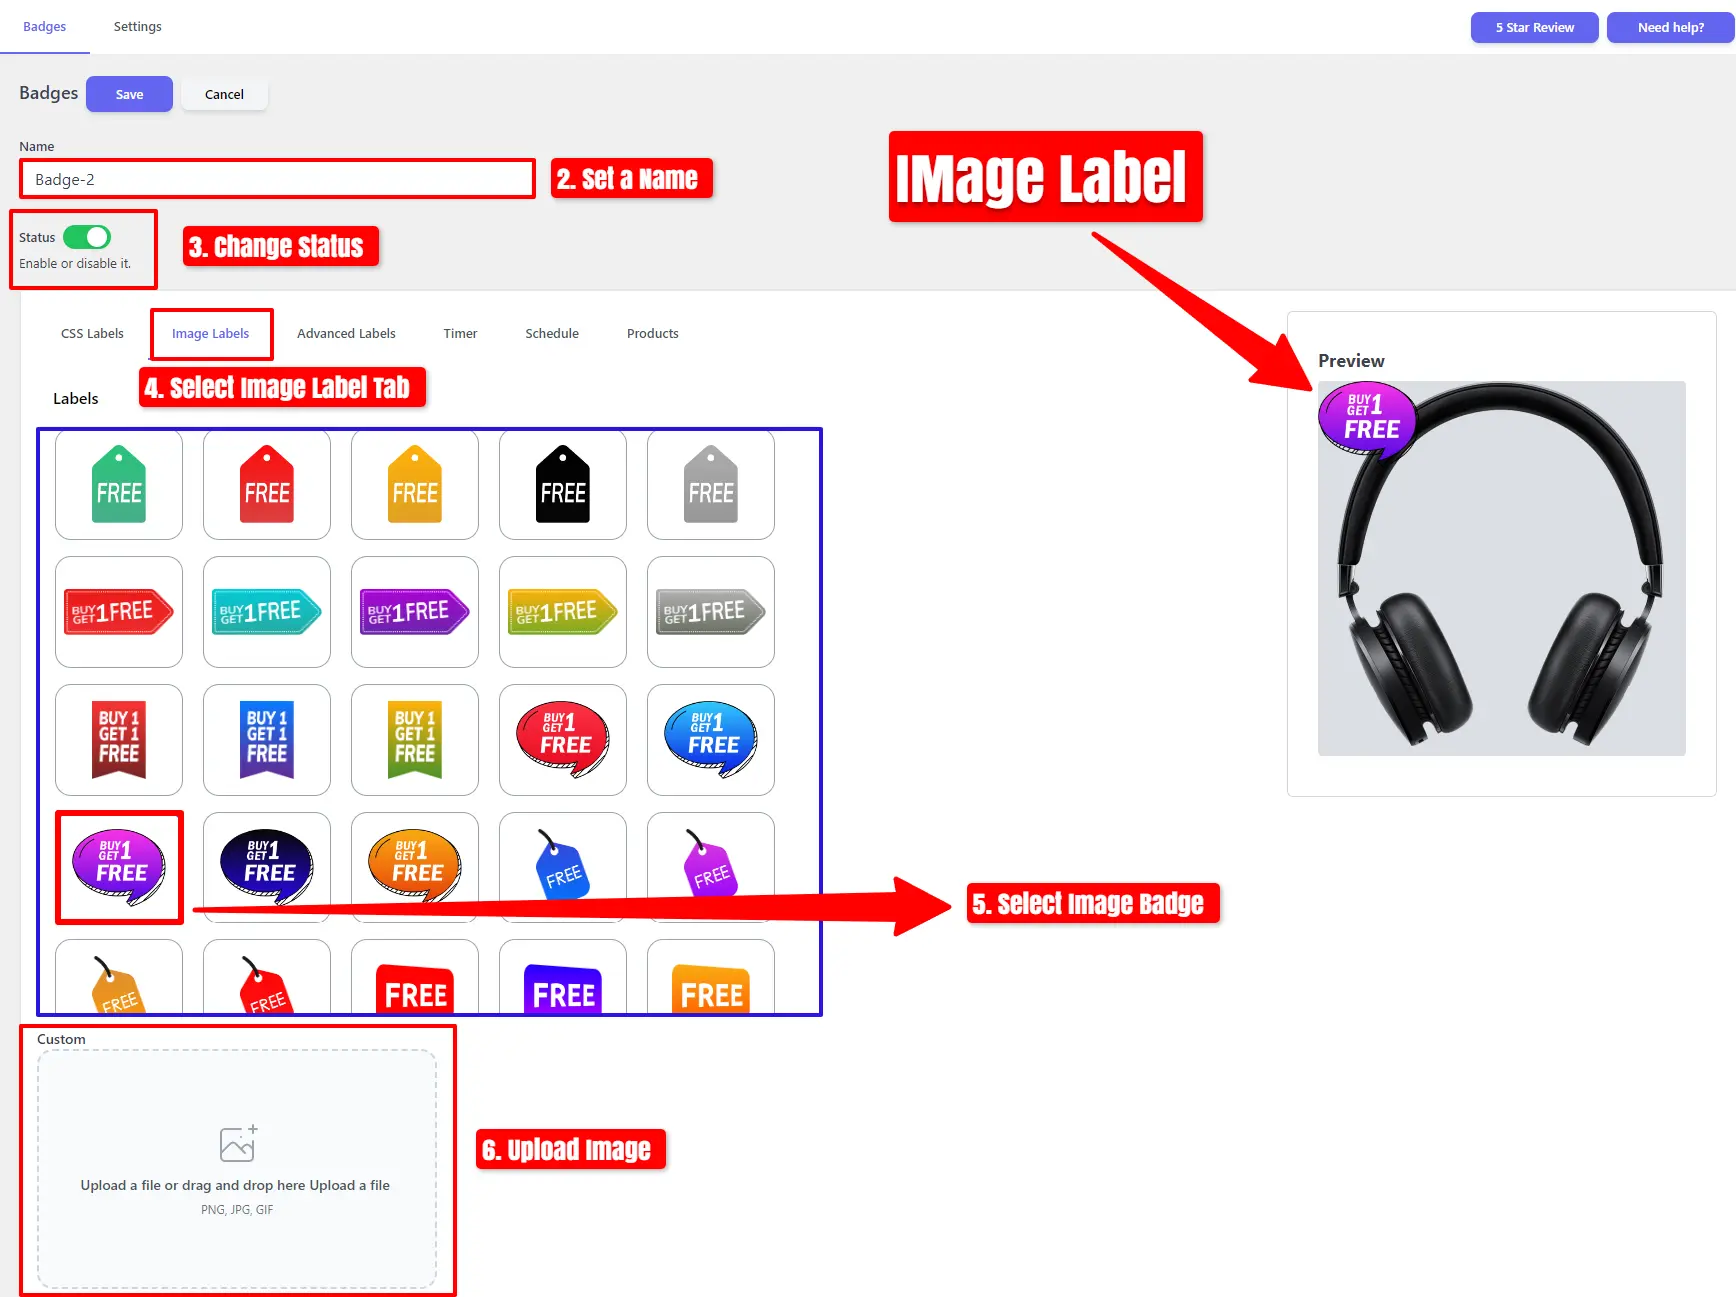
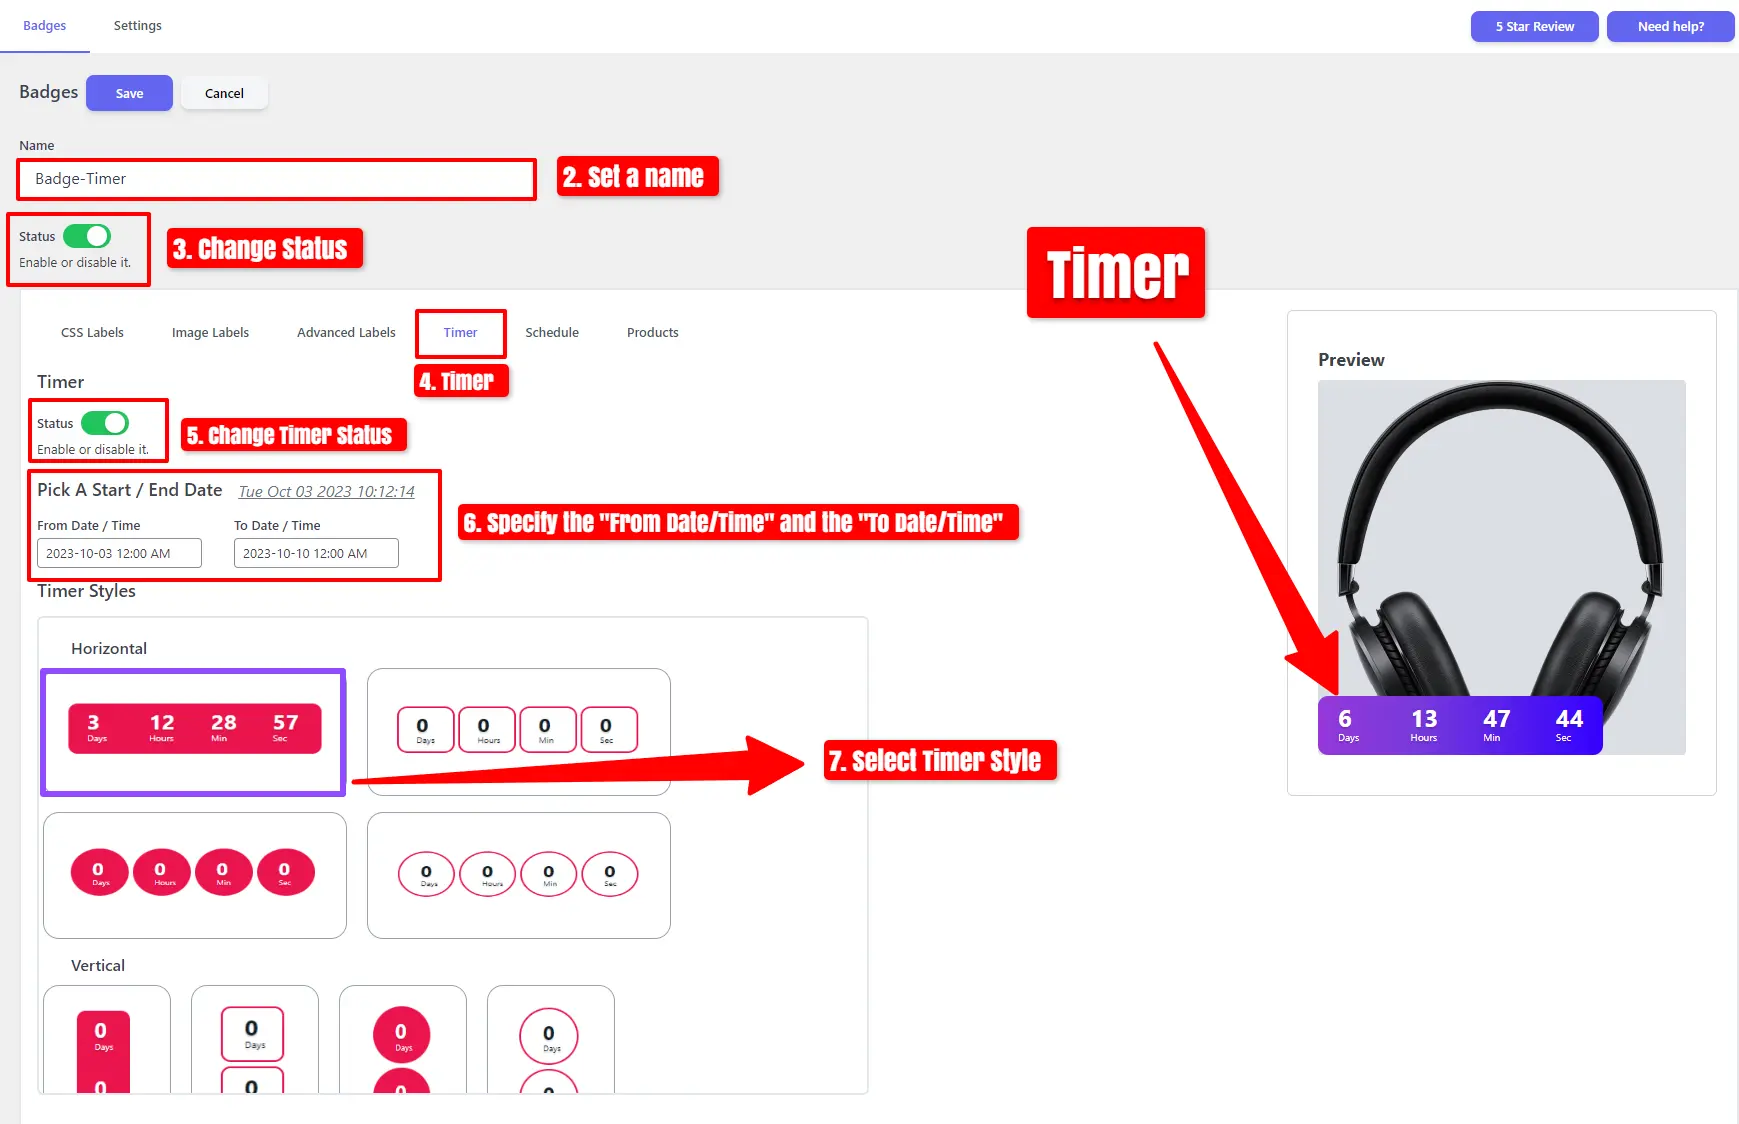
- To start, click on the ‘Timer‘ tab.
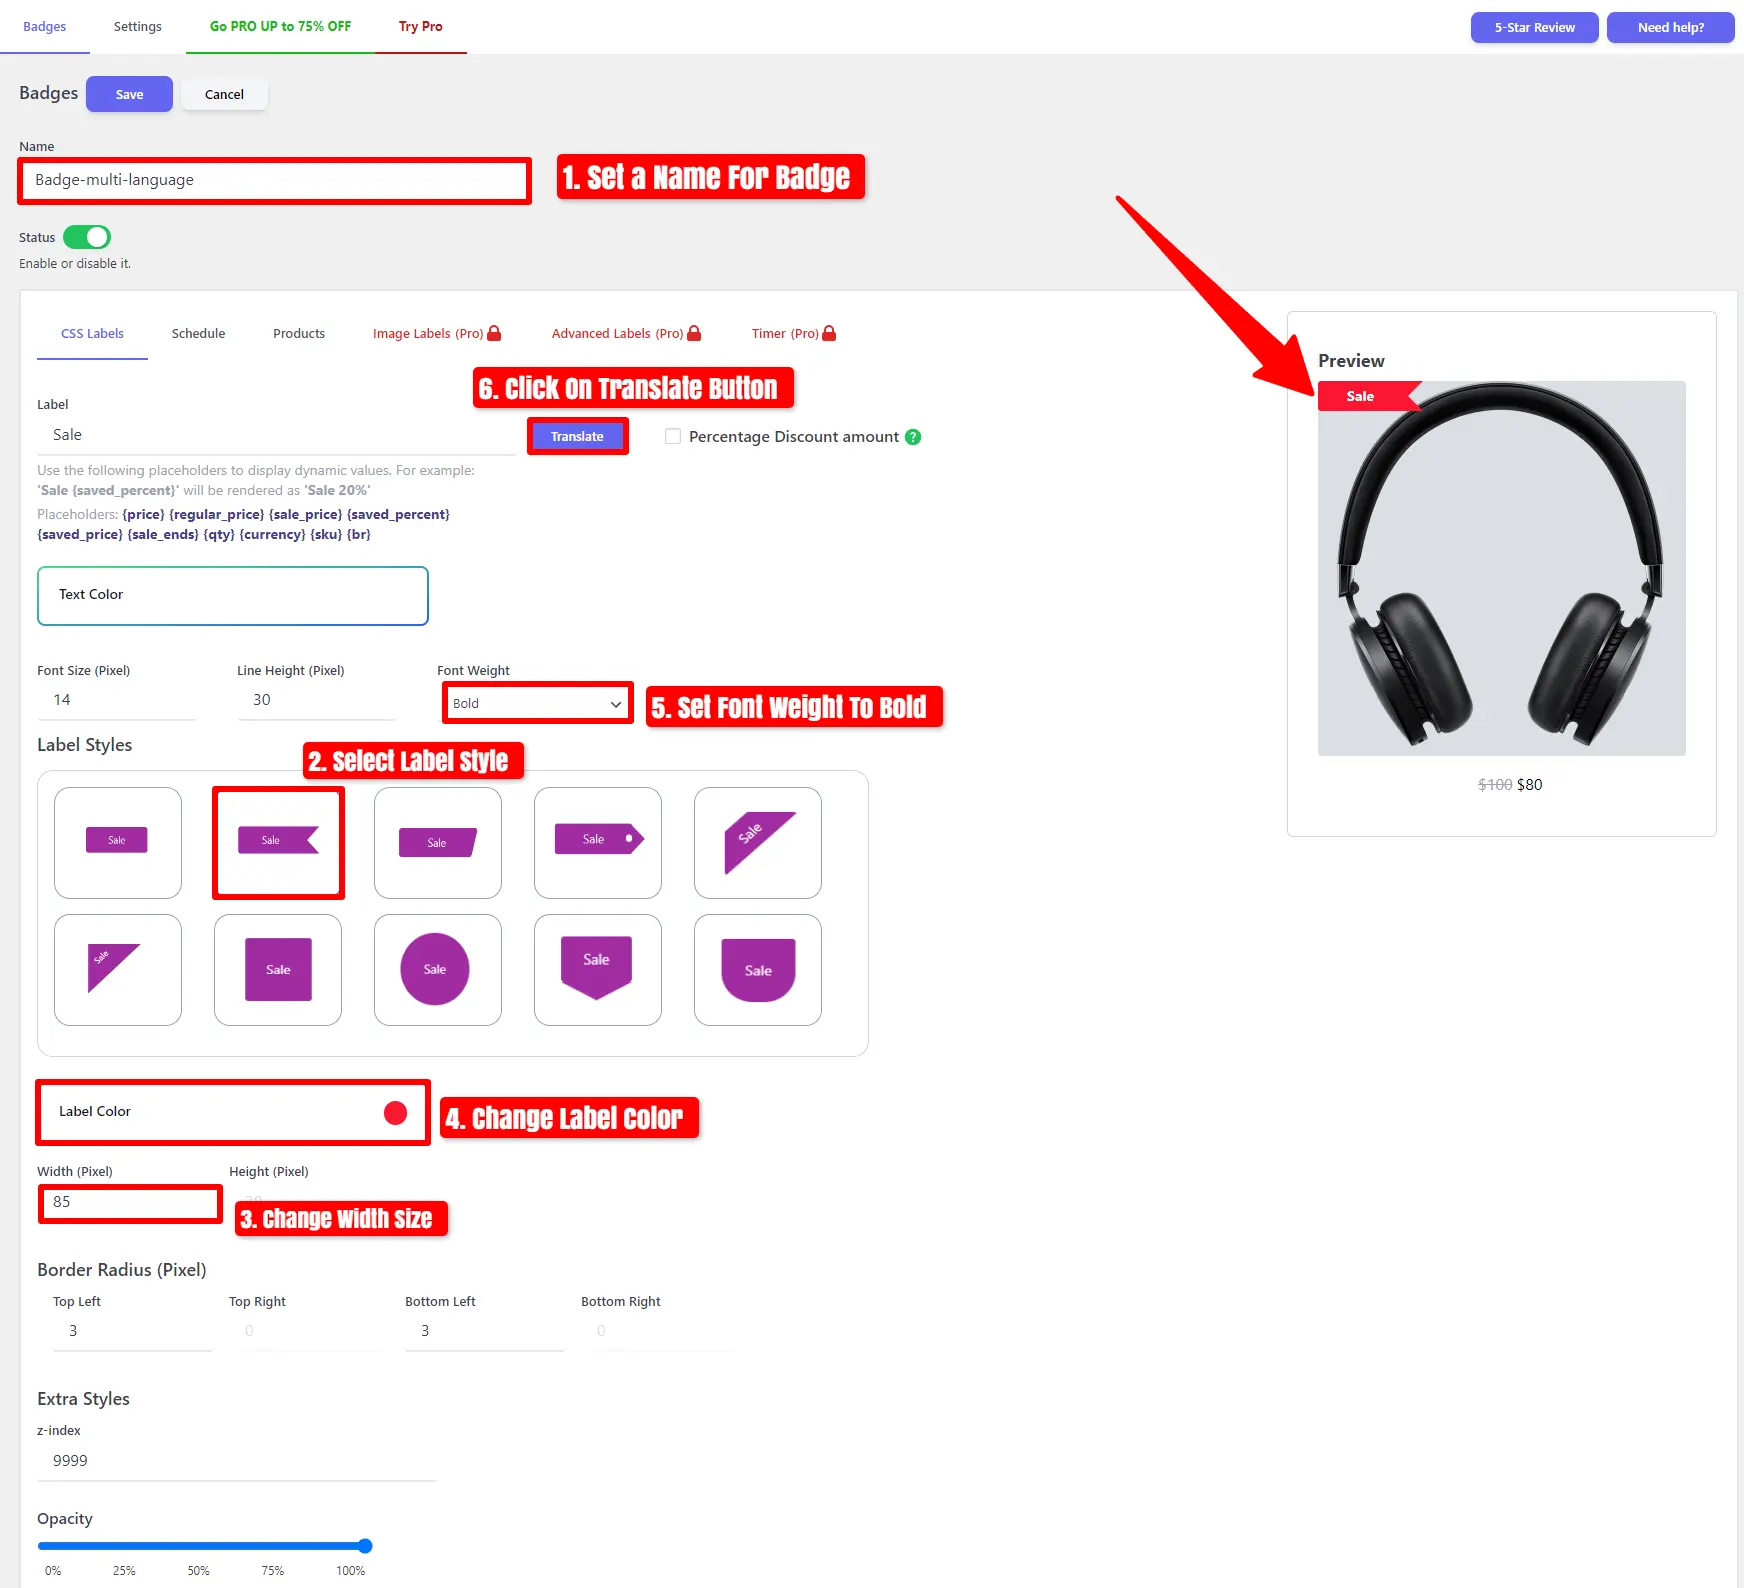
- Next, enable the Timer Status and choose your preferred Timer Style.
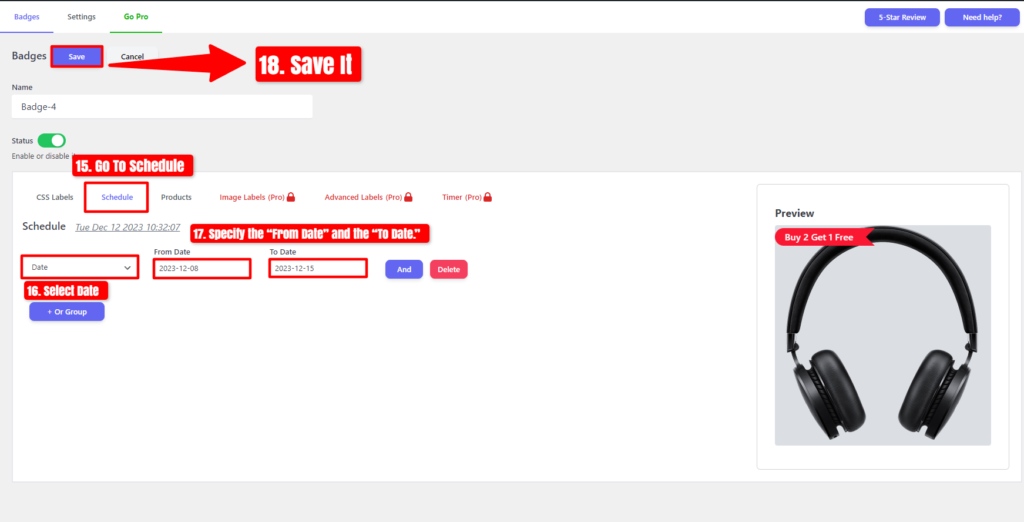
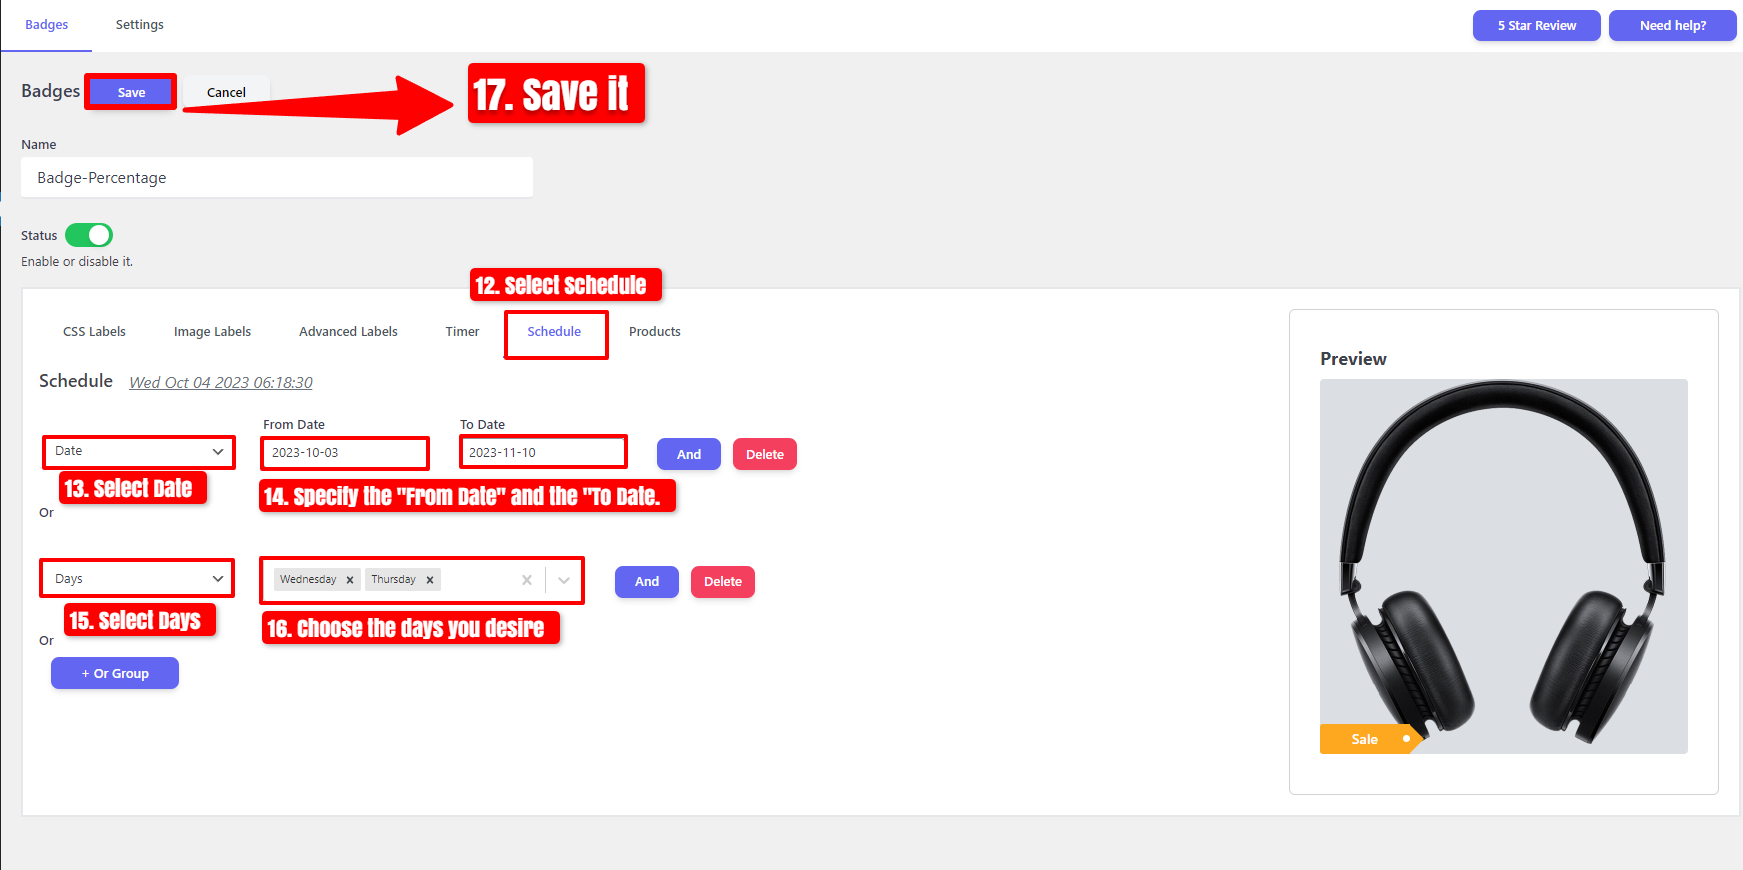
- Then, set the ‘From Date/Time‘ and ‘To Date/Time.’
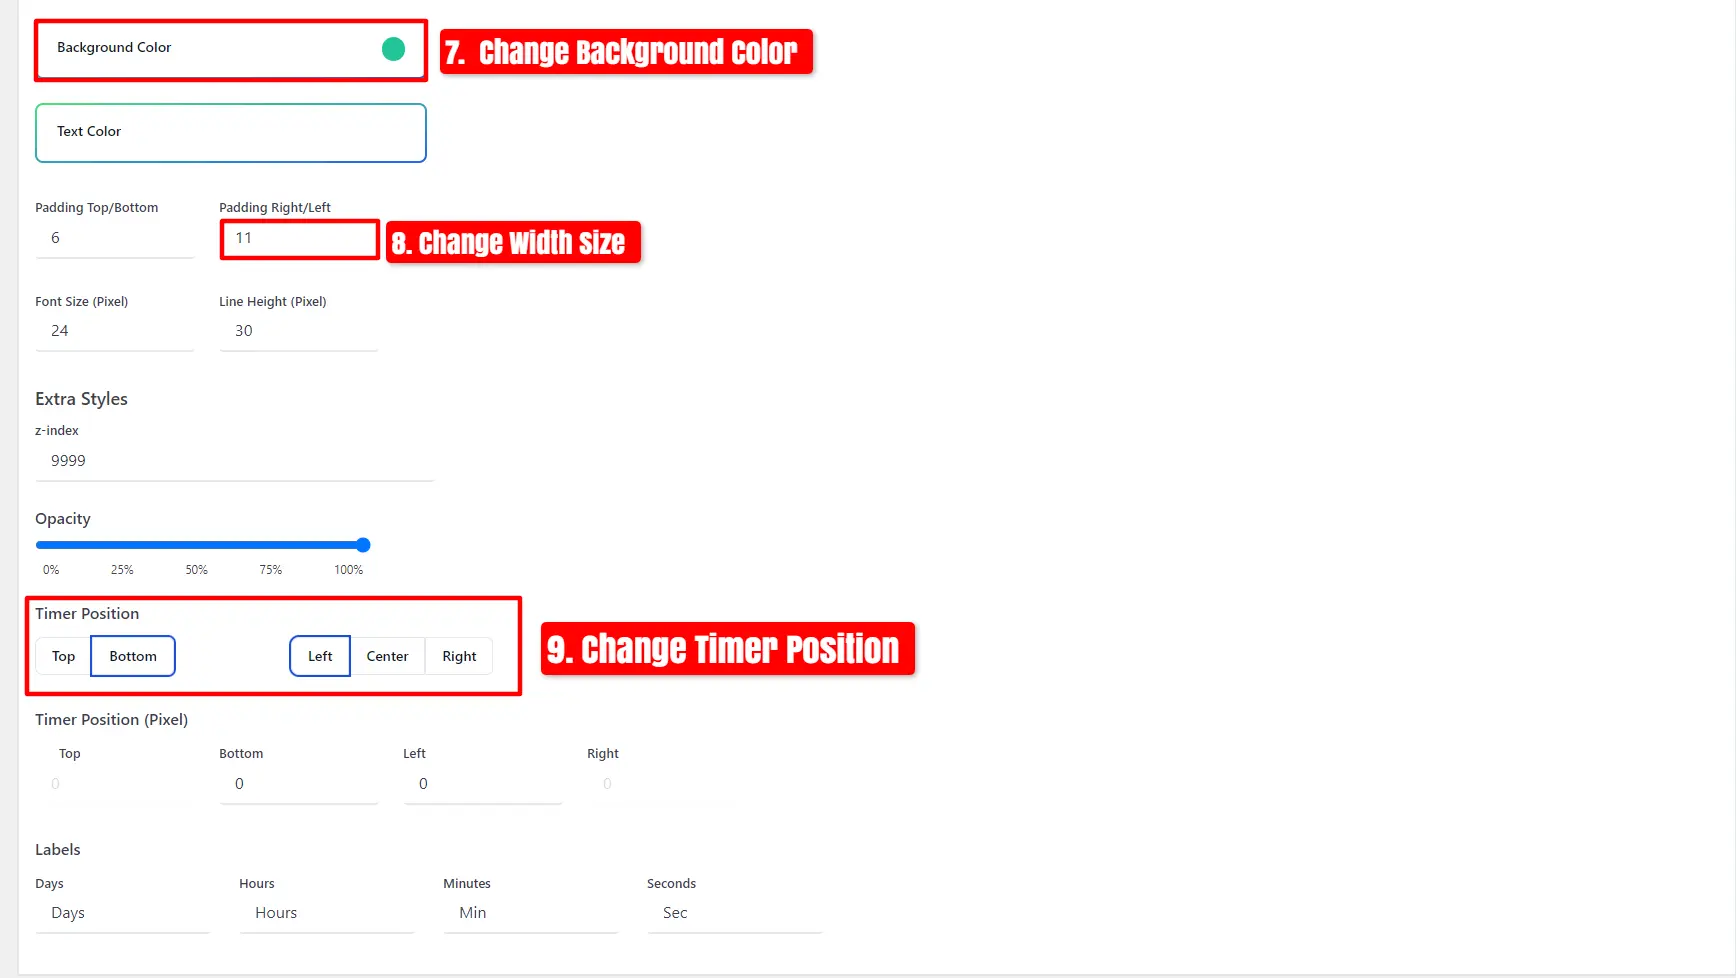
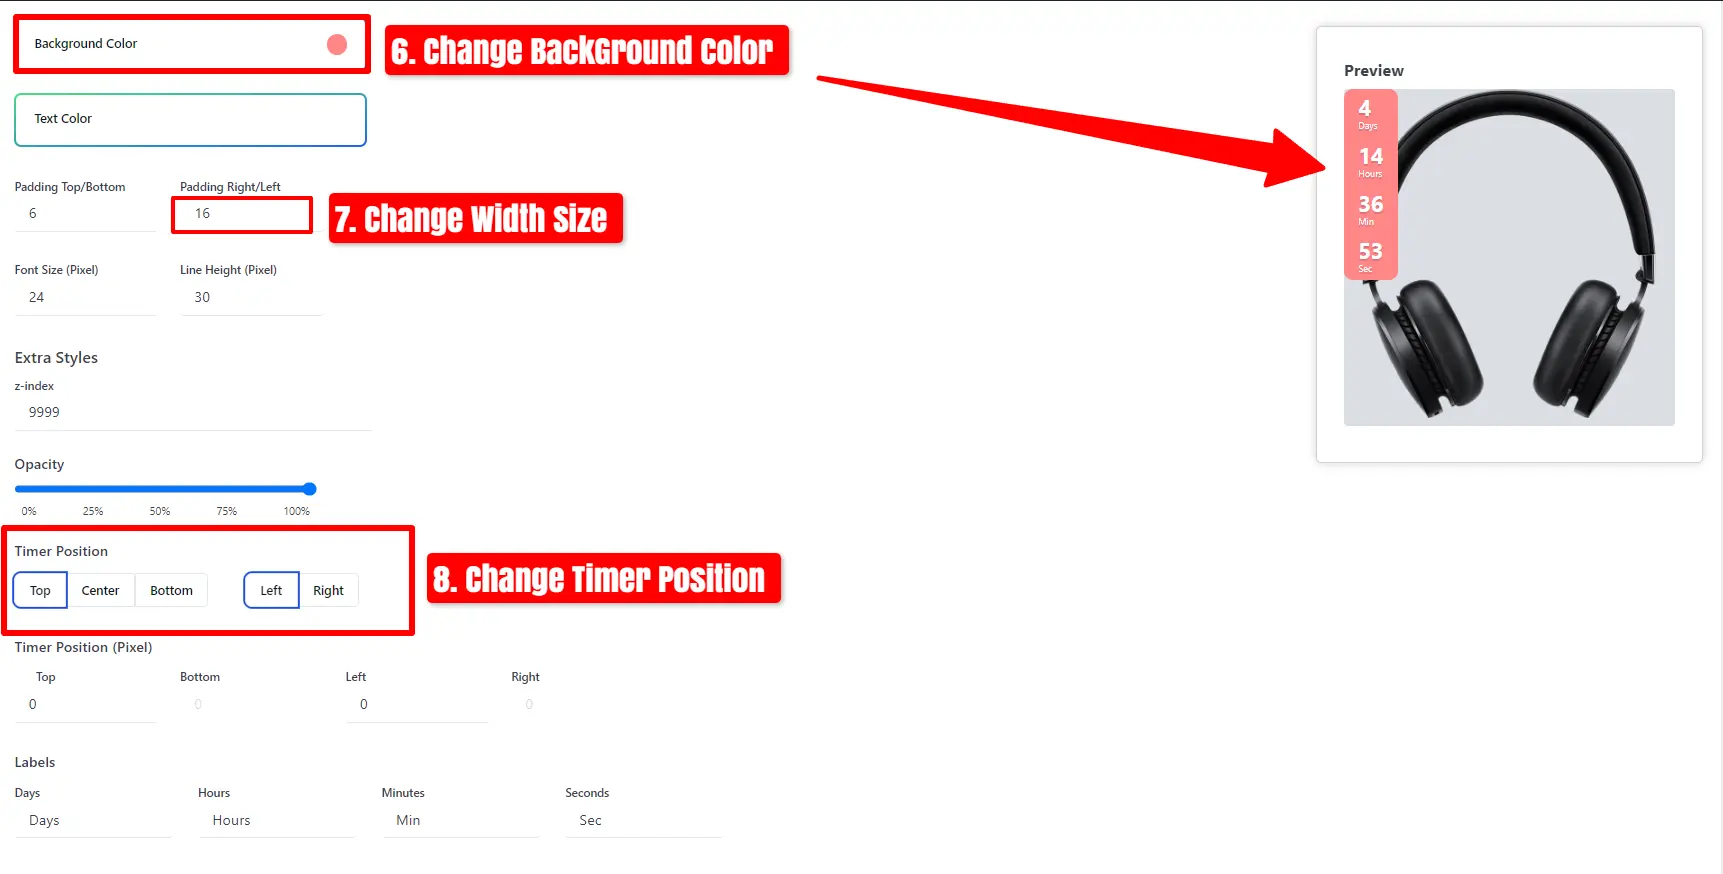
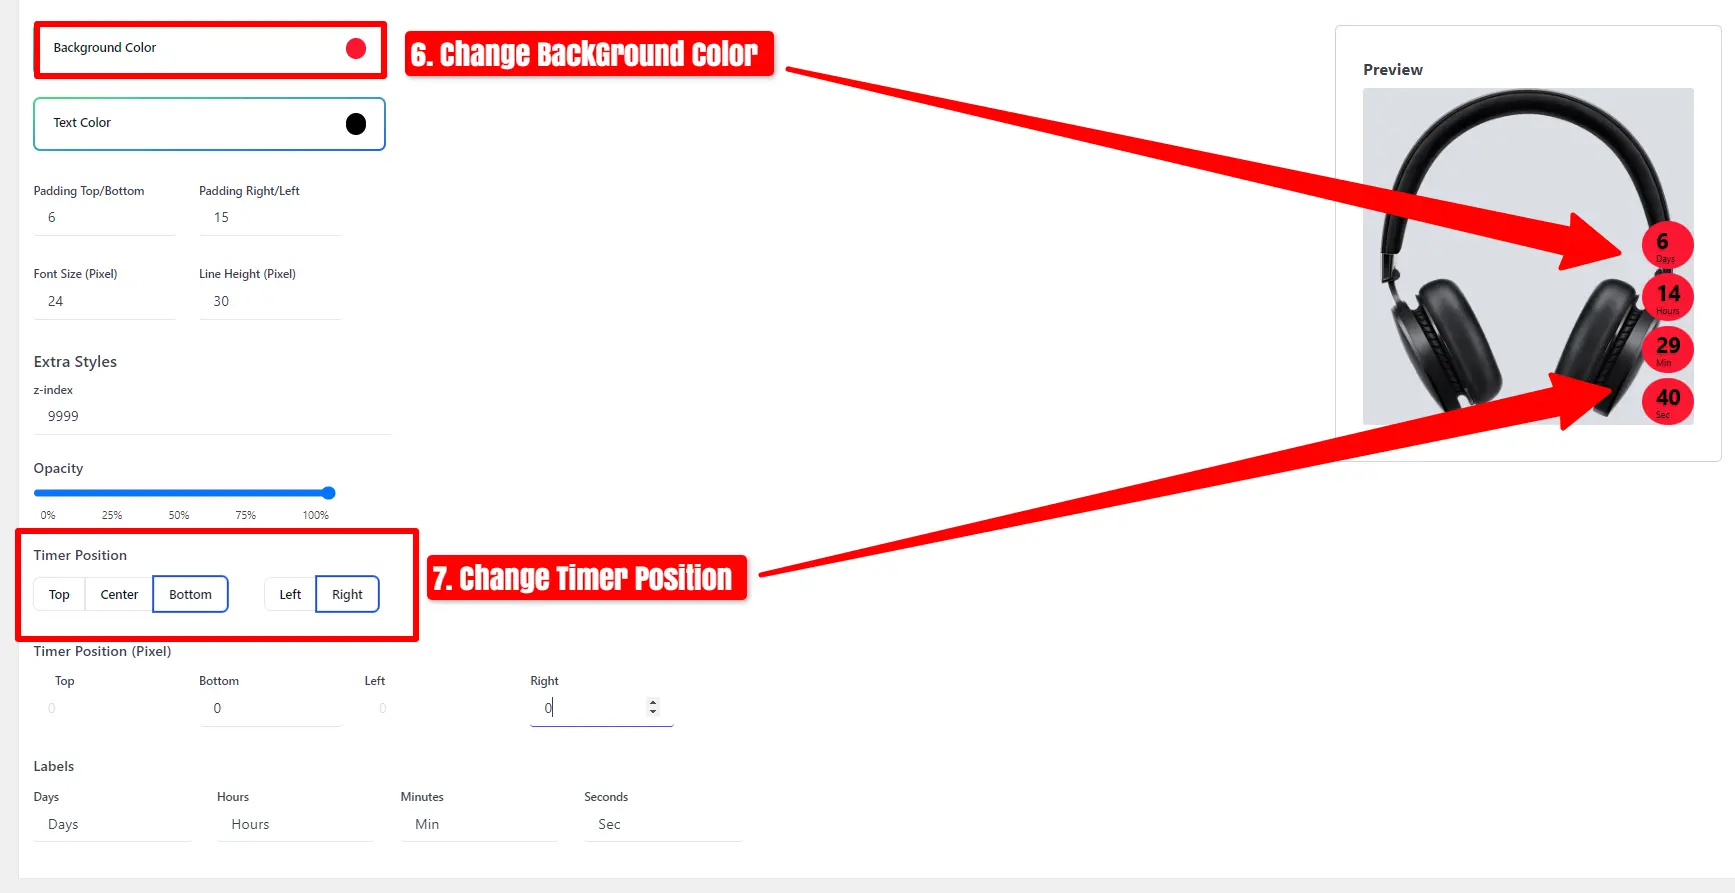
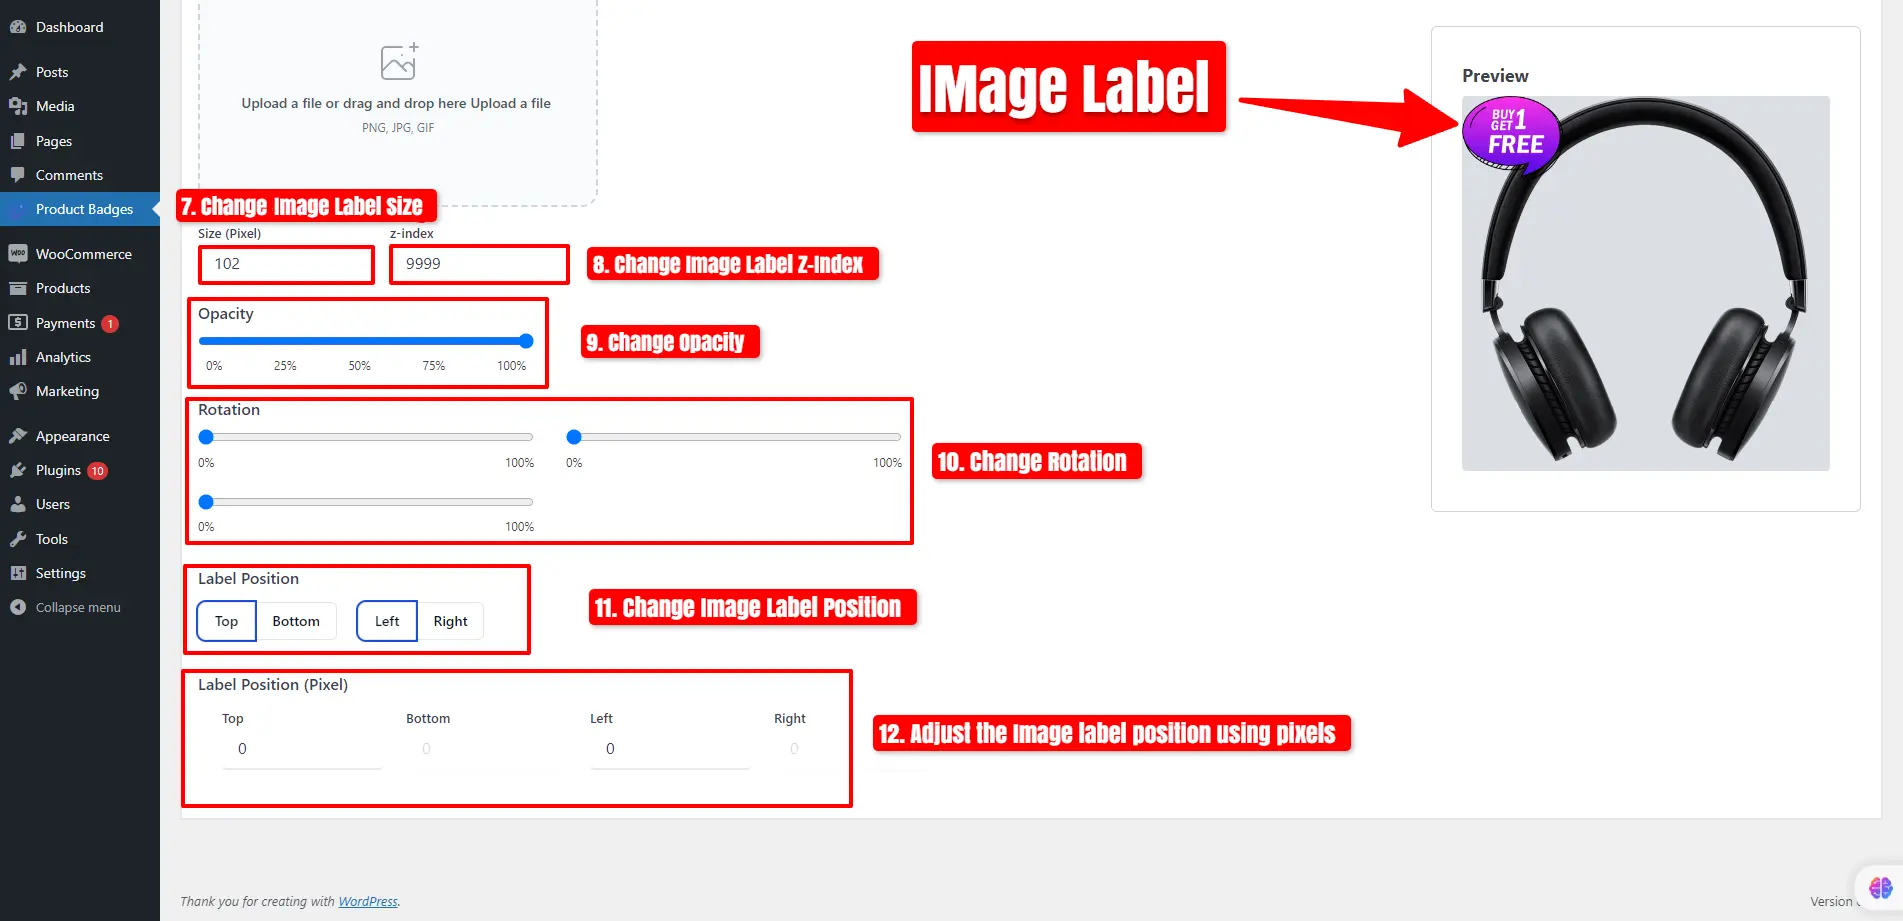
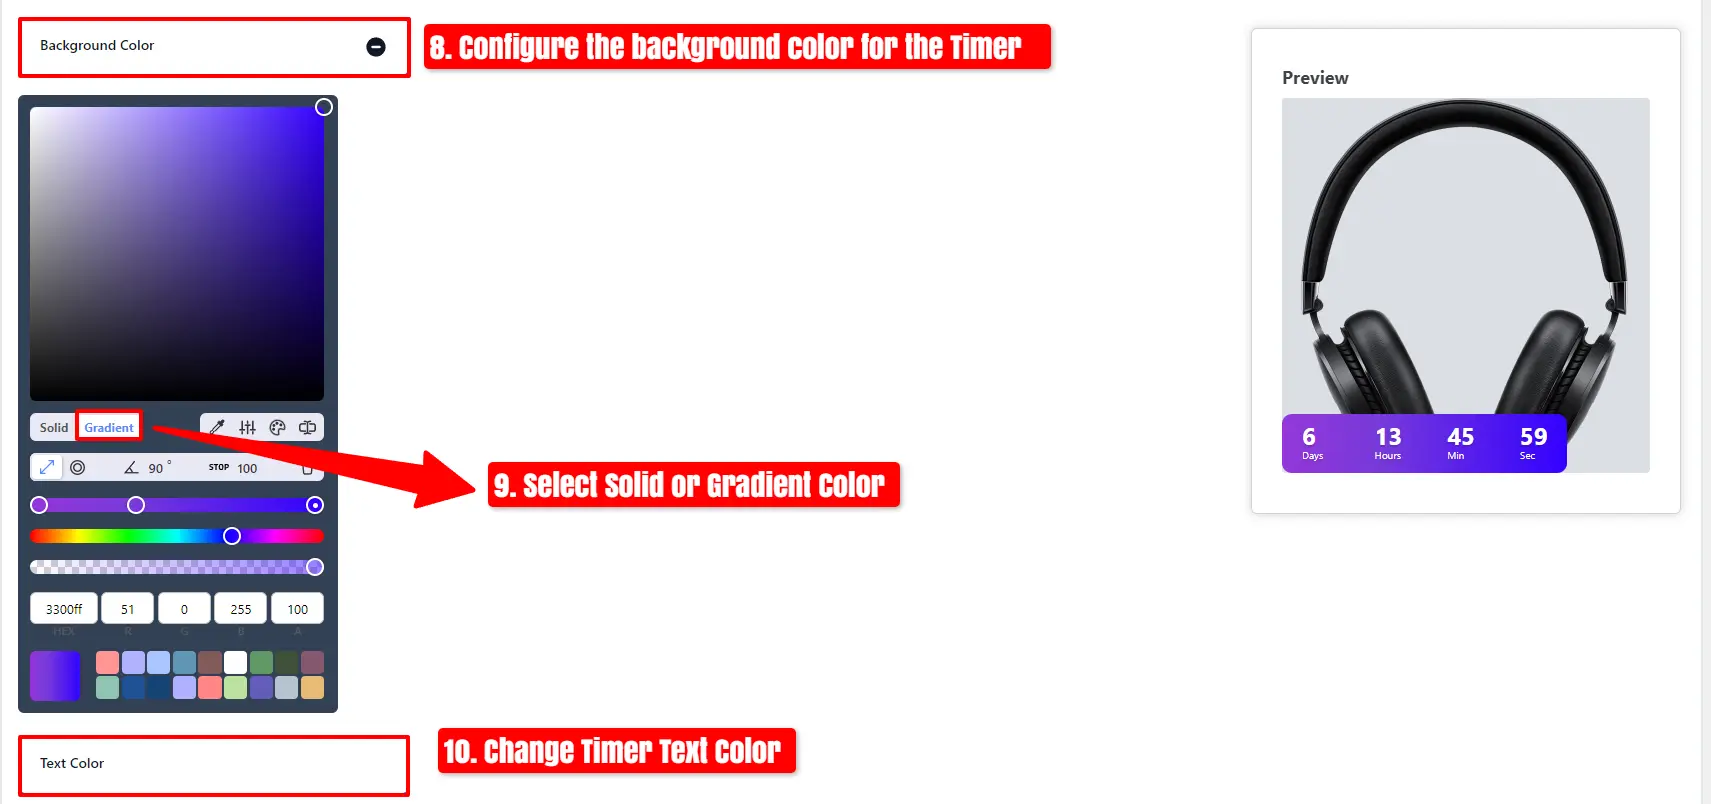
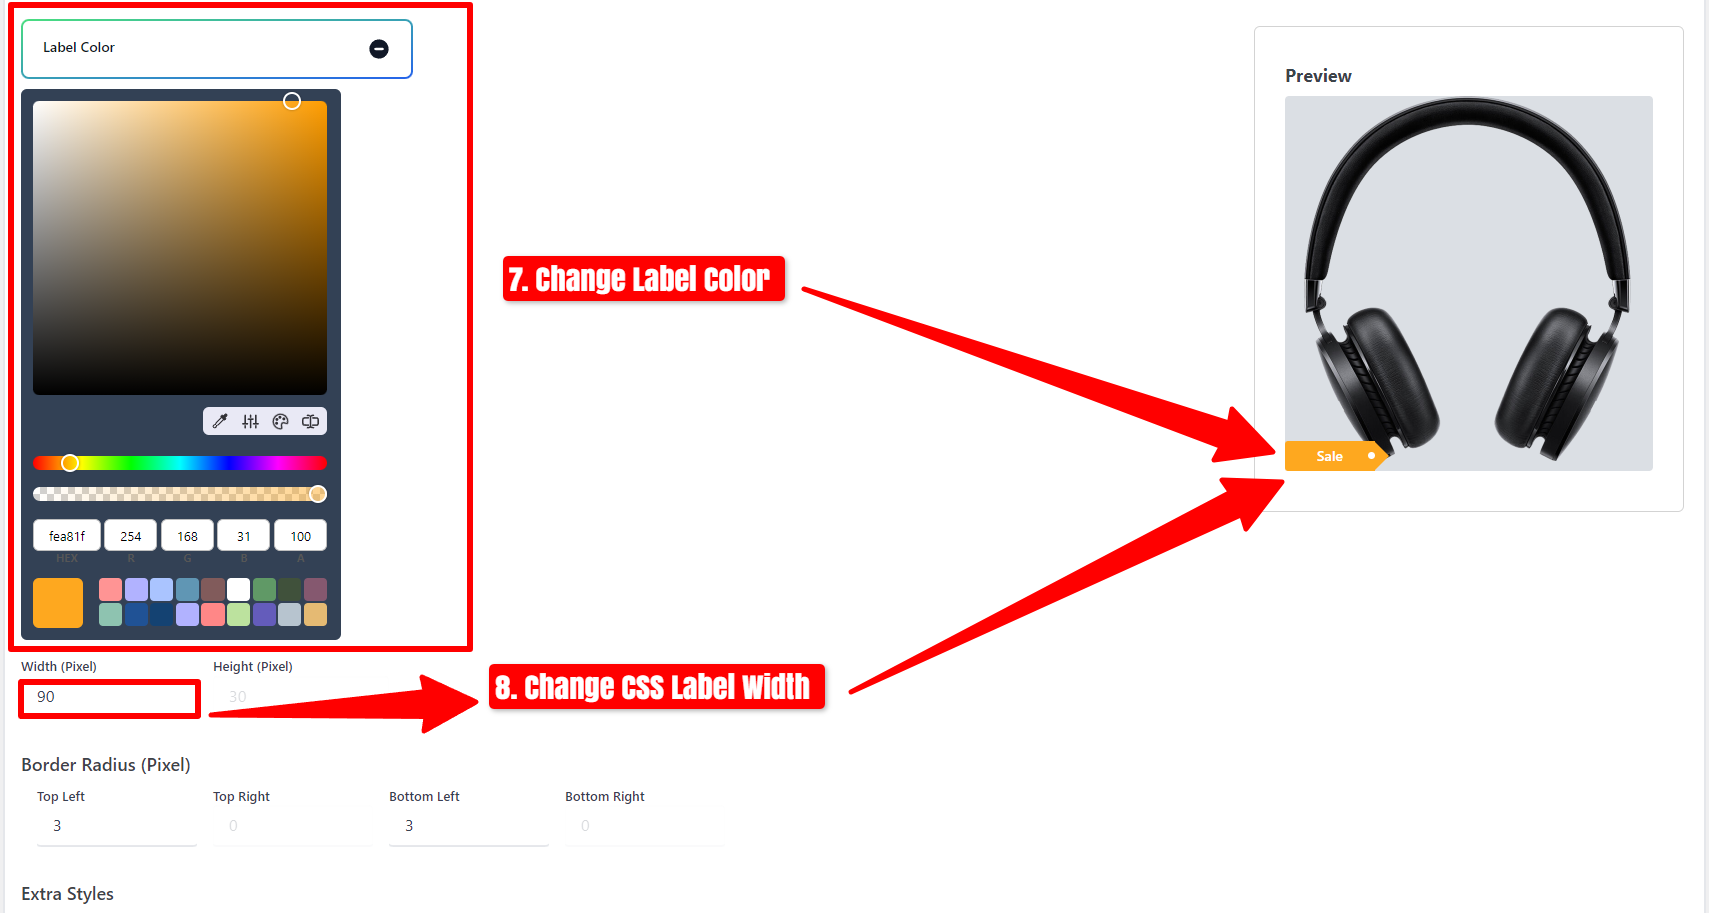
- Afterward, customize the Background Color and adjust the Timer Width Size.
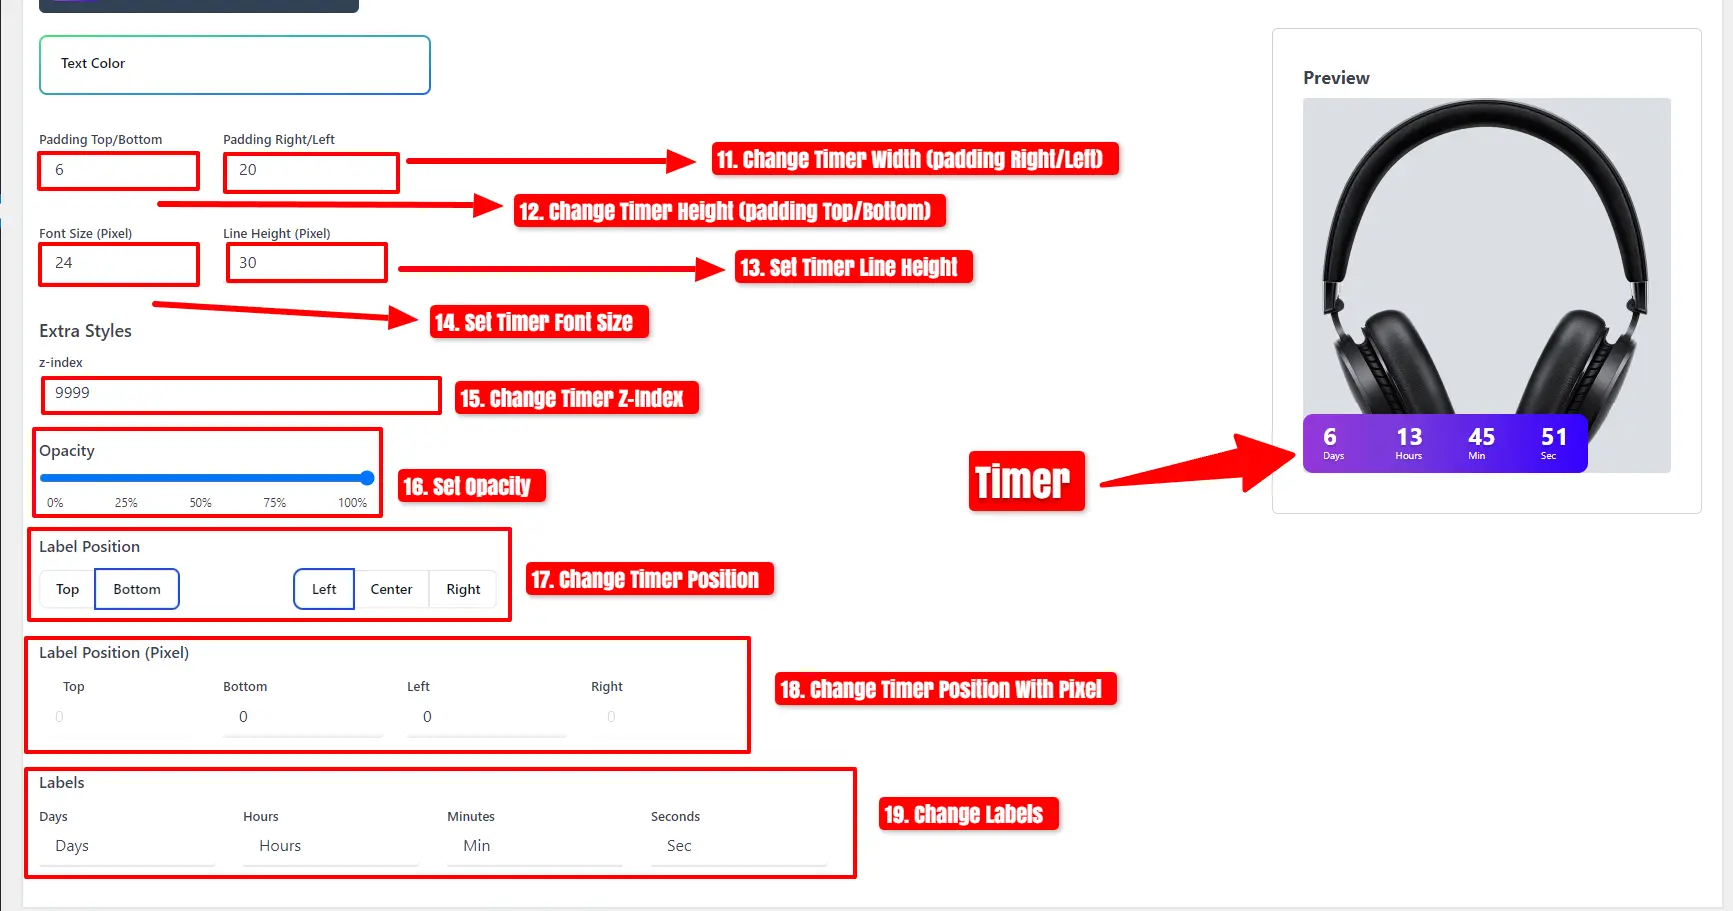
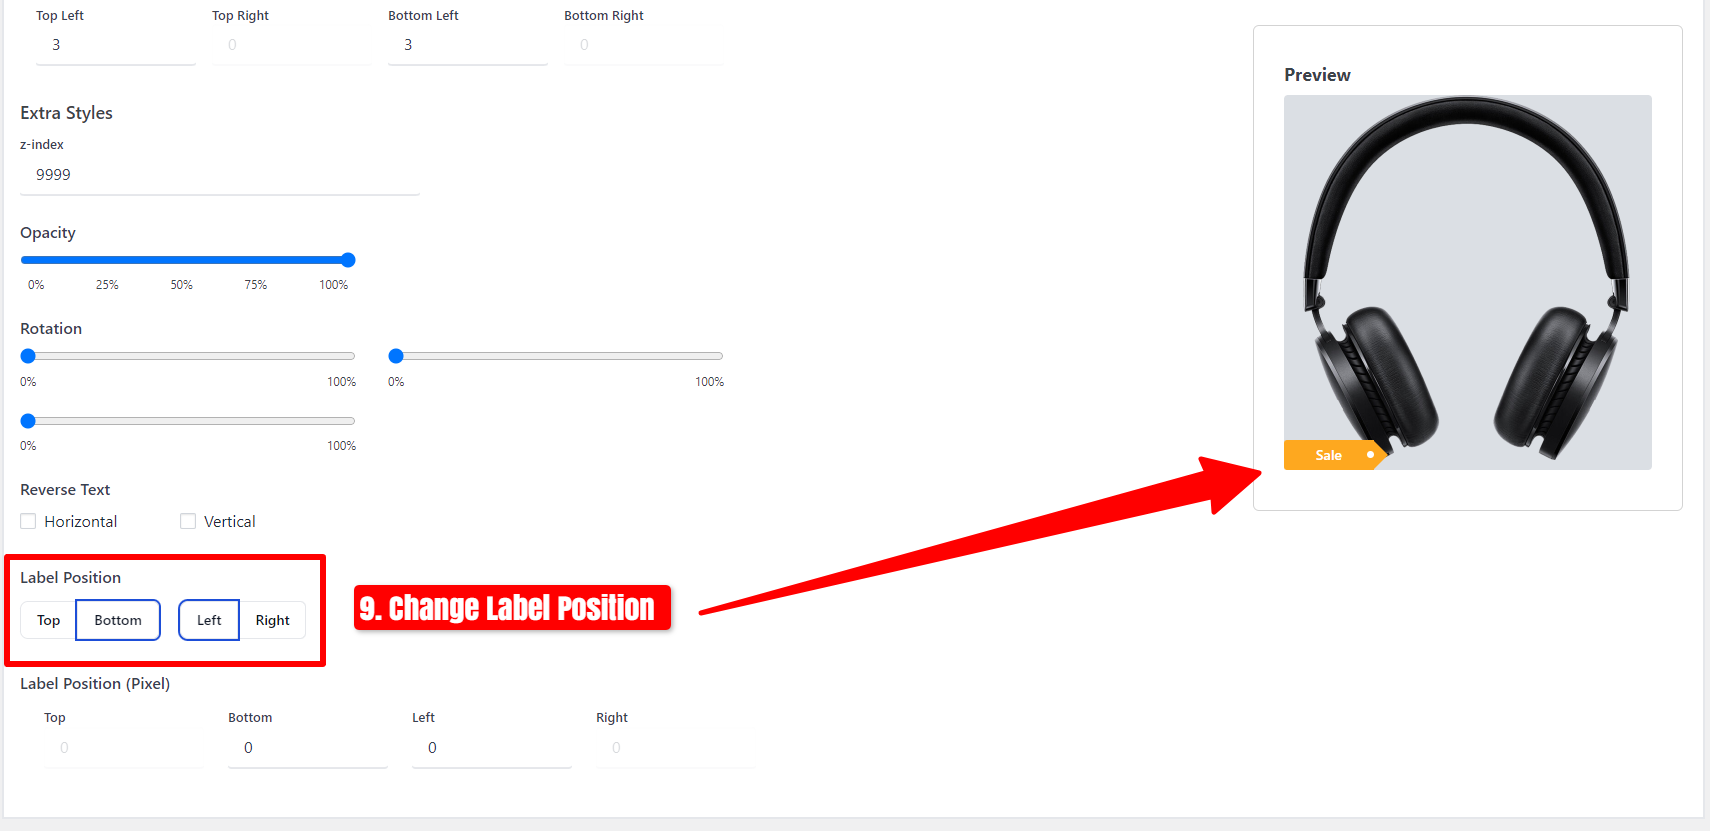
- Finally, alter the Timer Position as needed.
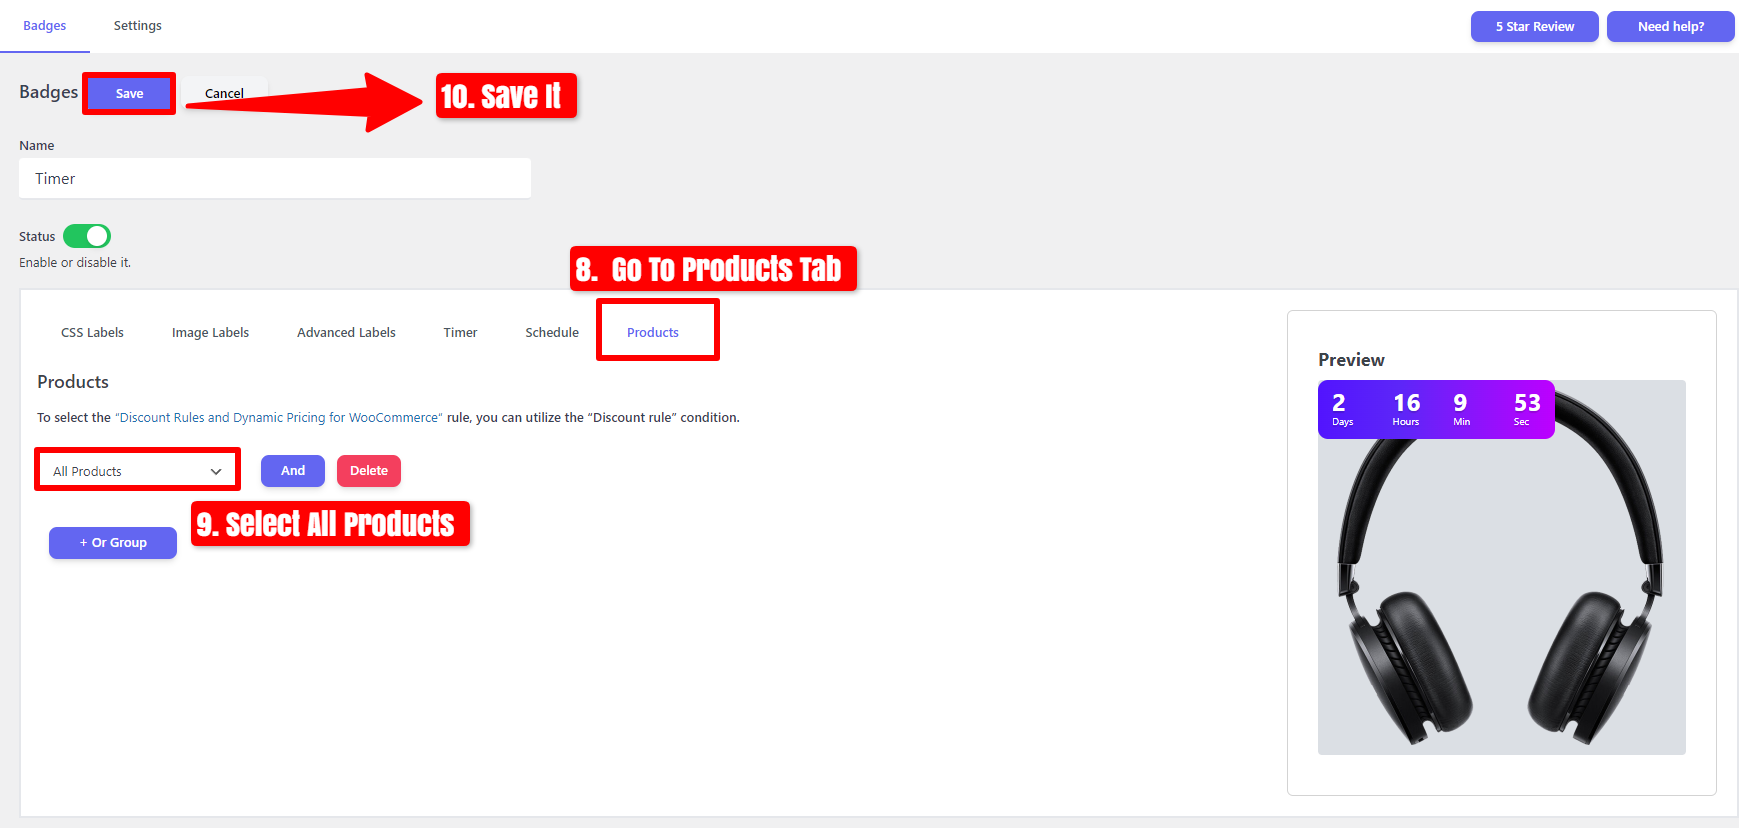
After enabling the Timer and making modifications.
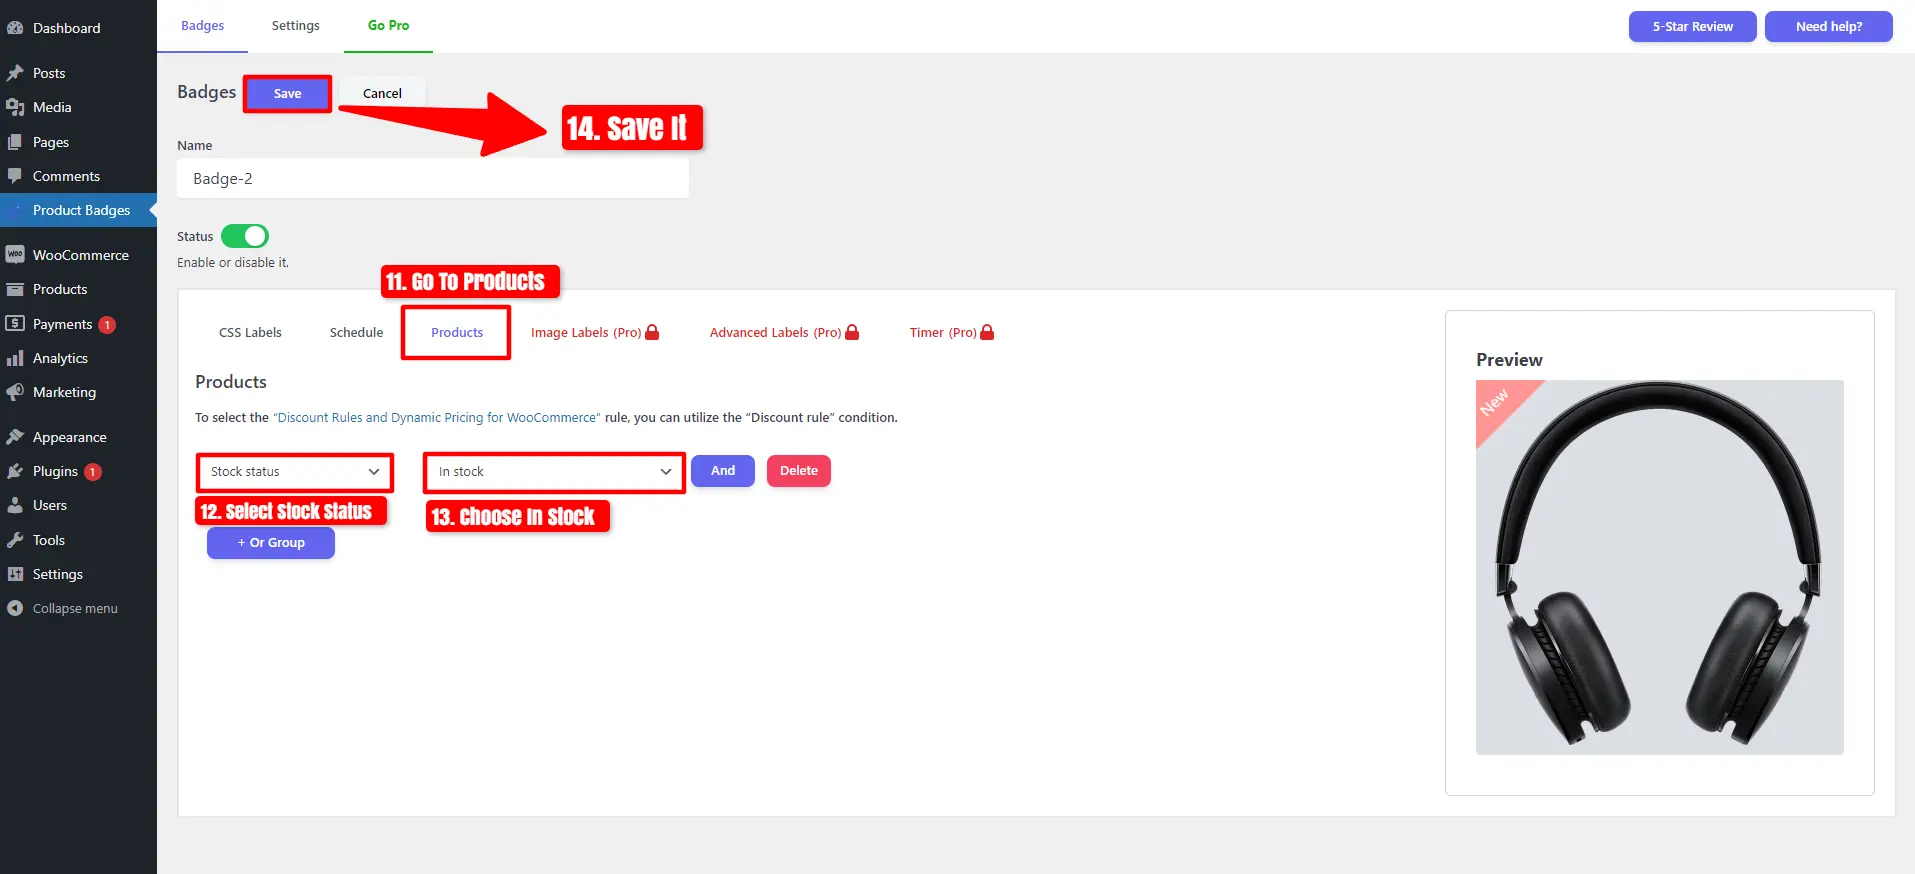
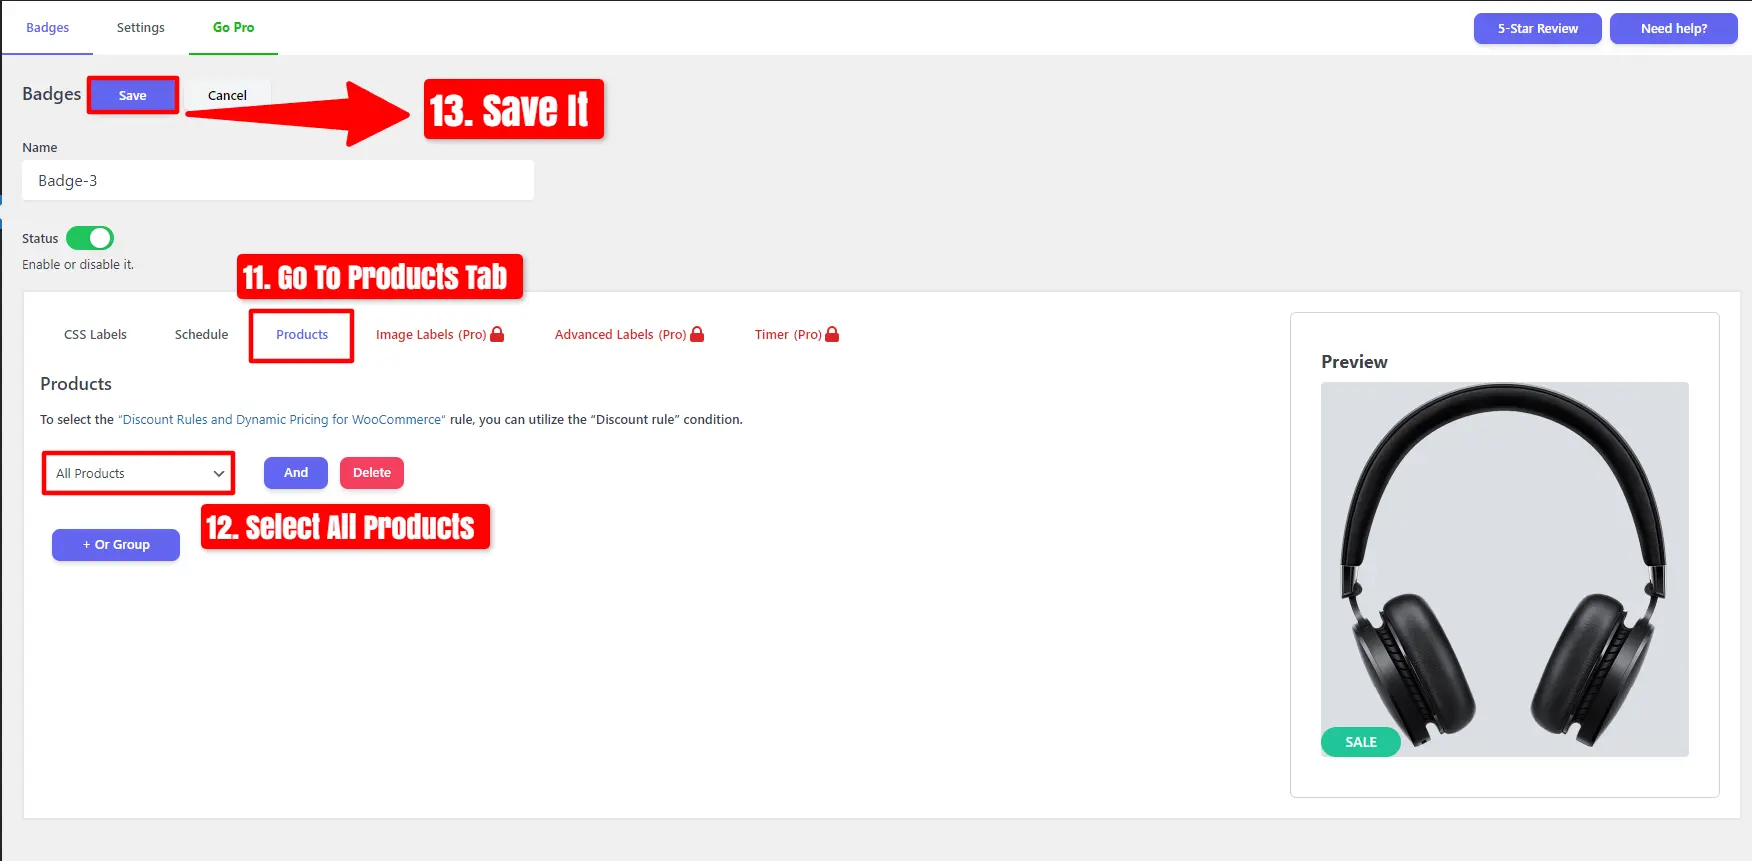
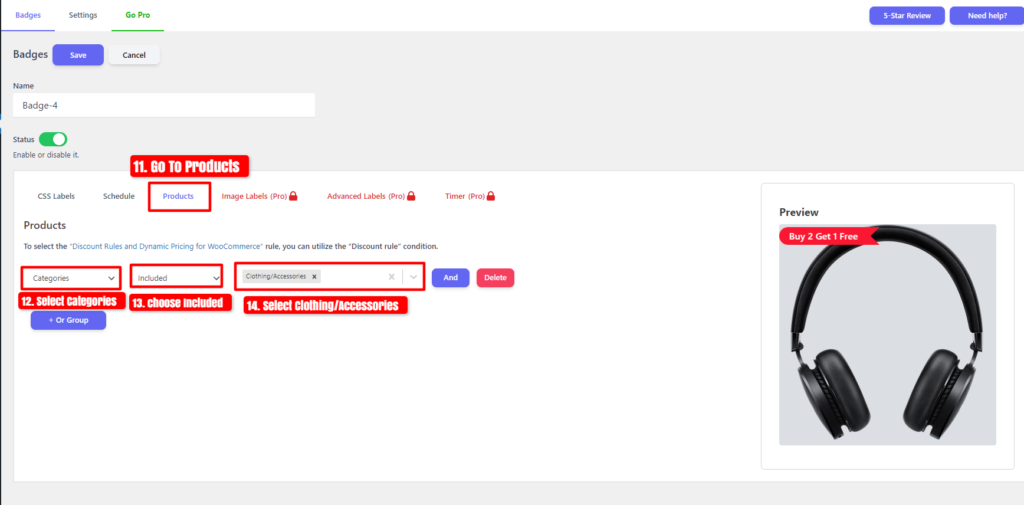
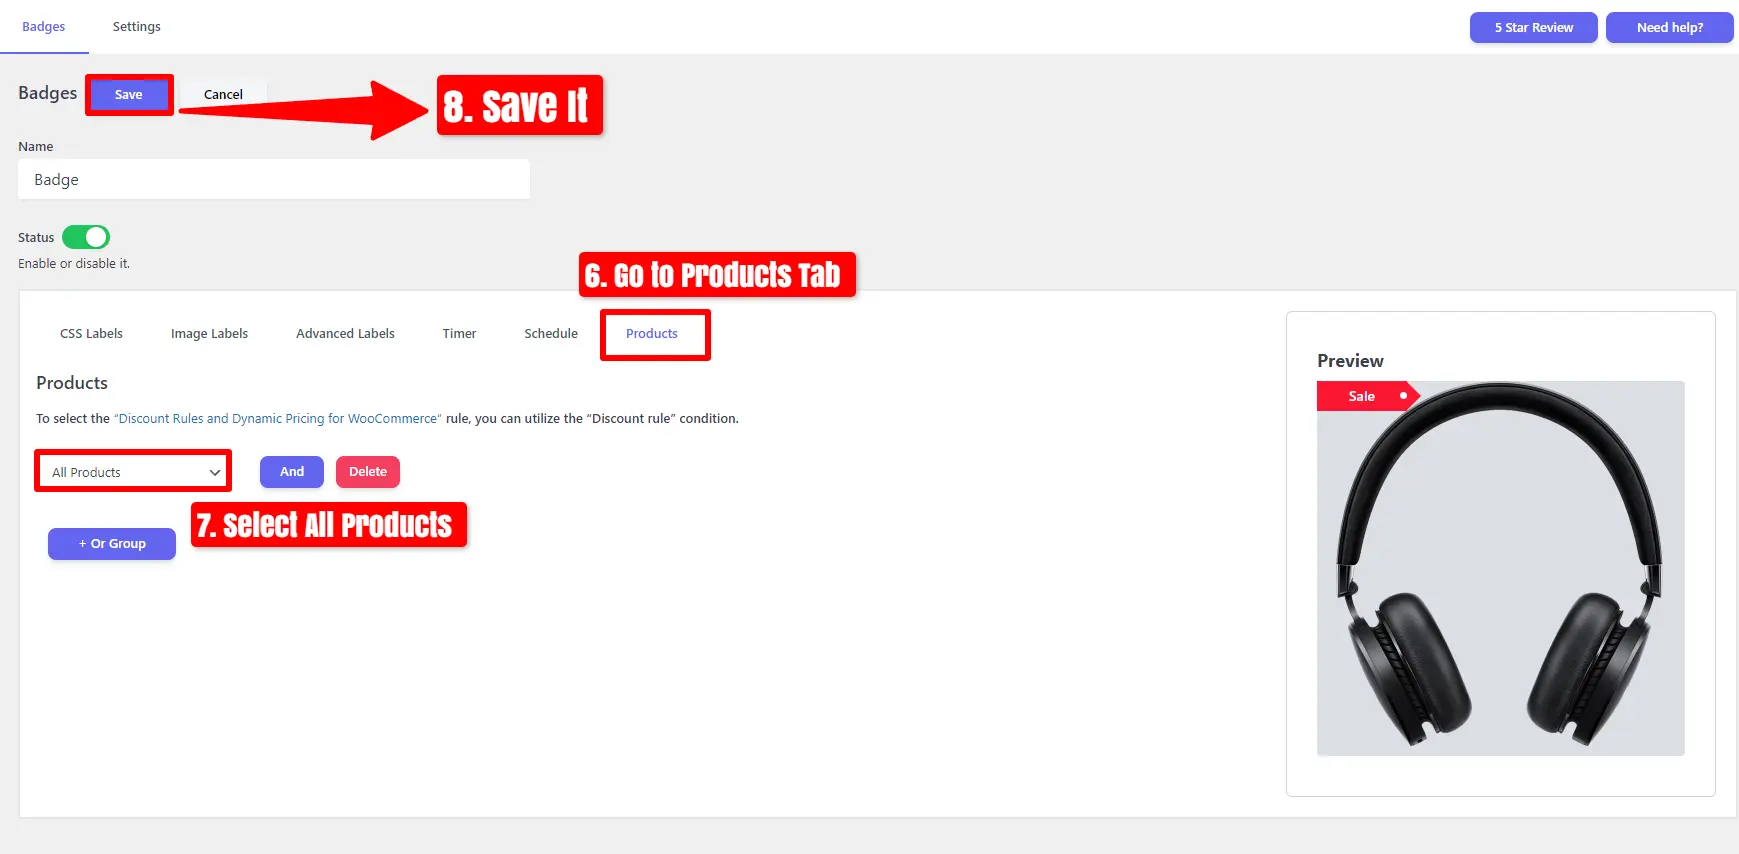
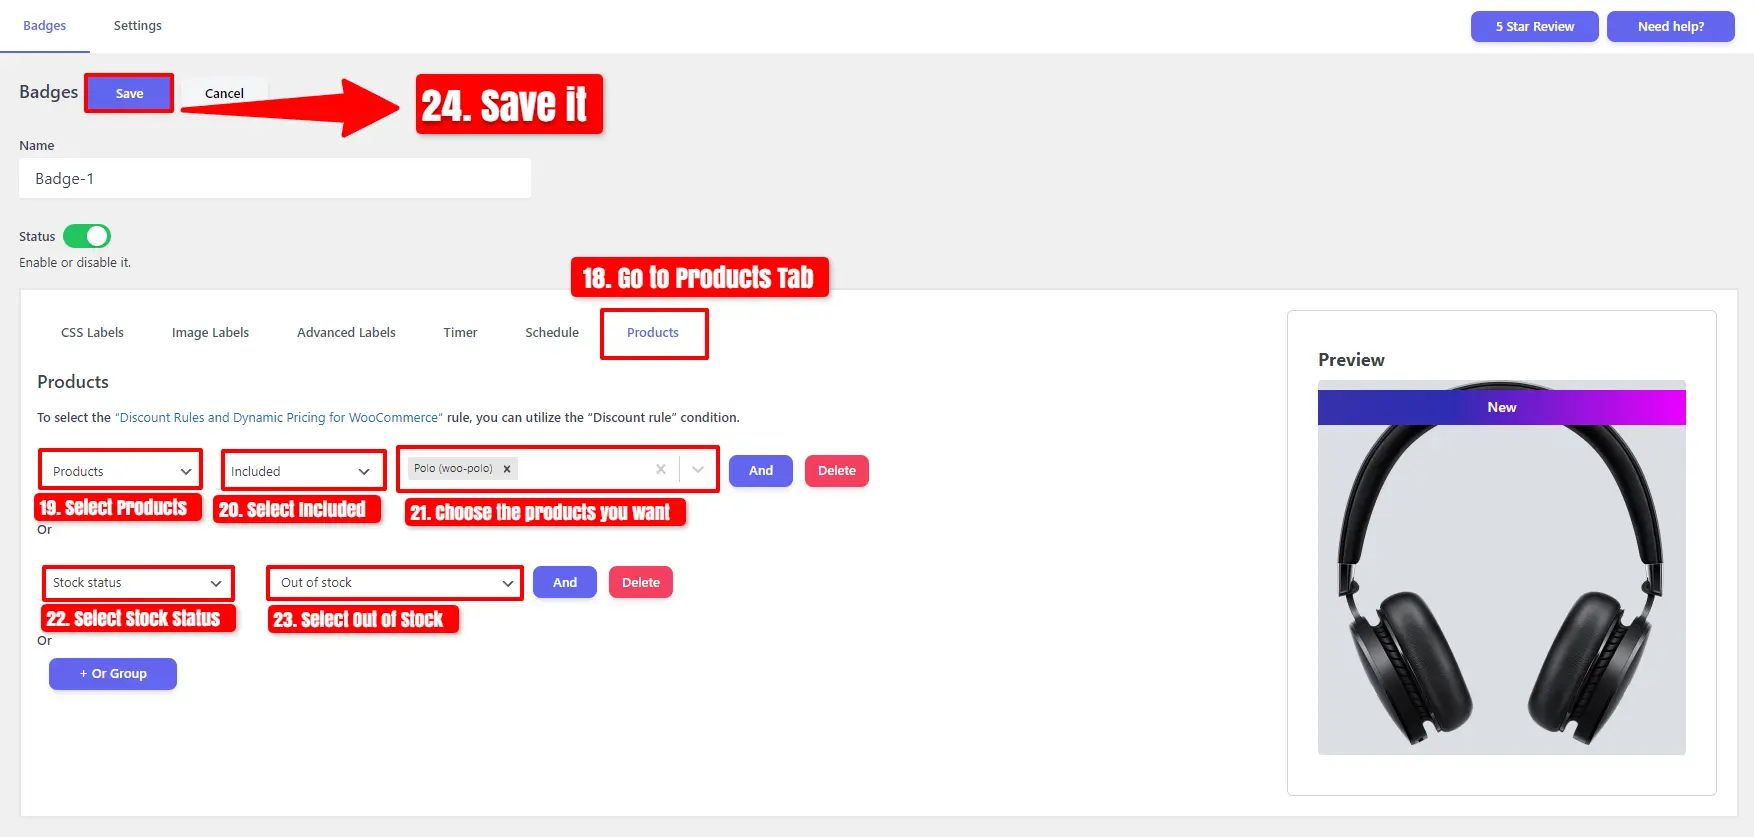
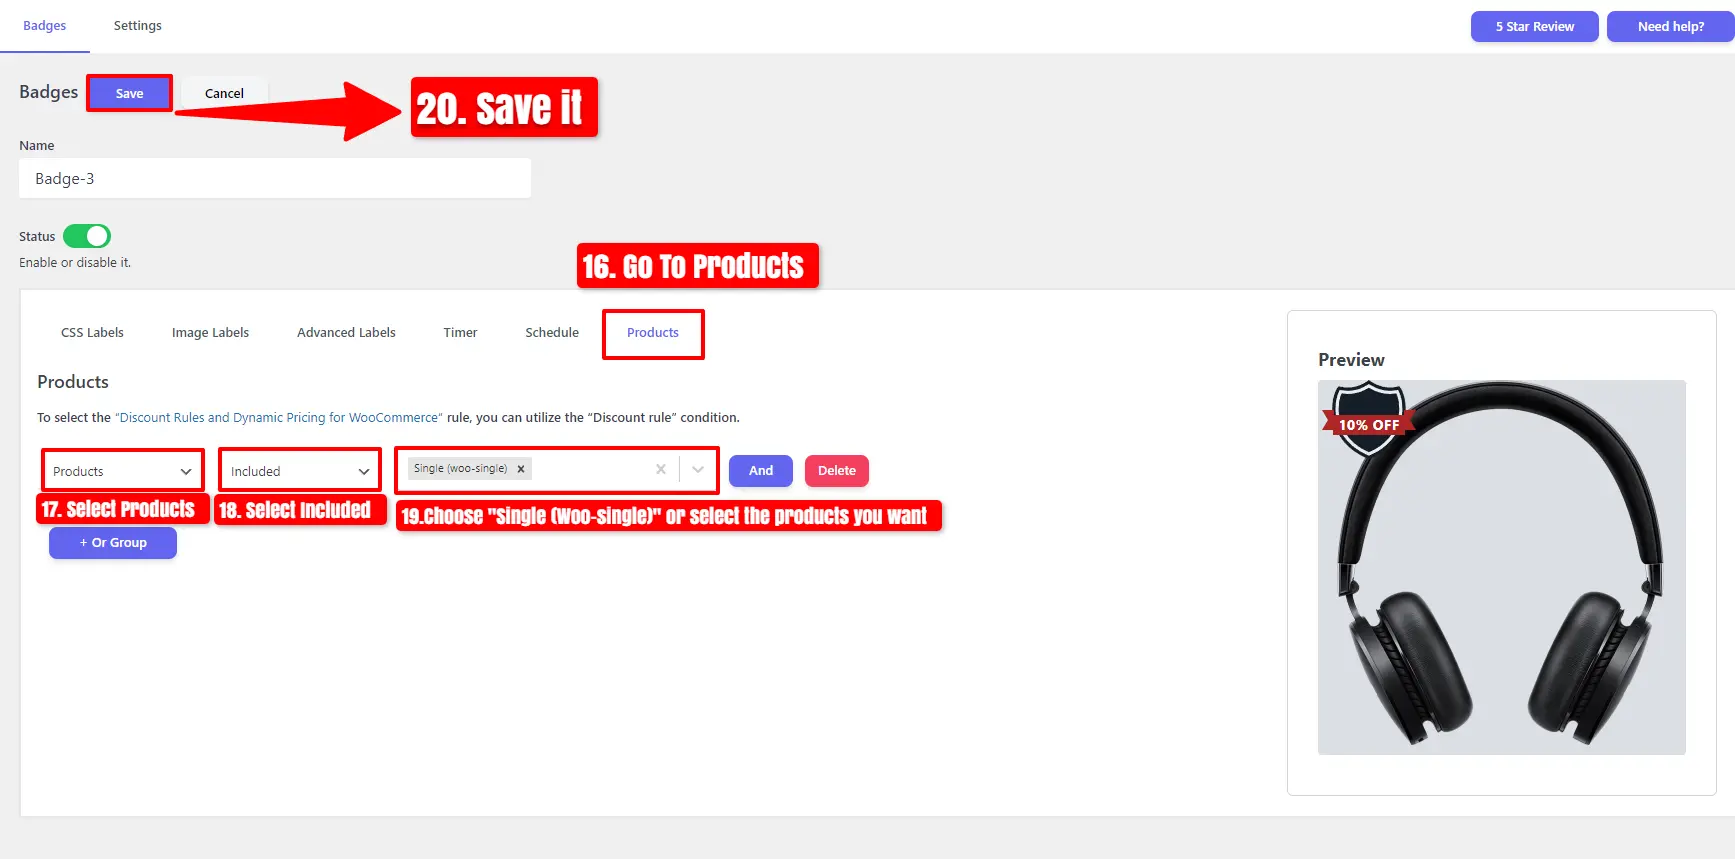
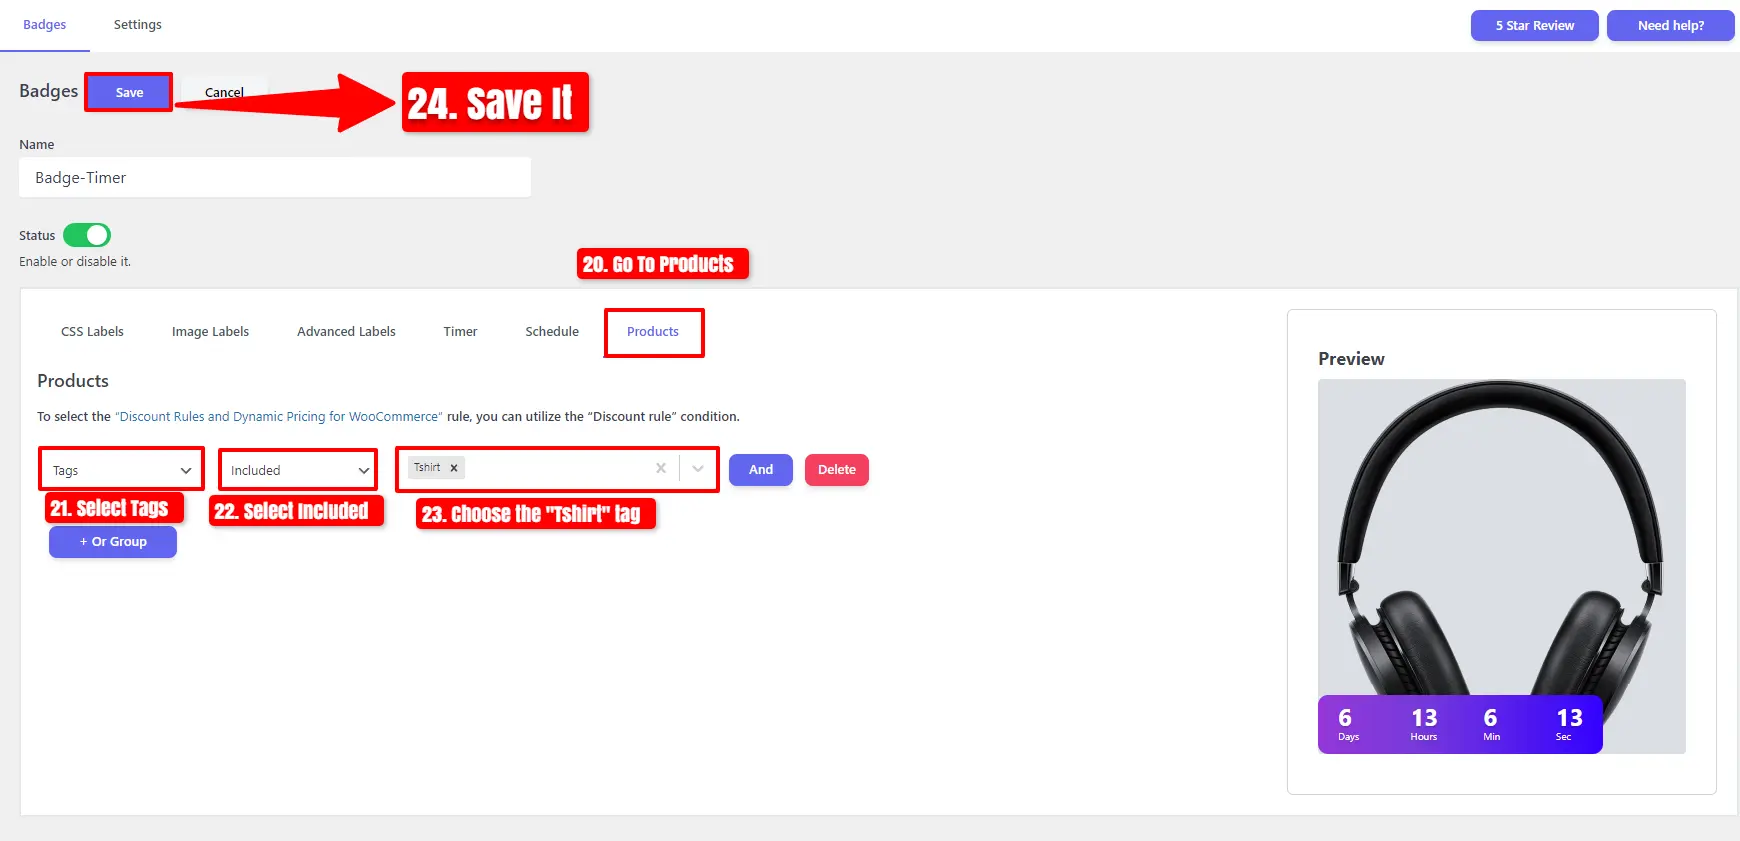
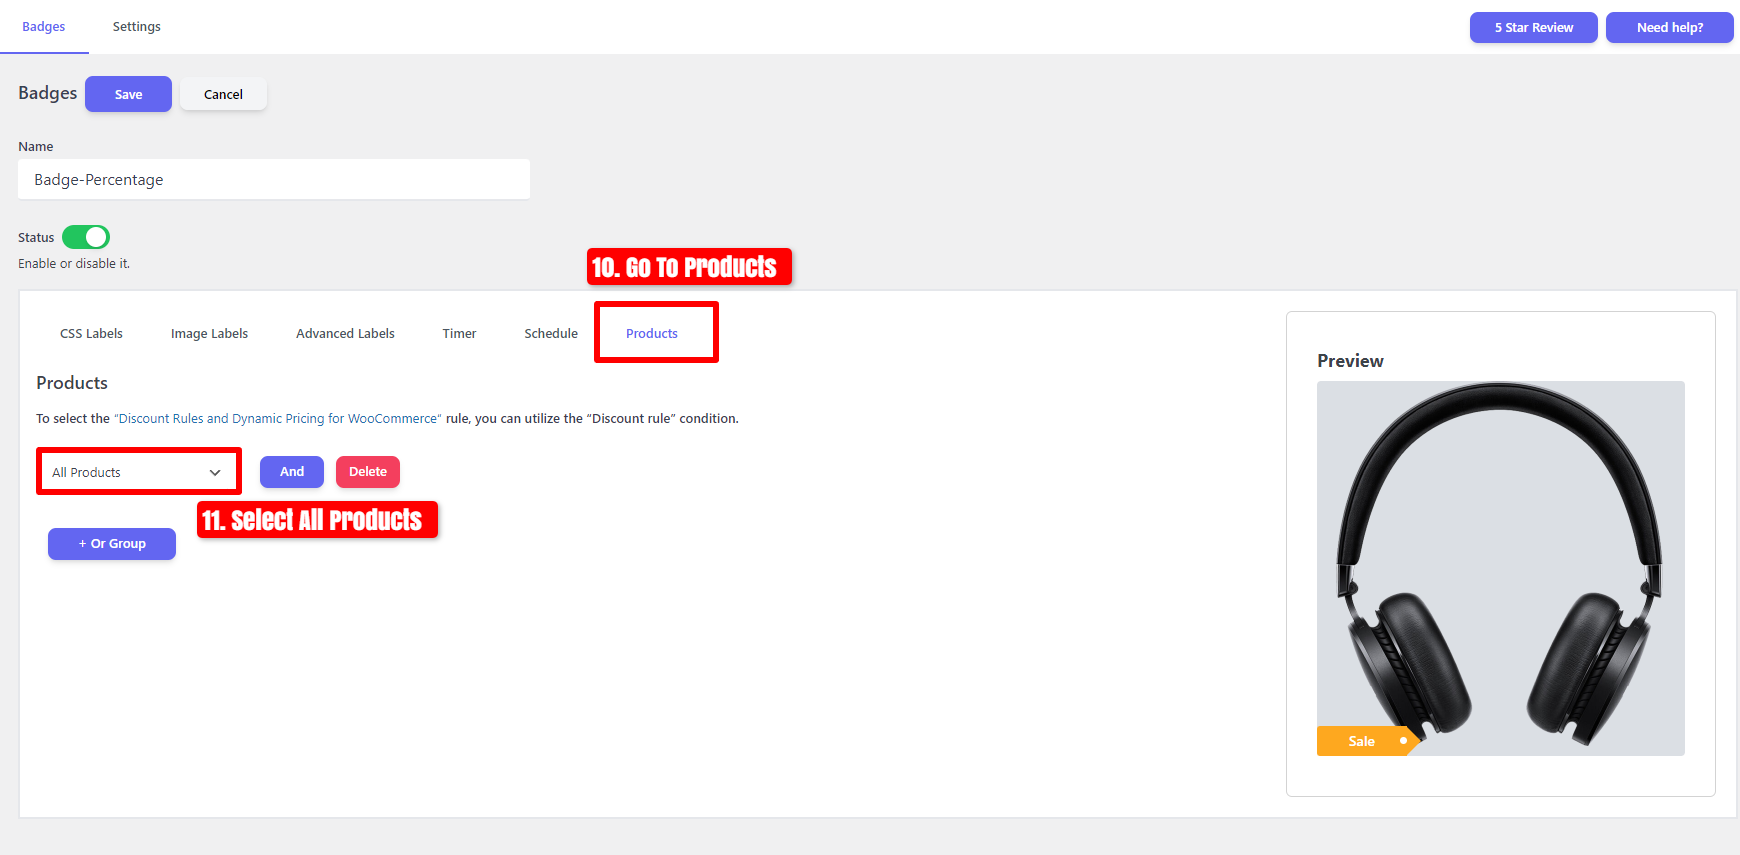
- navigate to the ‘Products‘ tab.
- Select ‘All Products.’
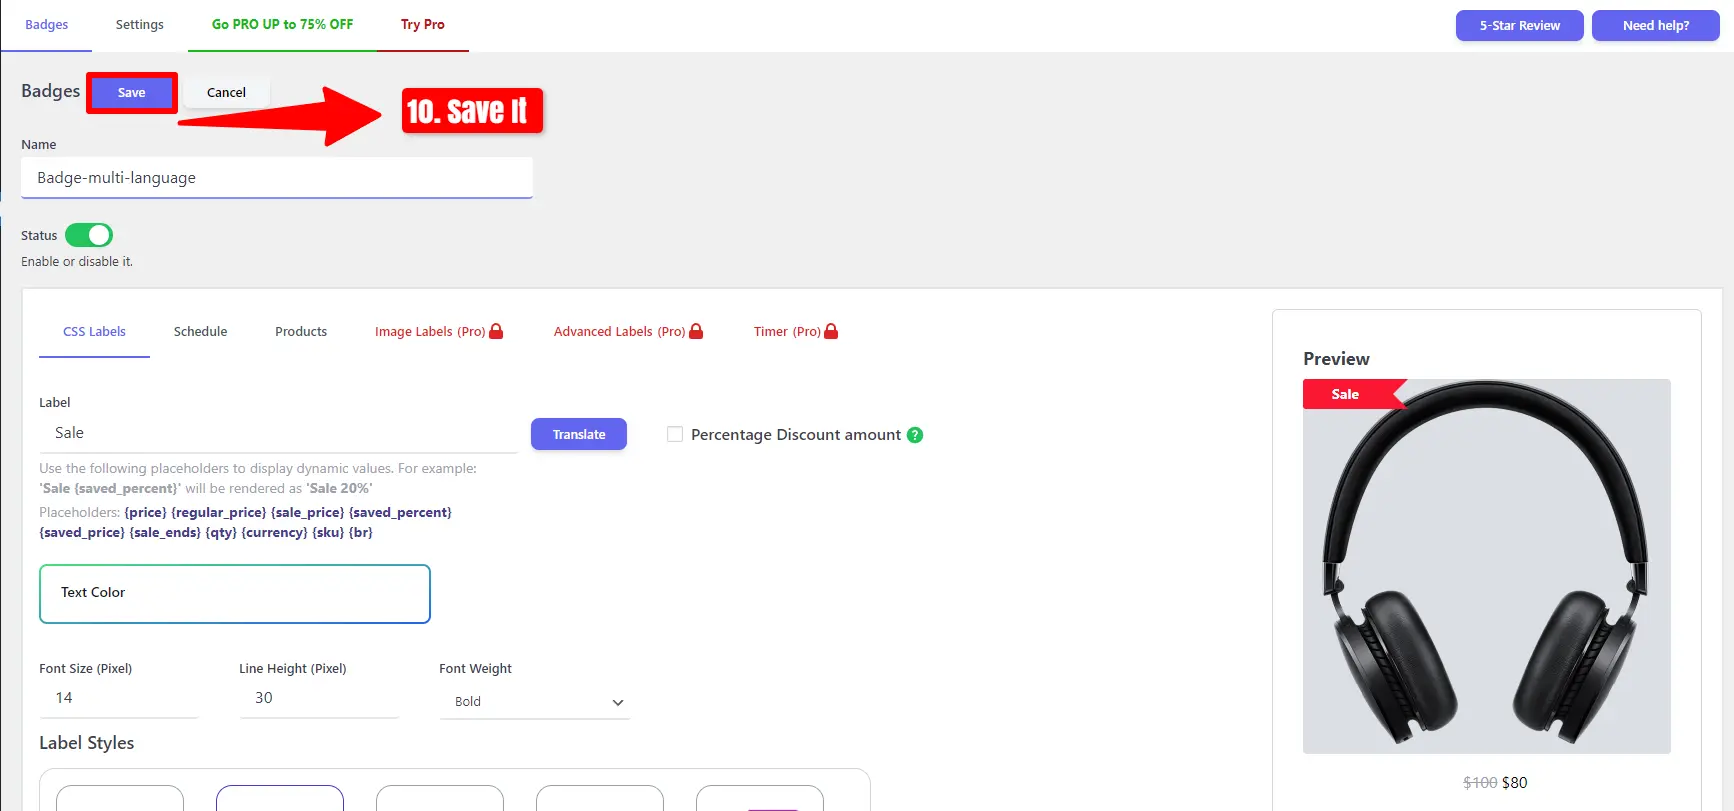
- Save your changes.
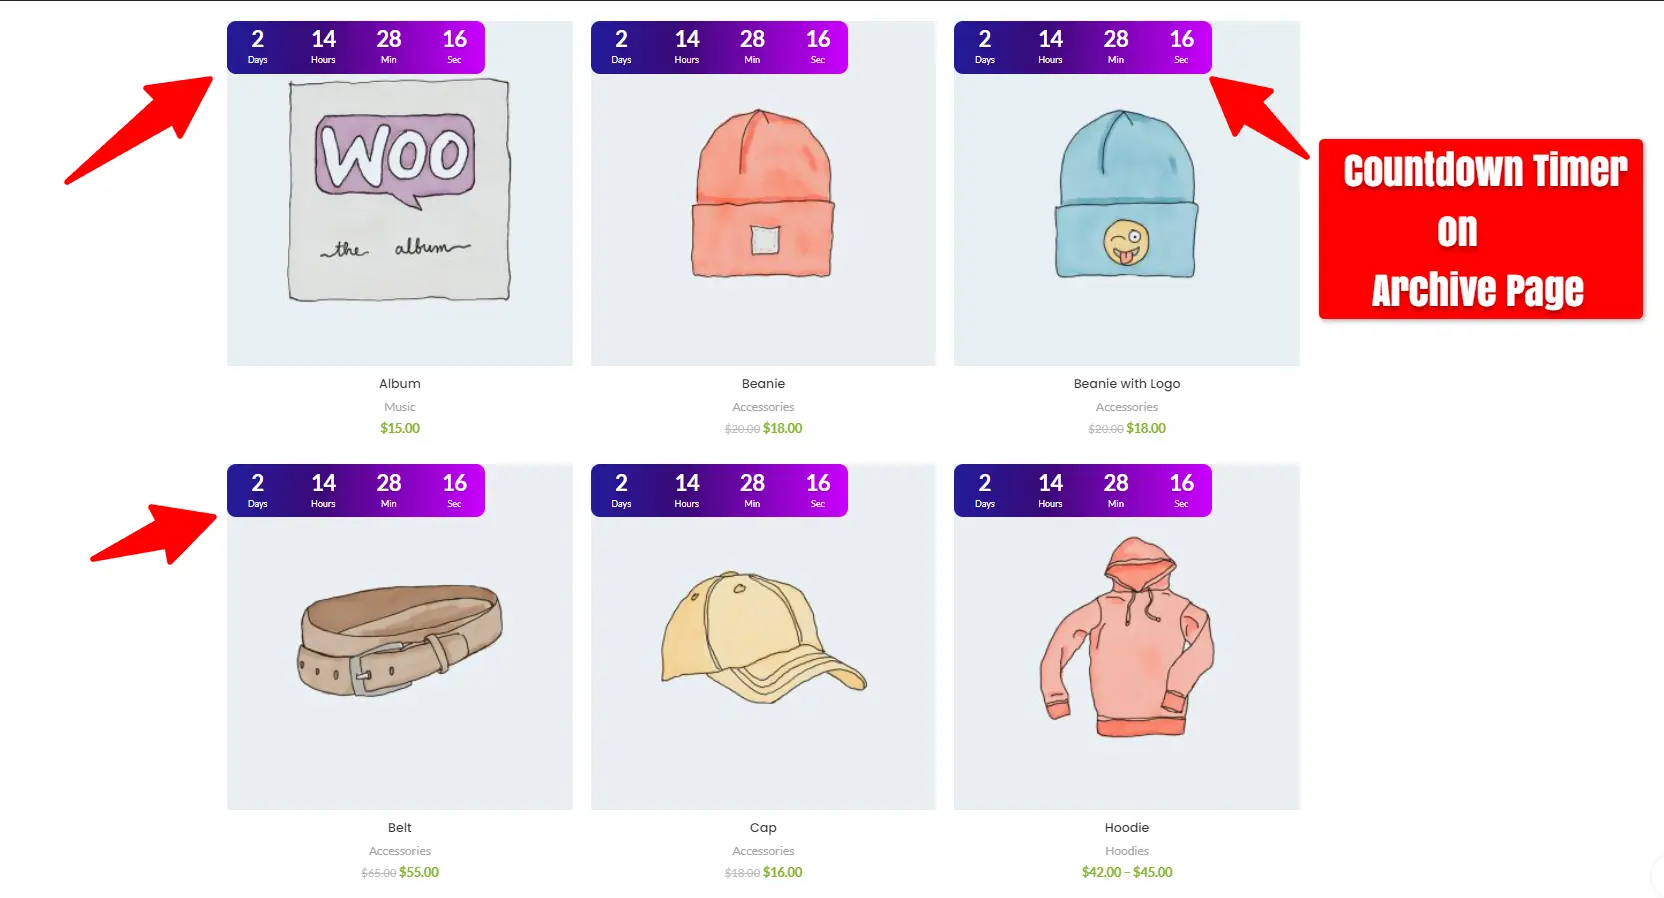
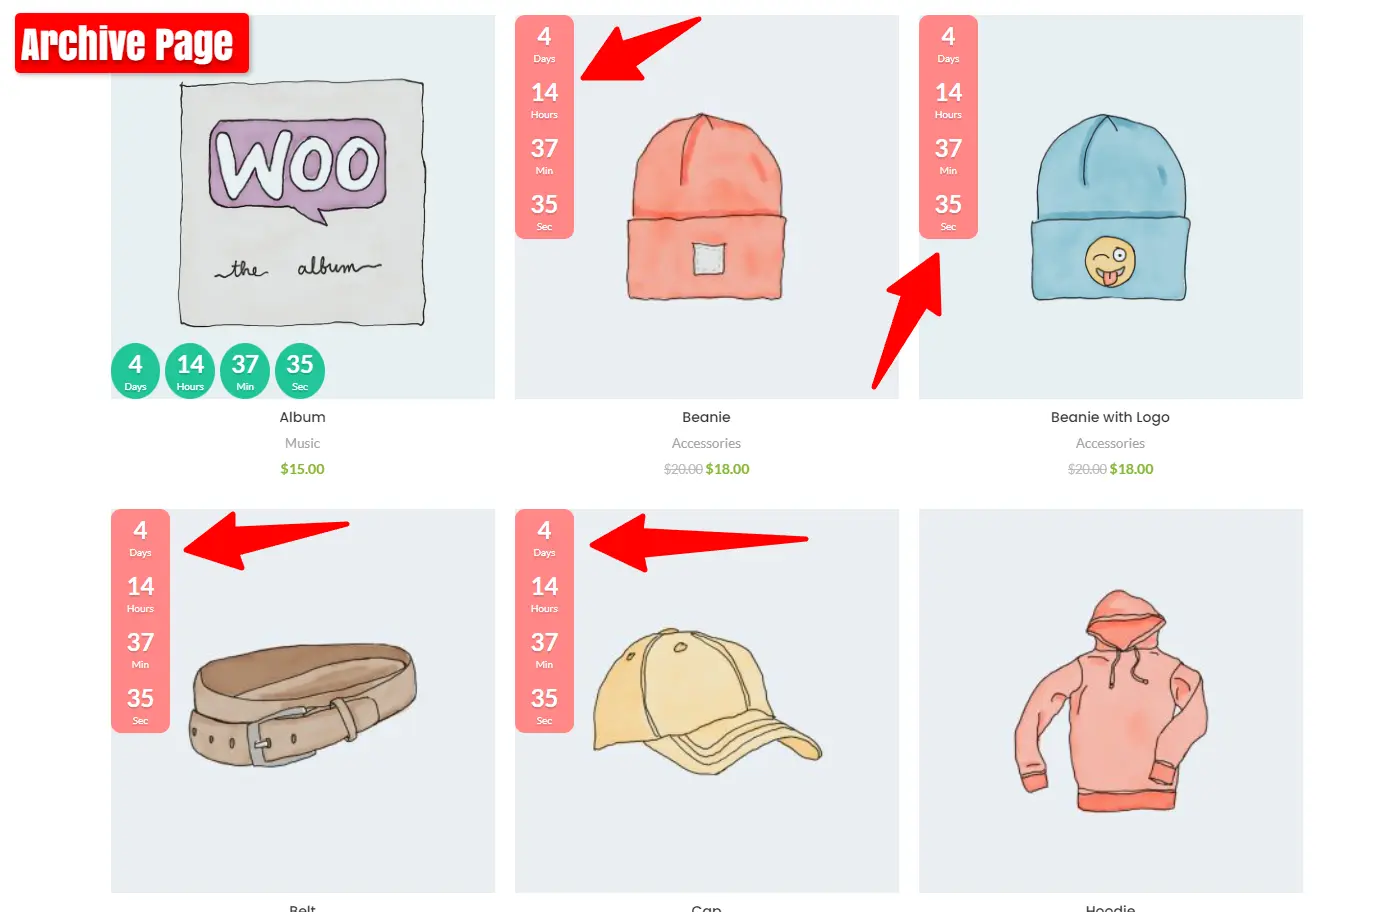
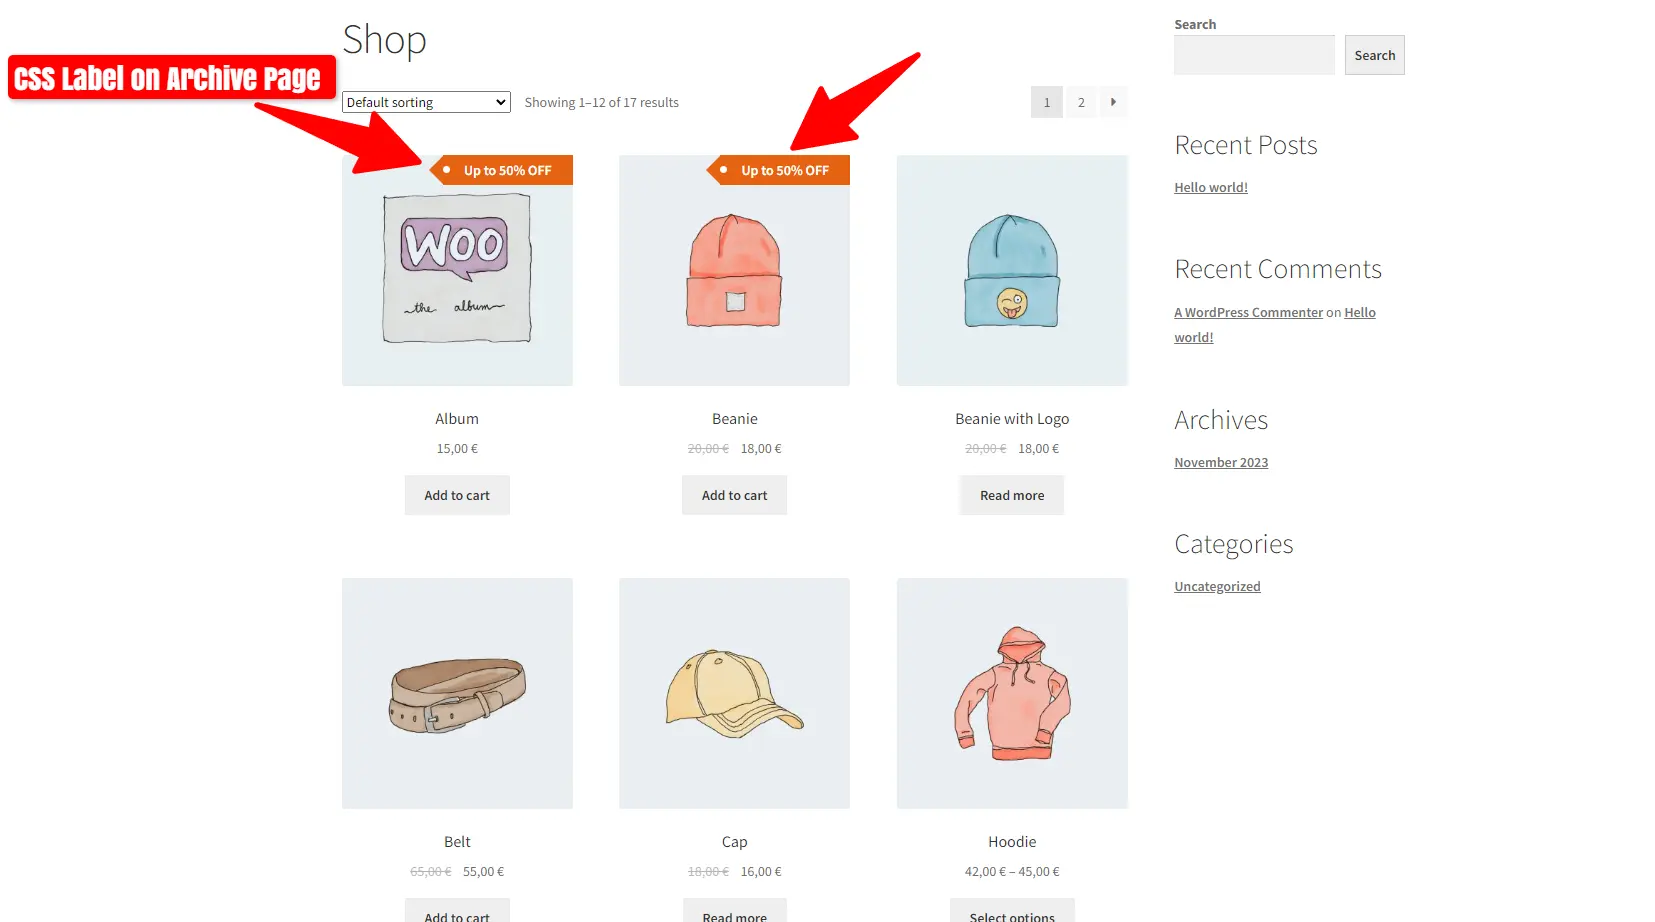
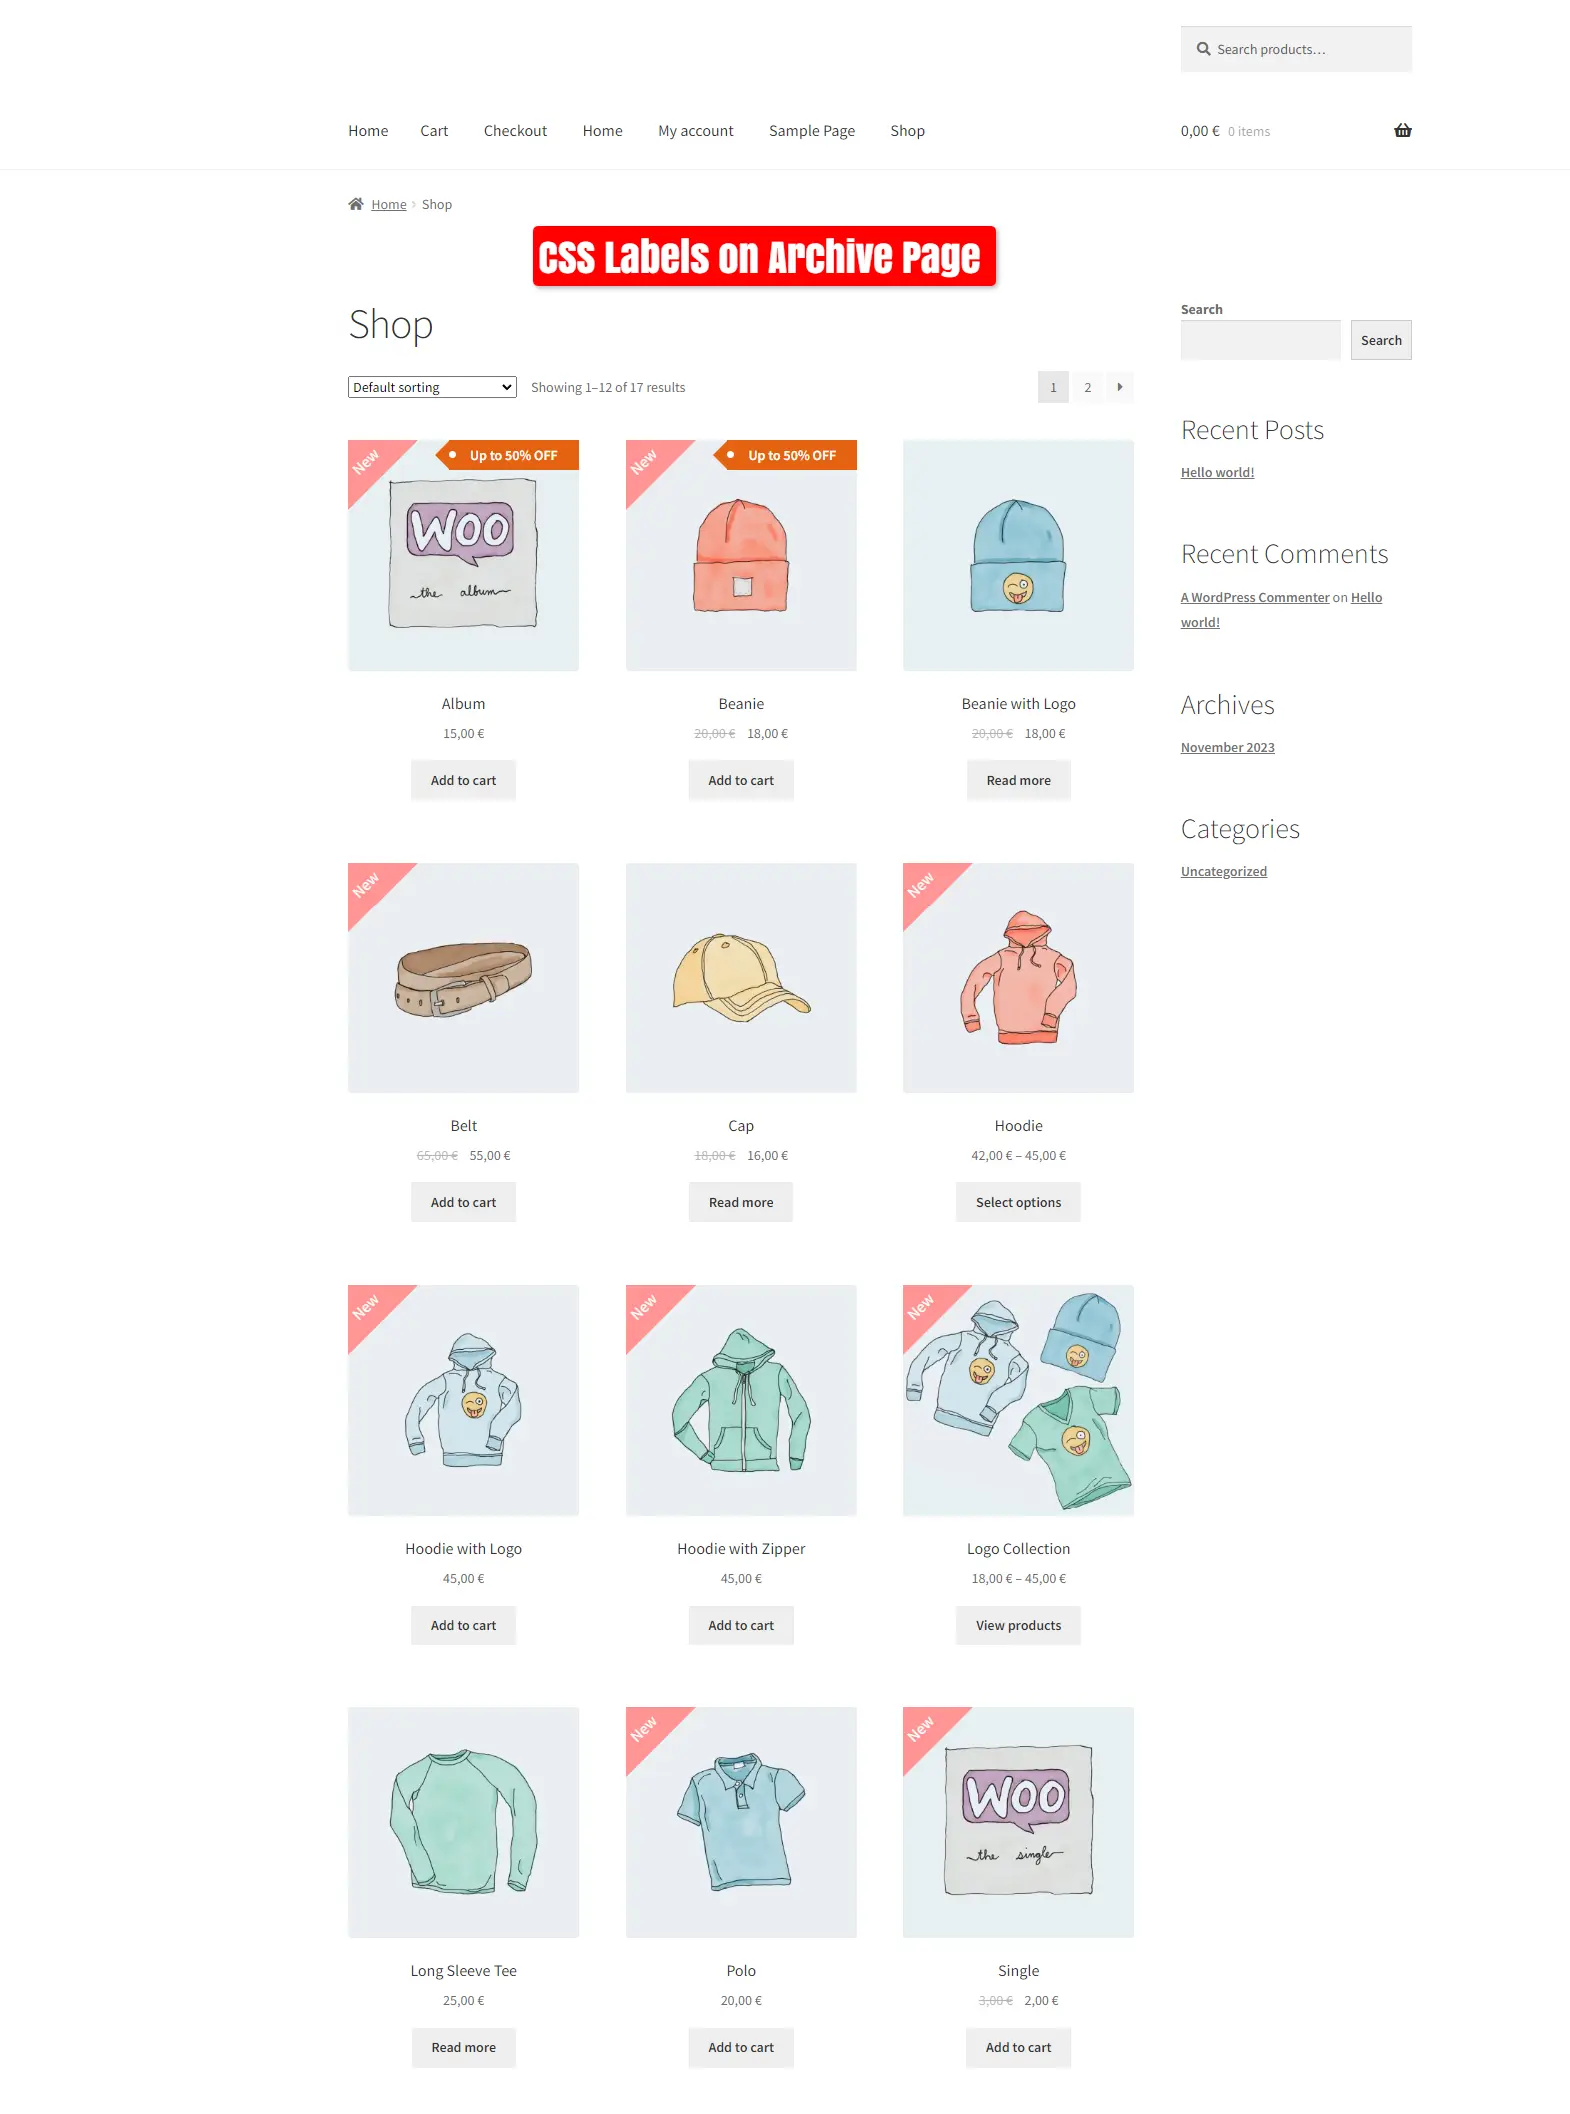
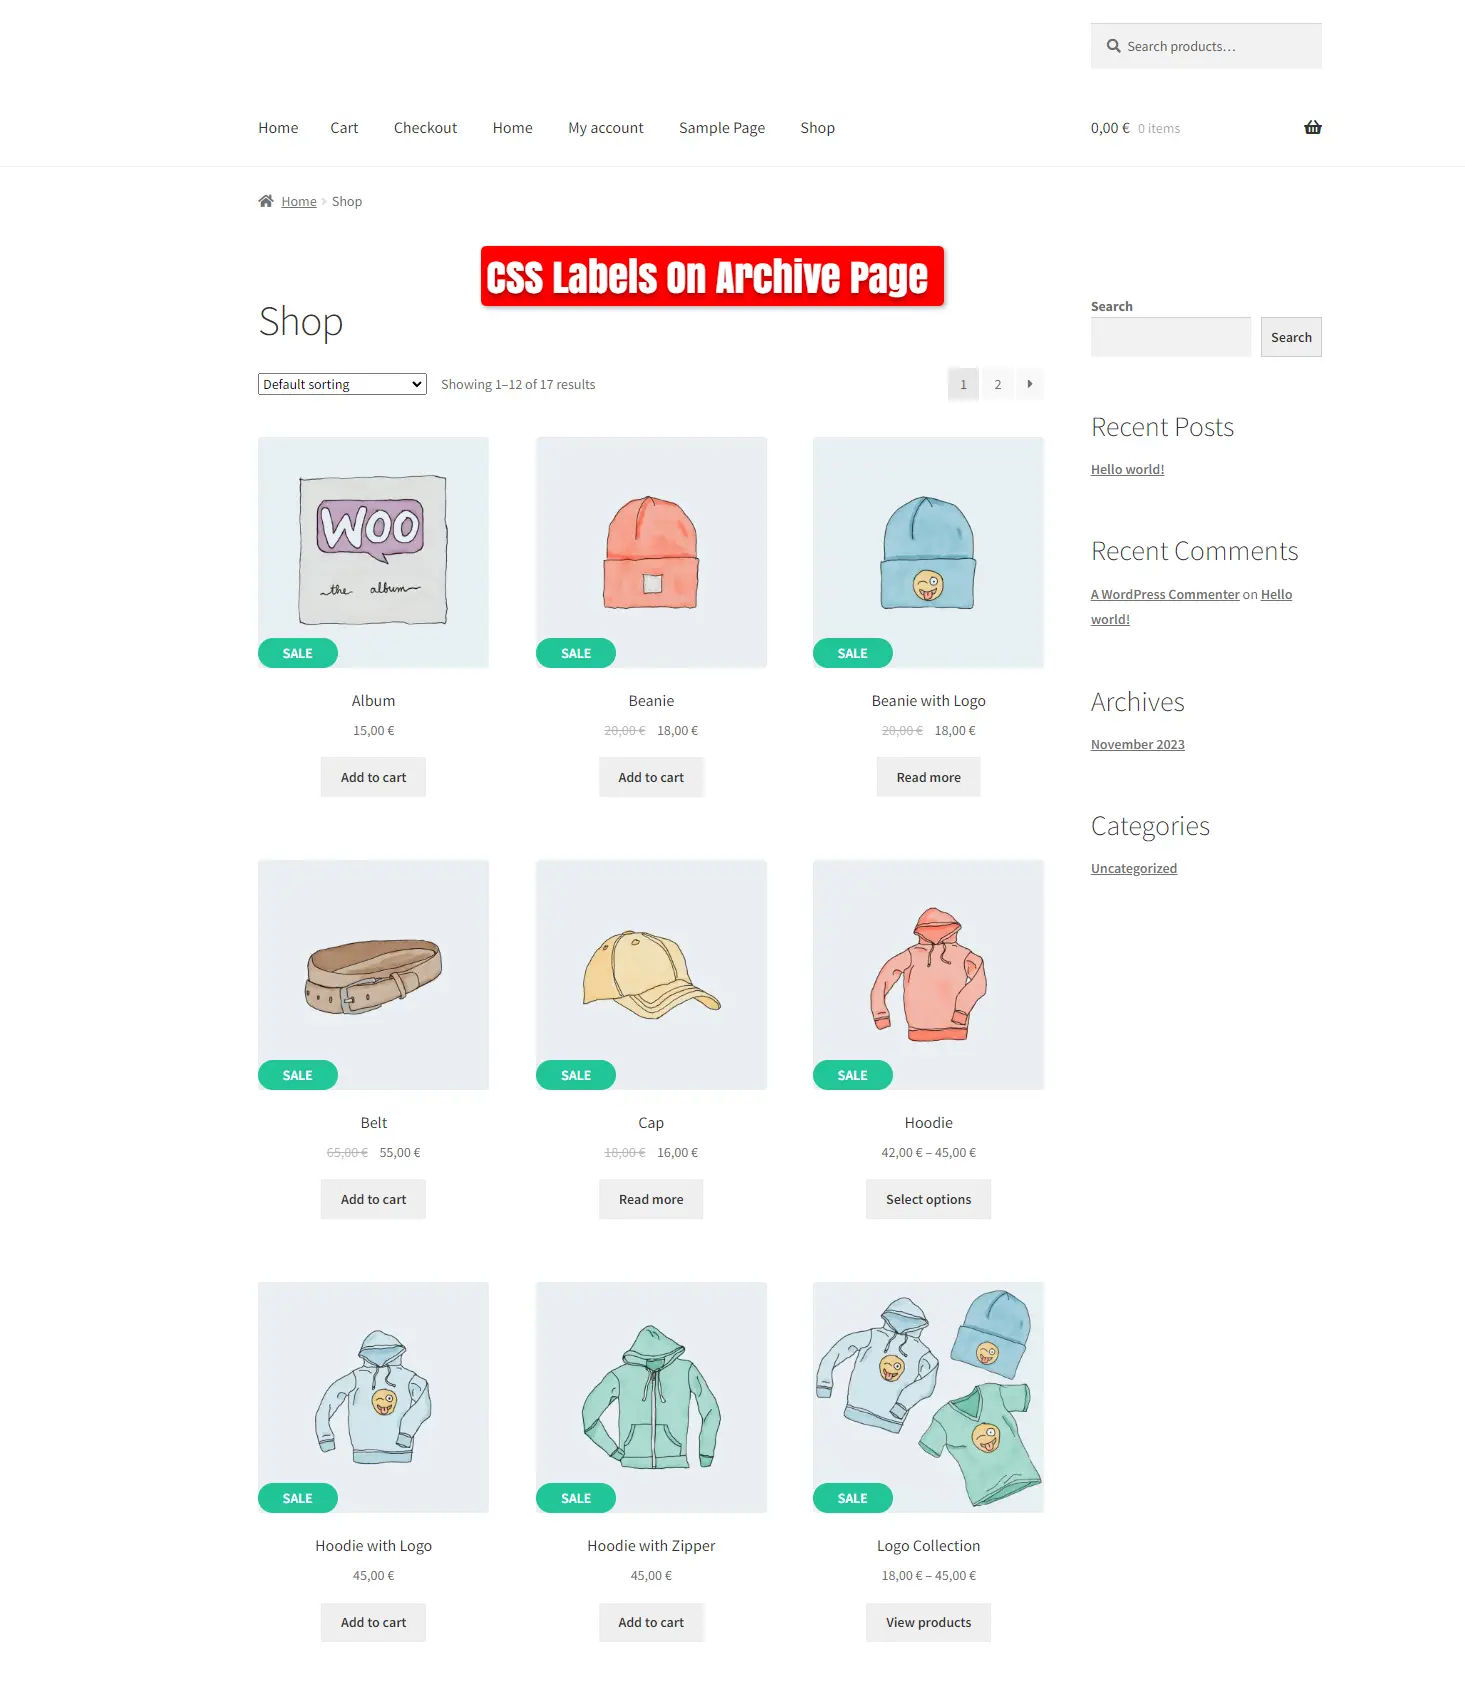
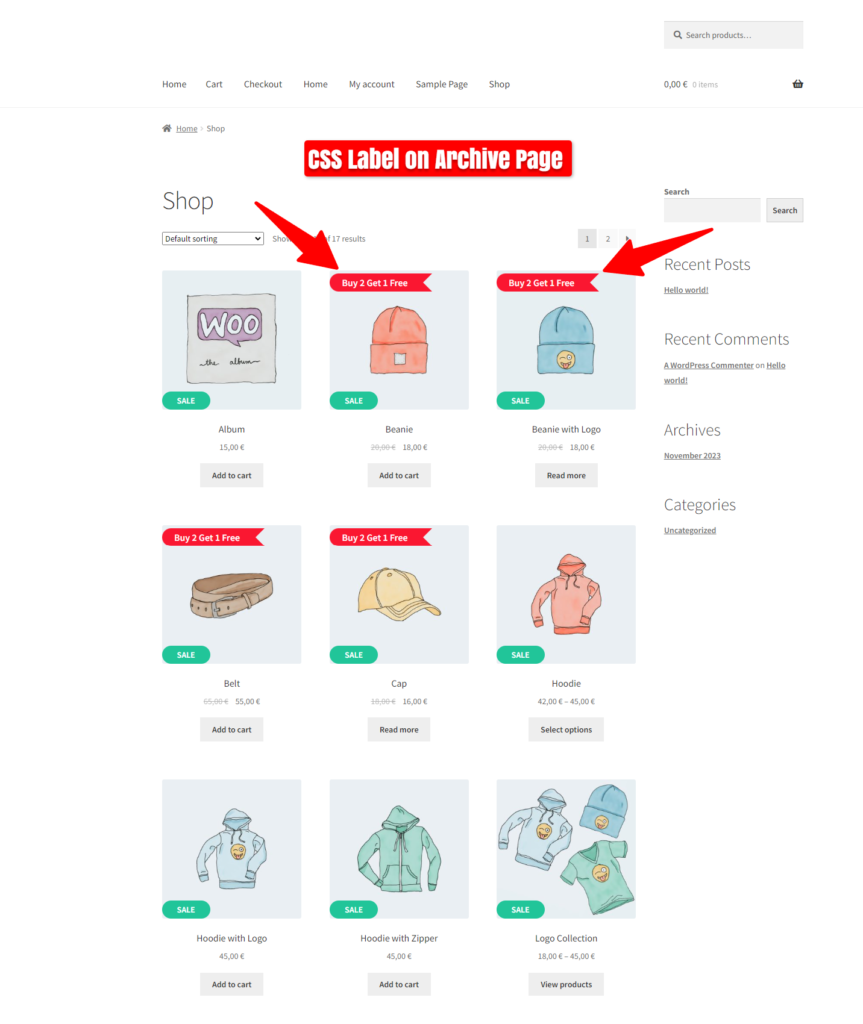
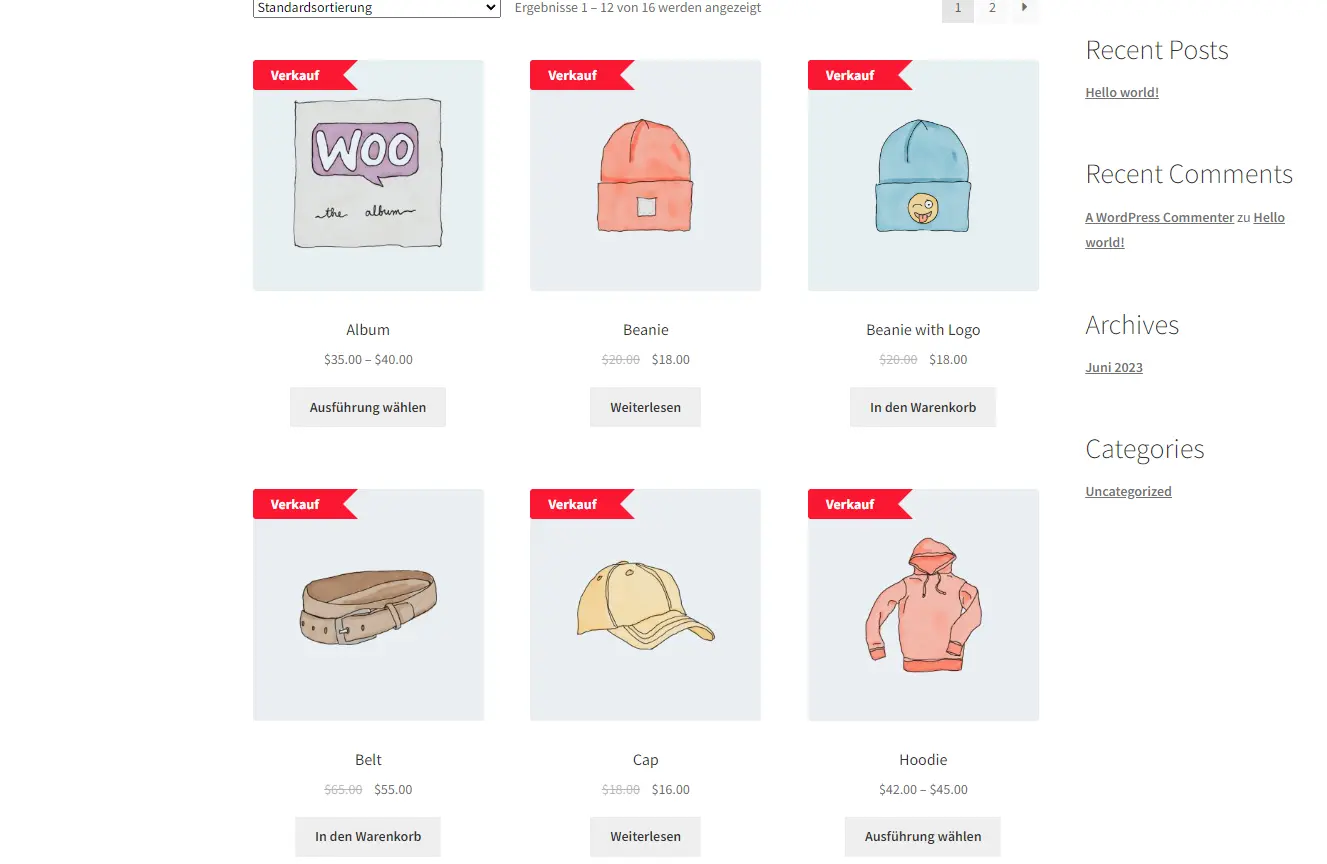
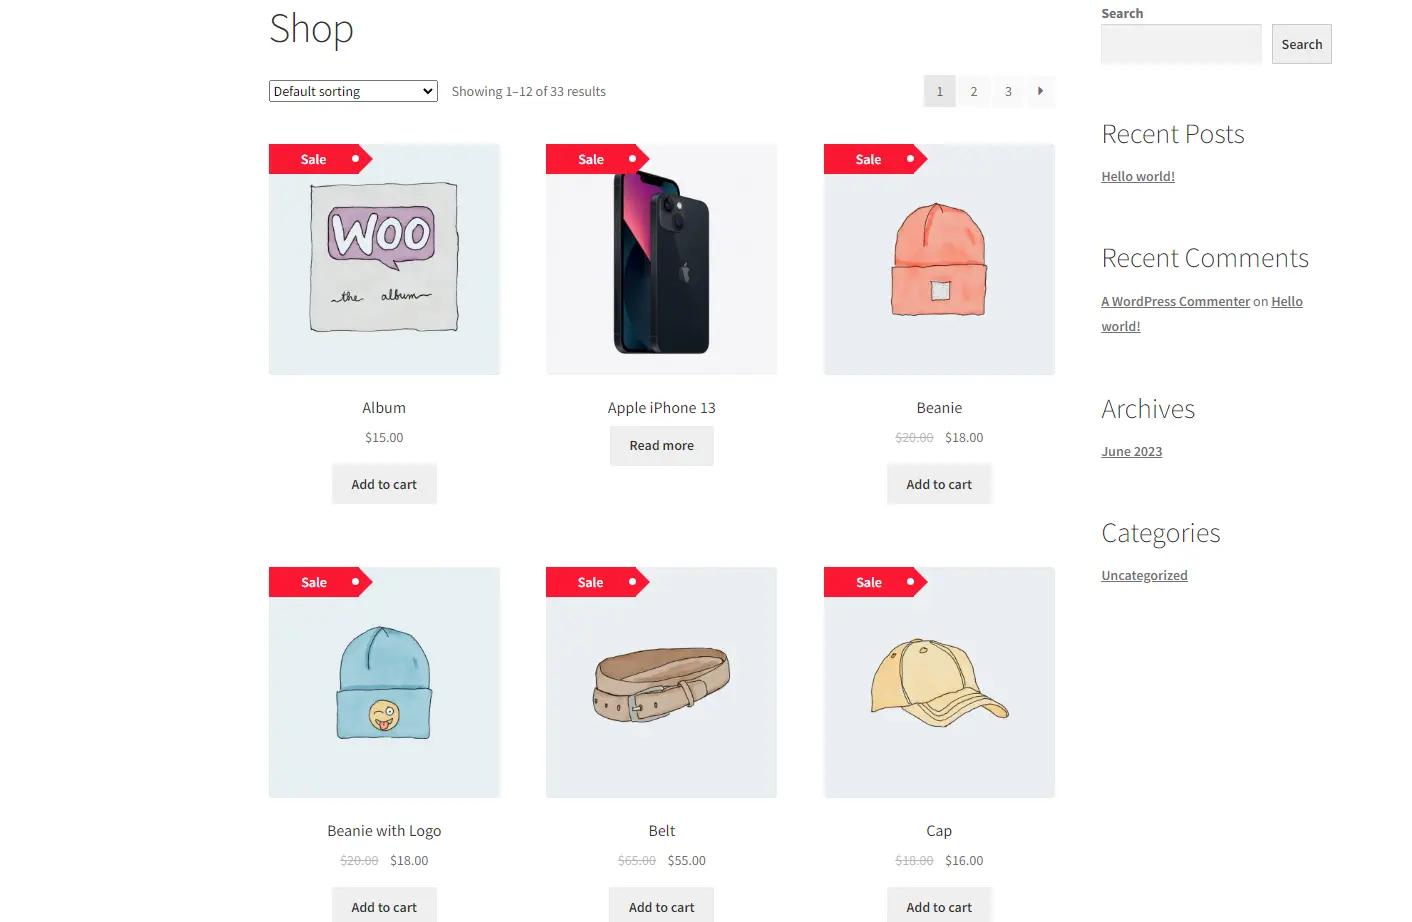
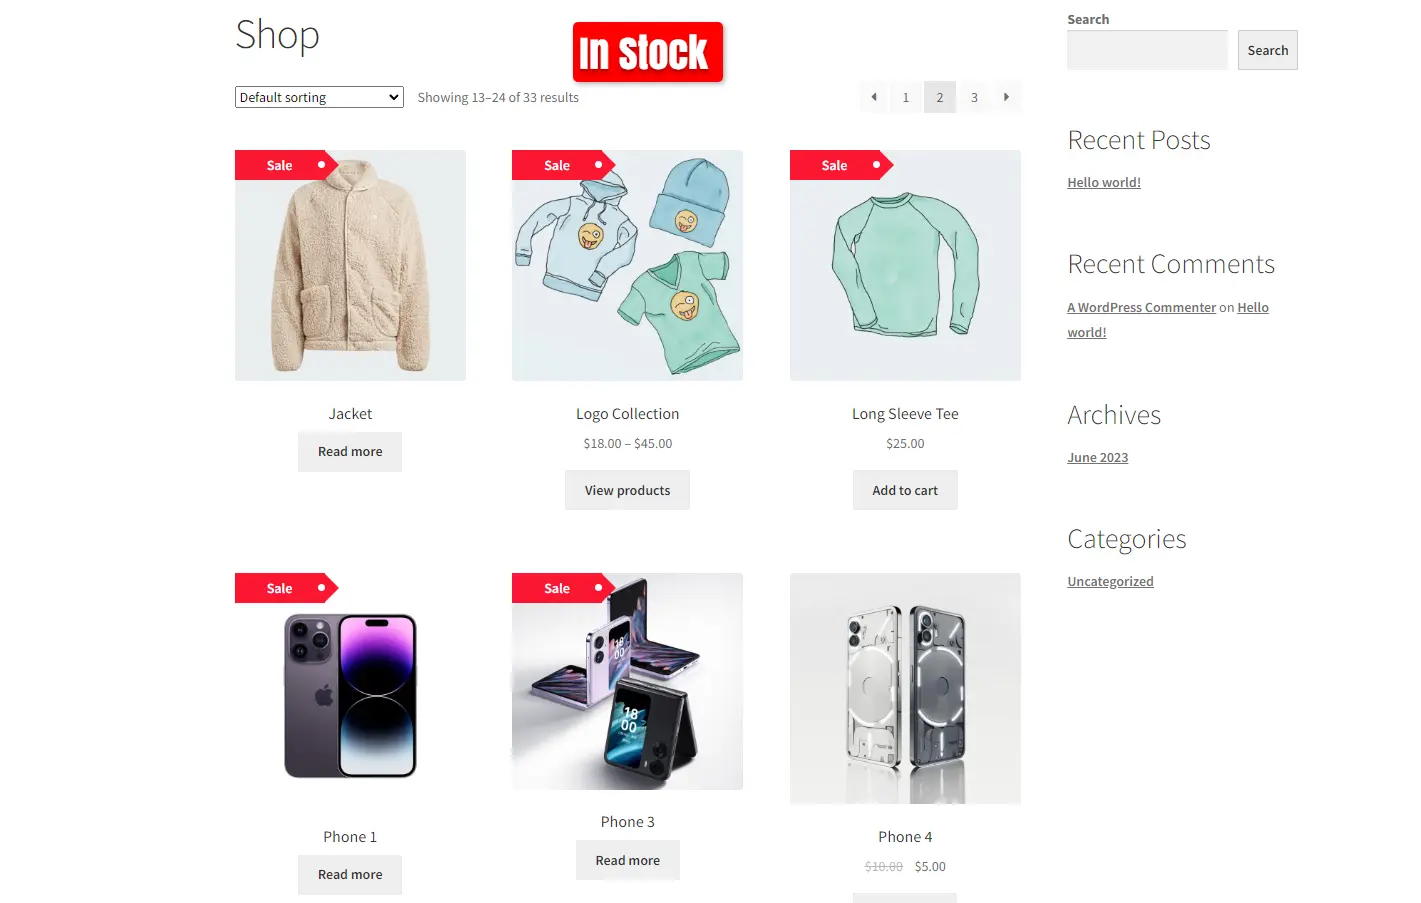
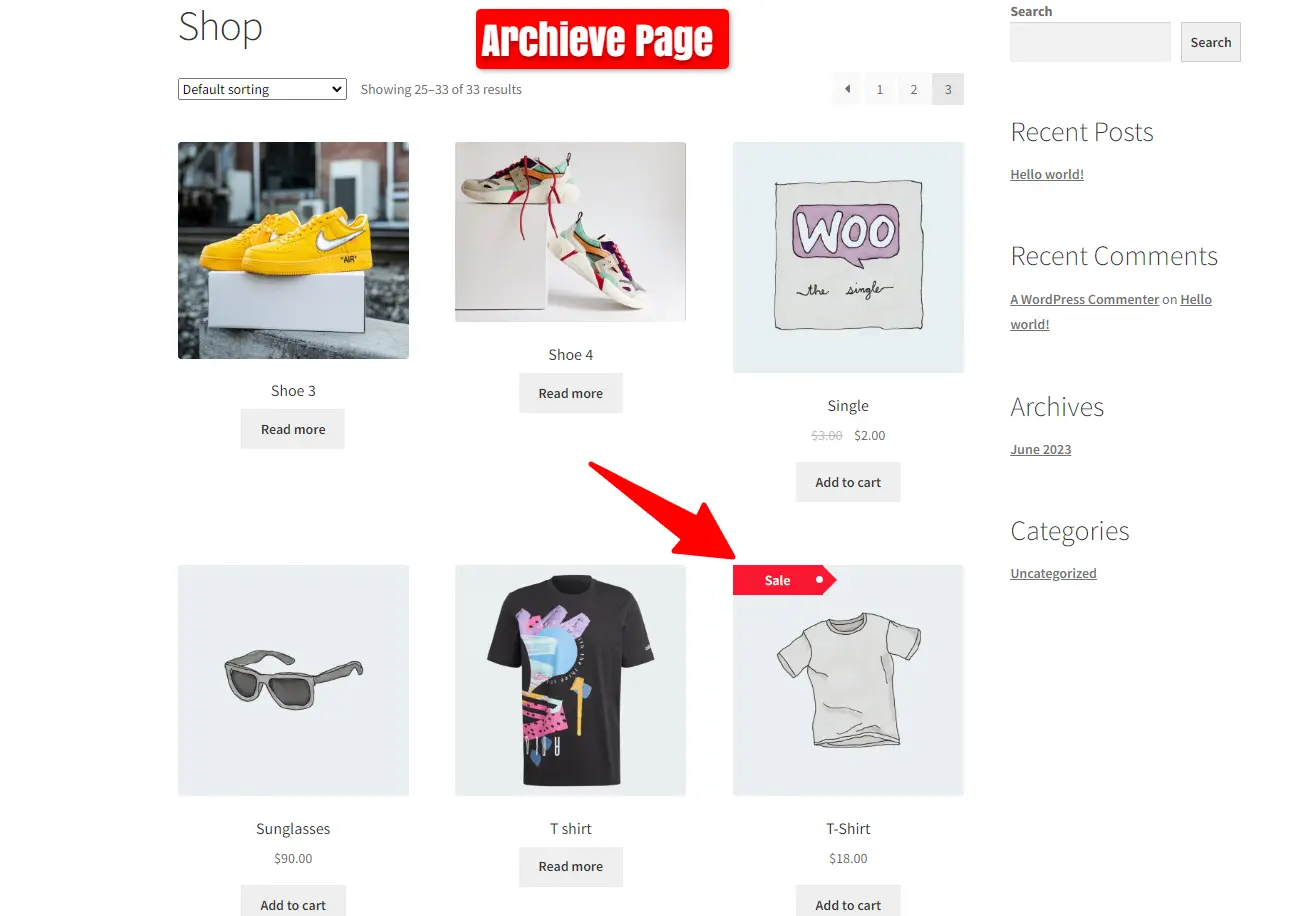
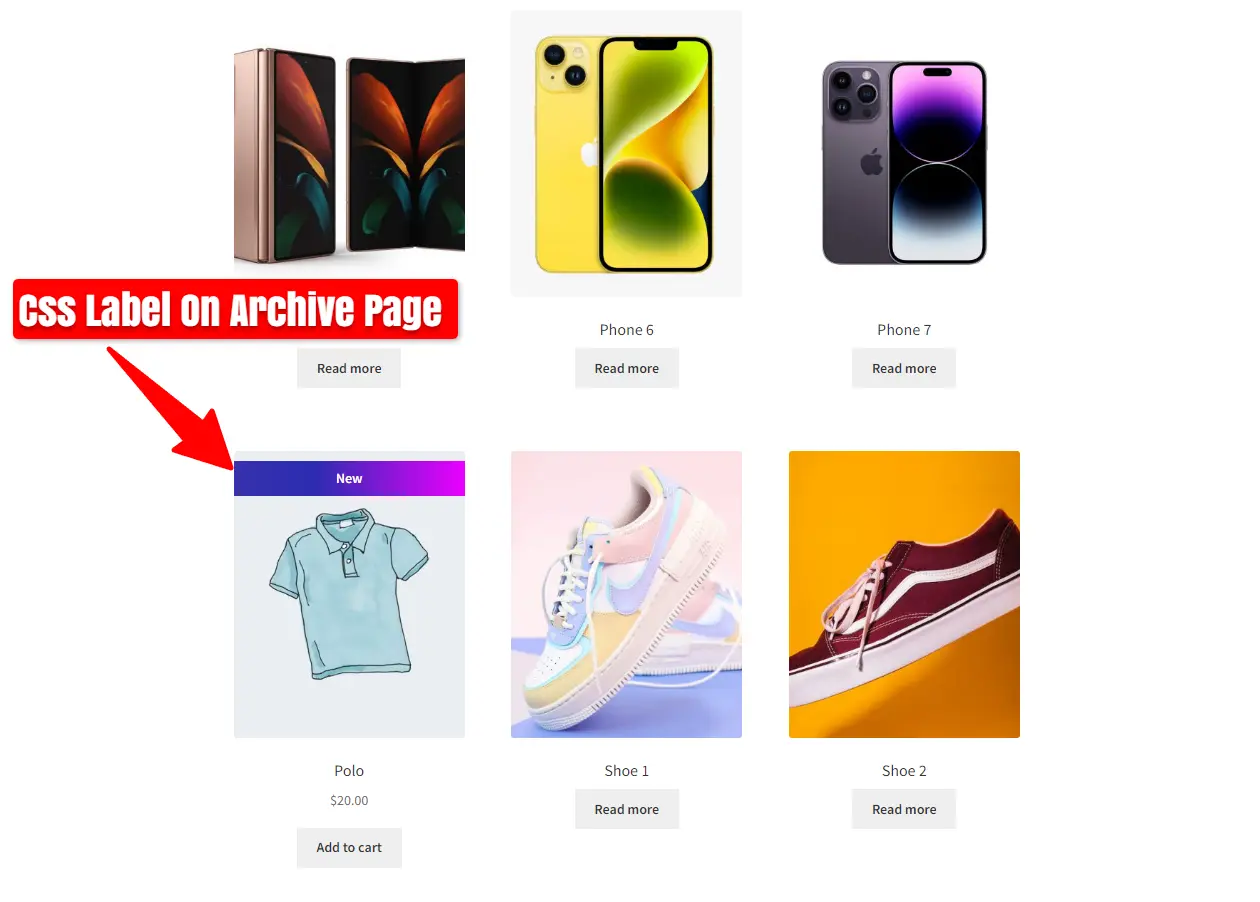
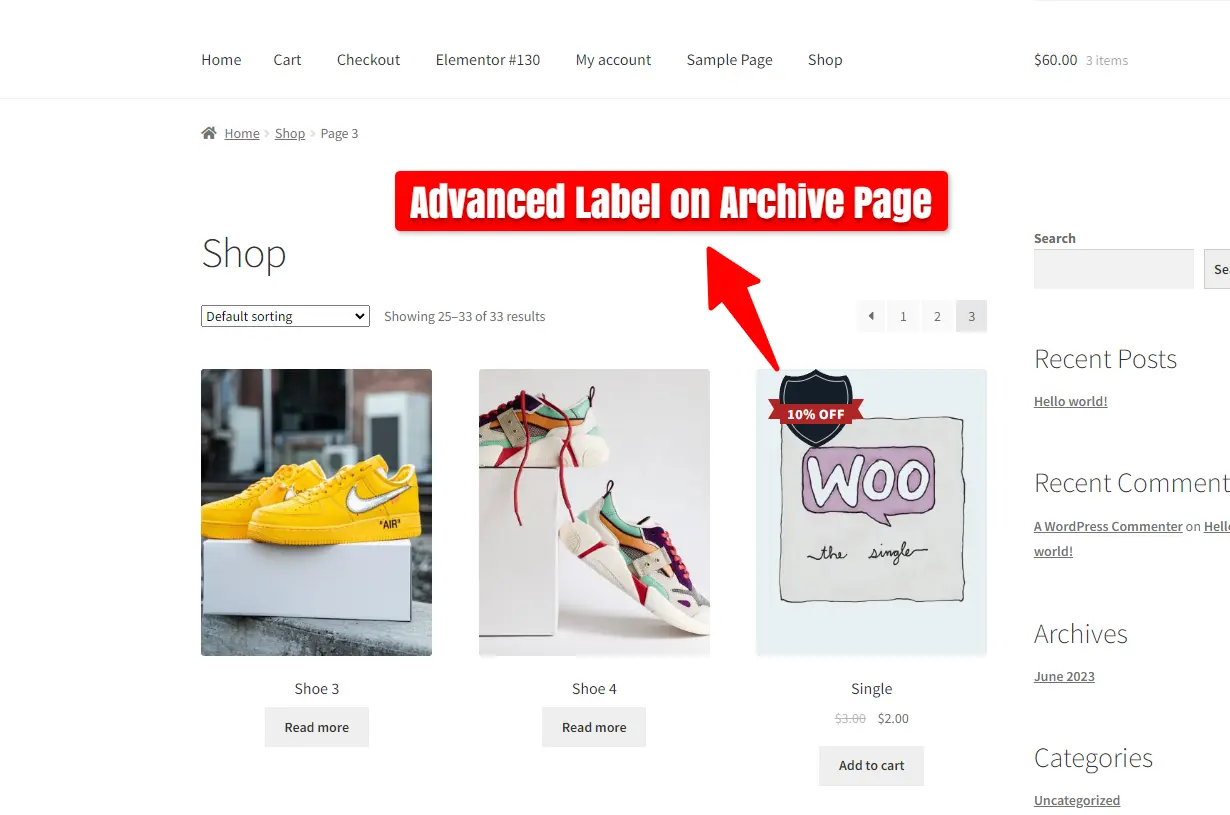
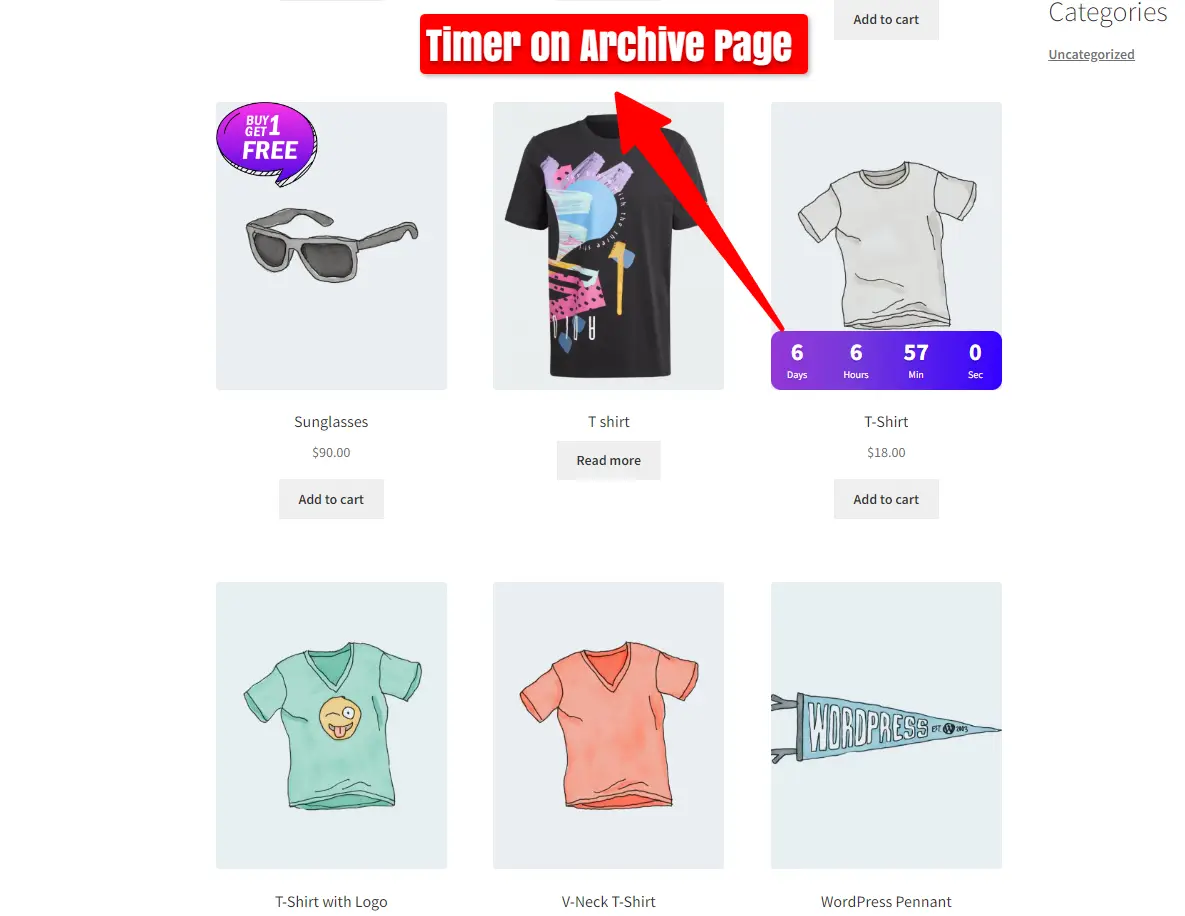
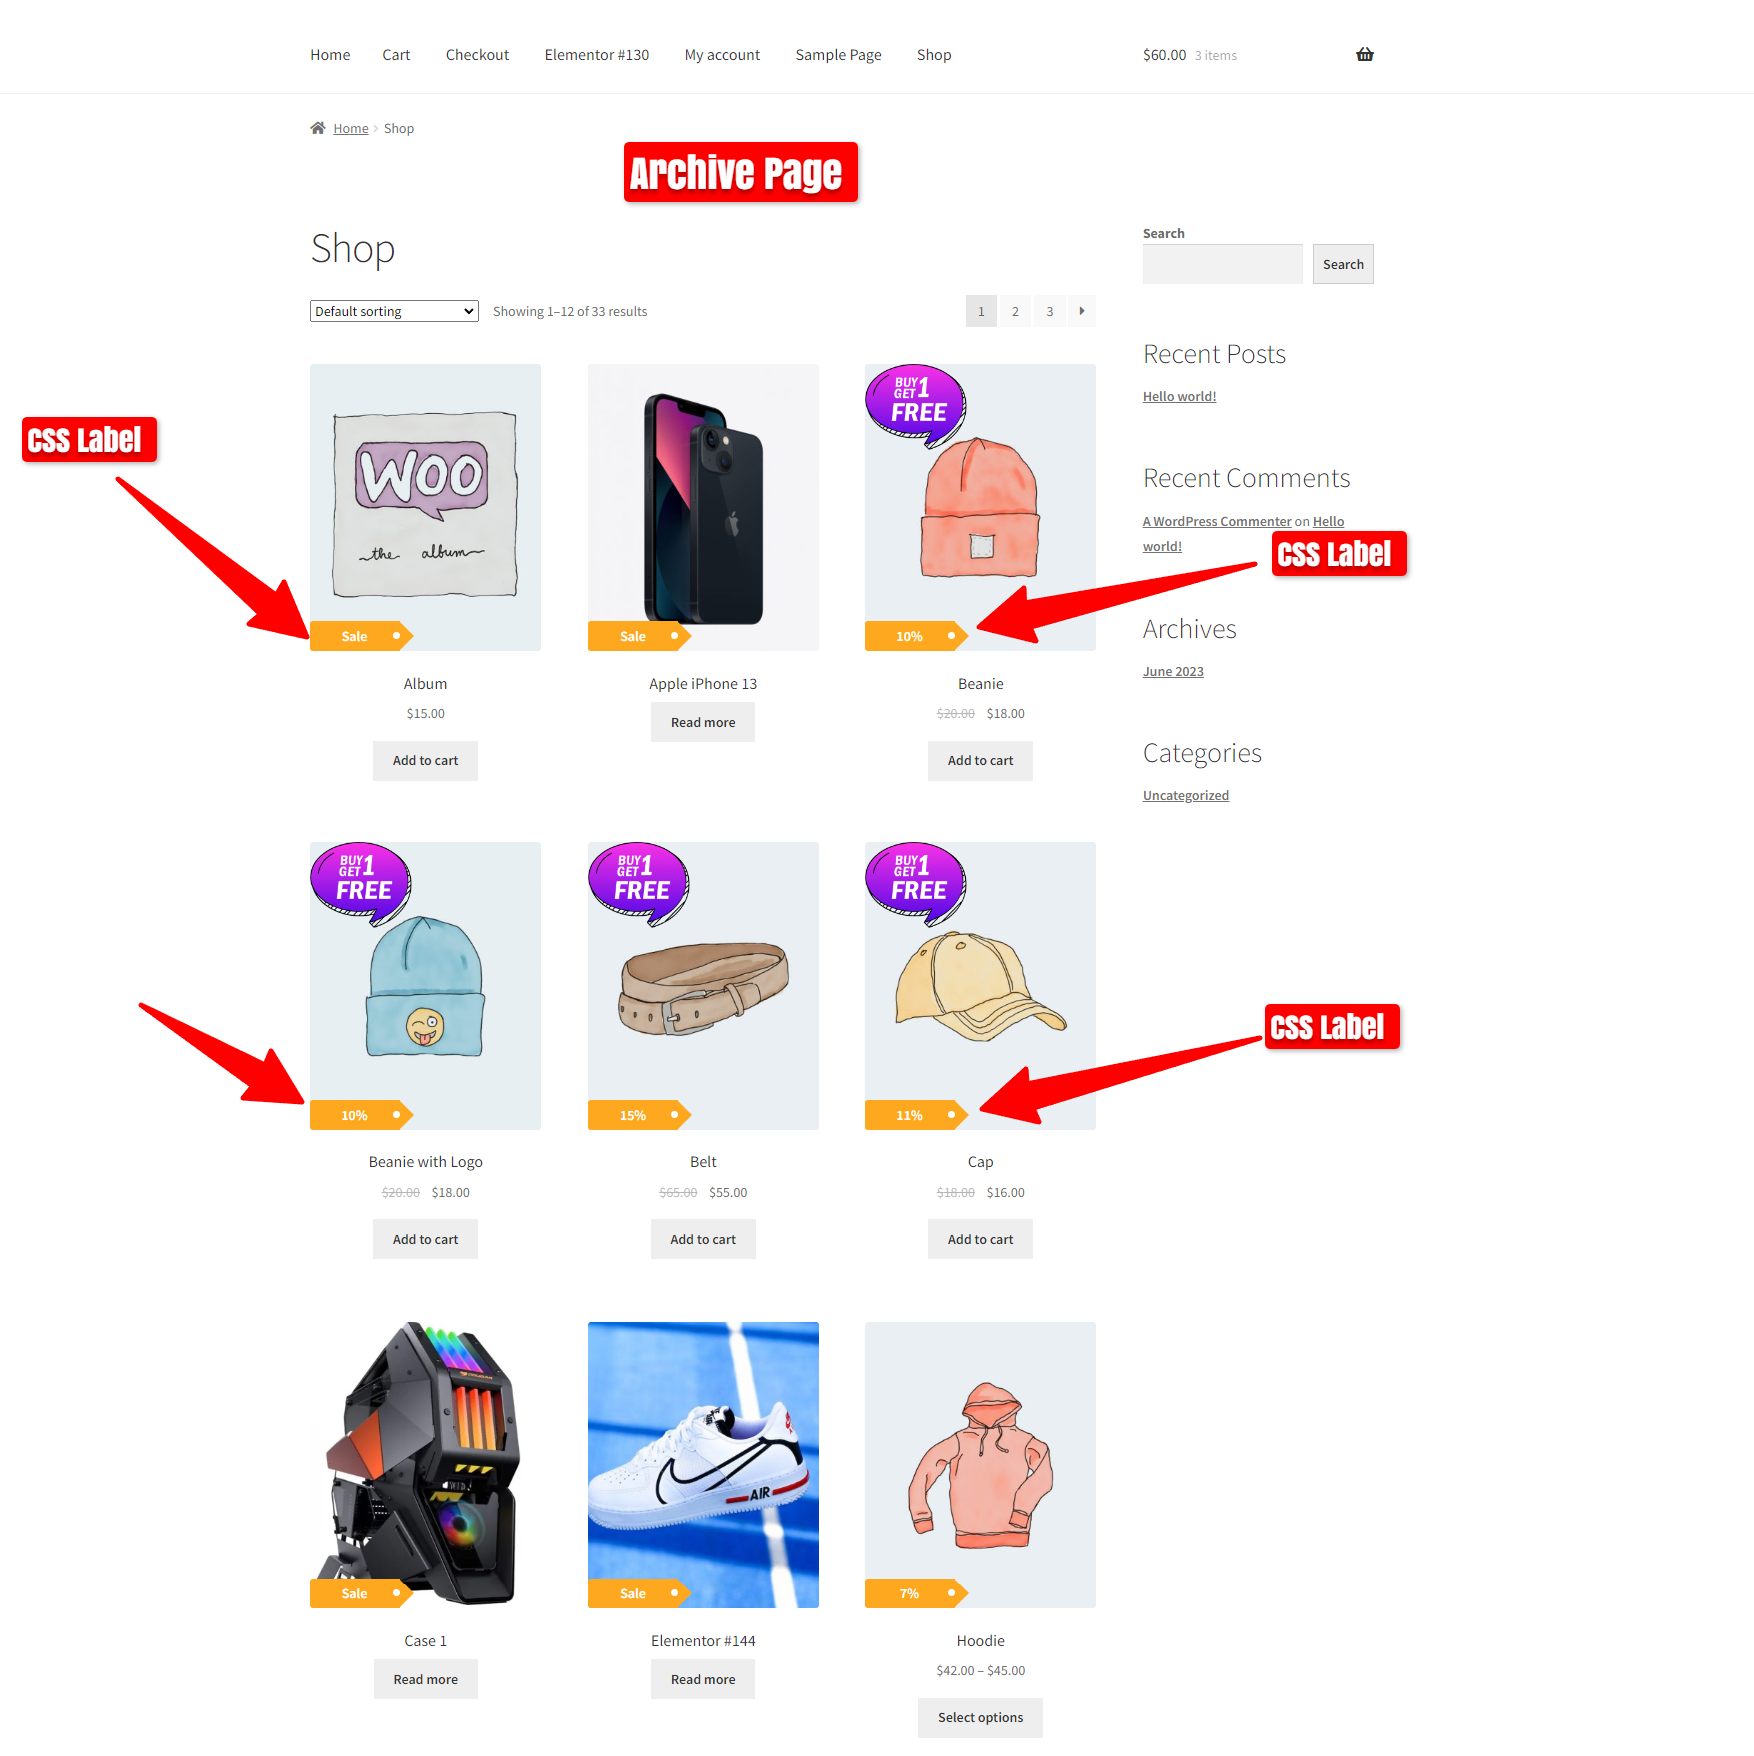
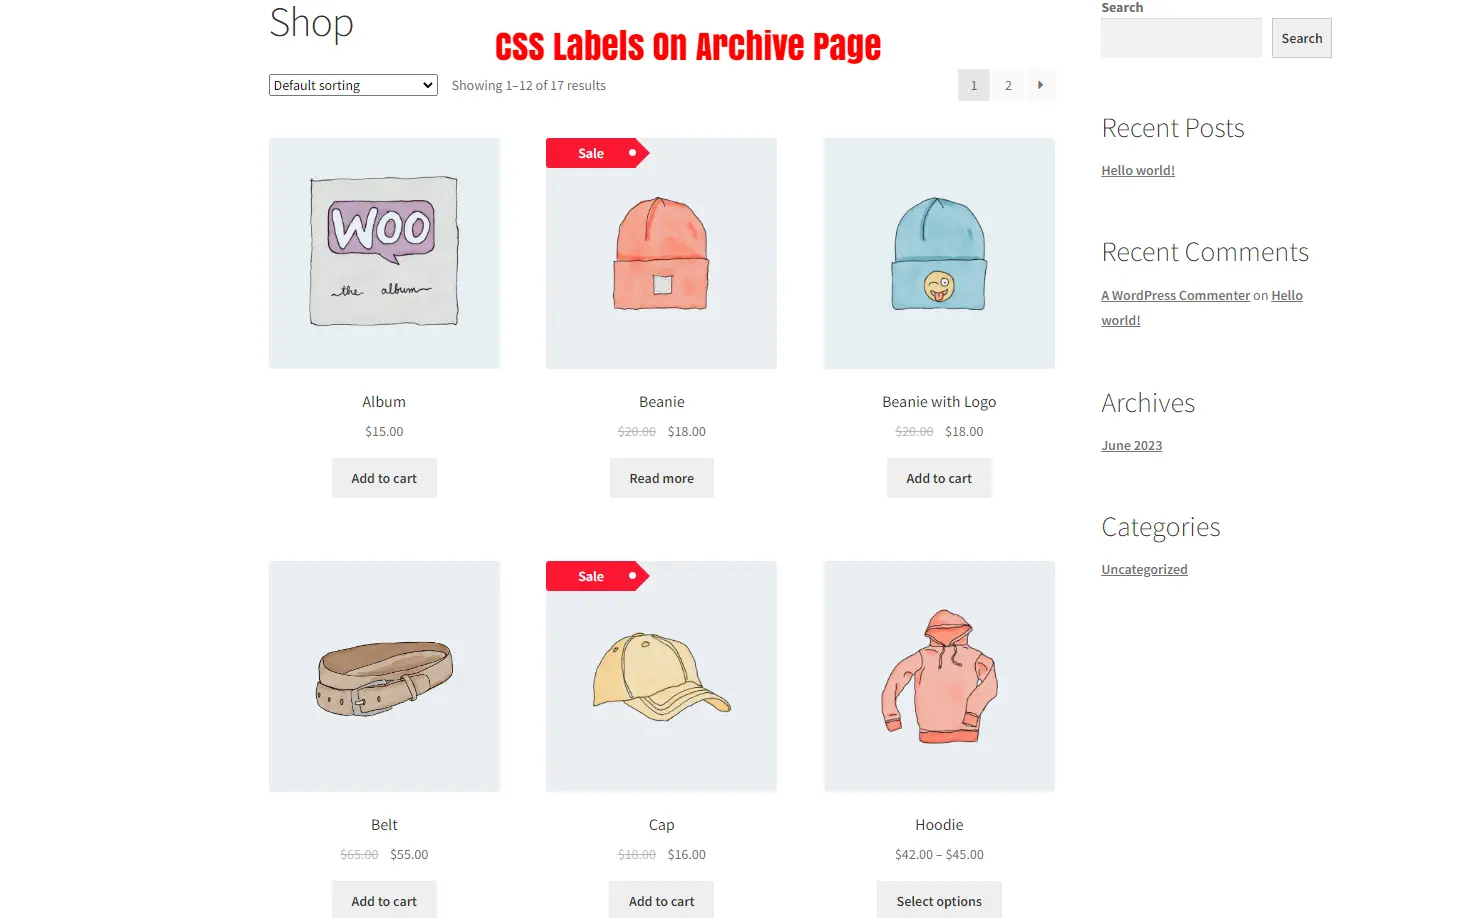
Now you can view the Countdown Timer on the Archive Page.
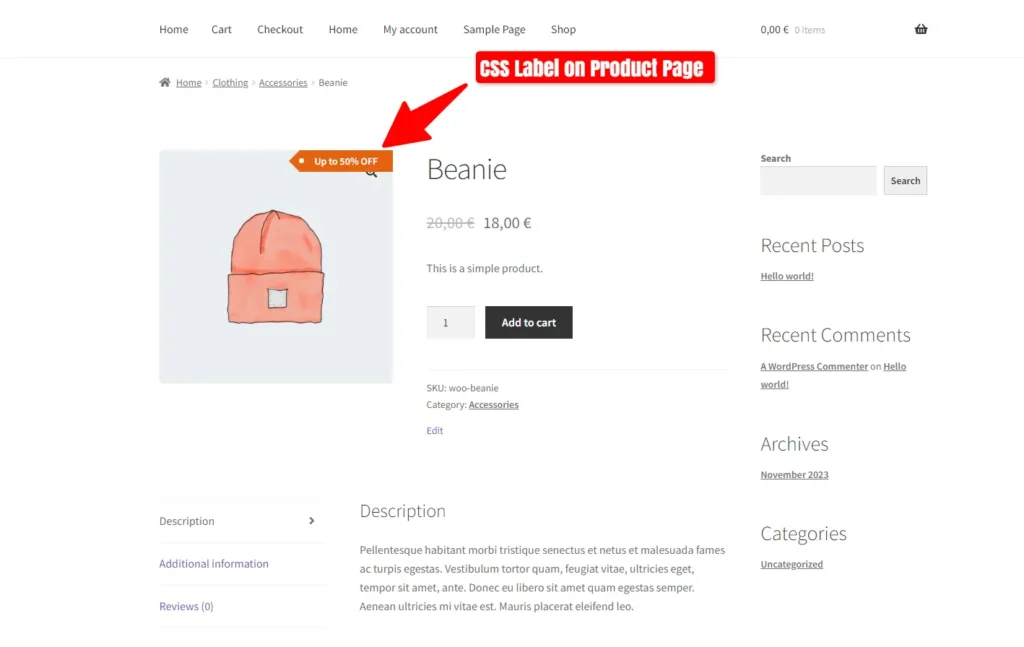
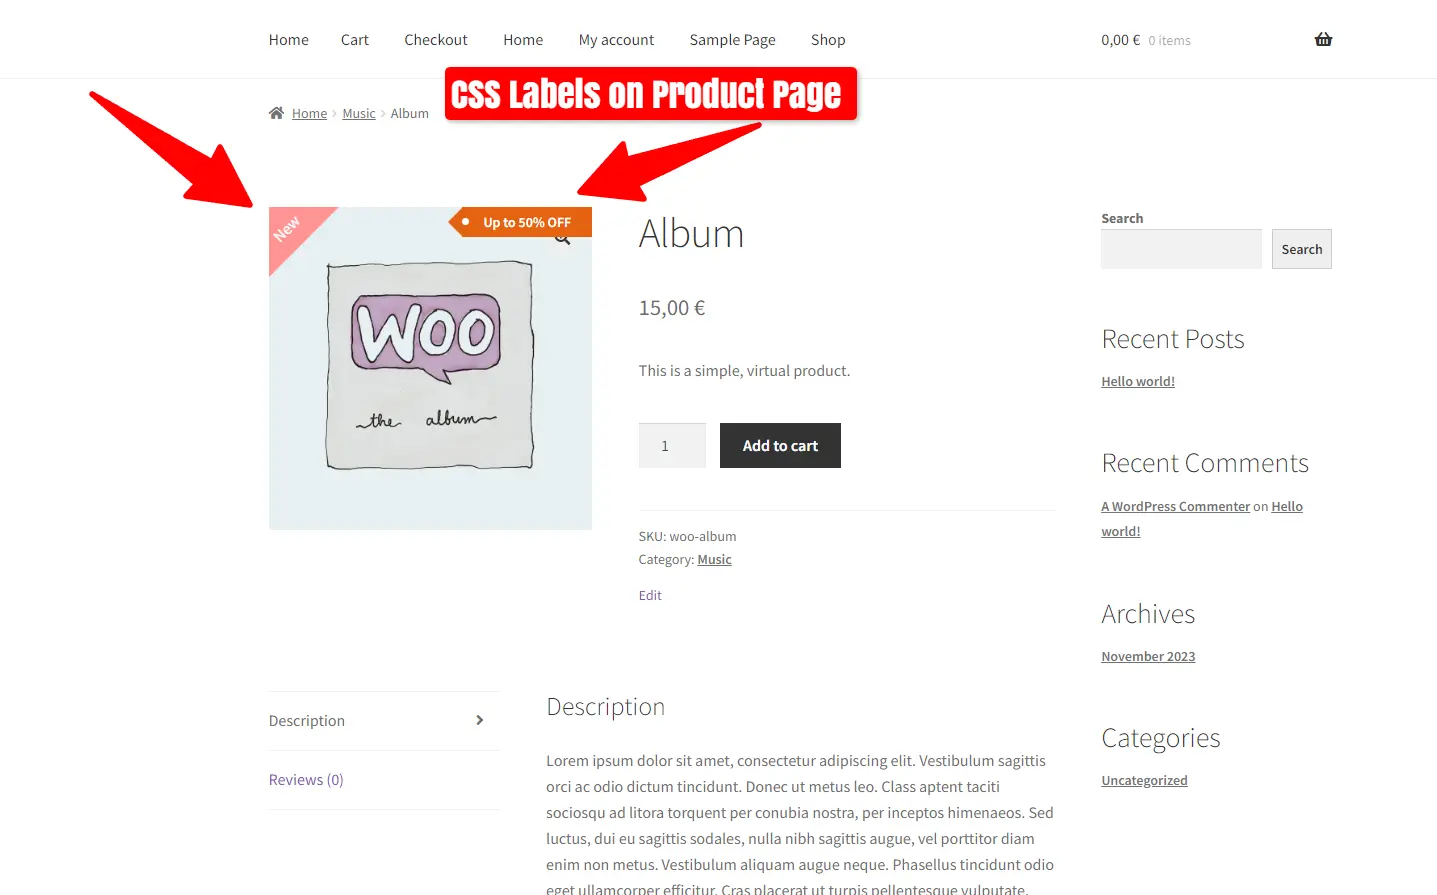
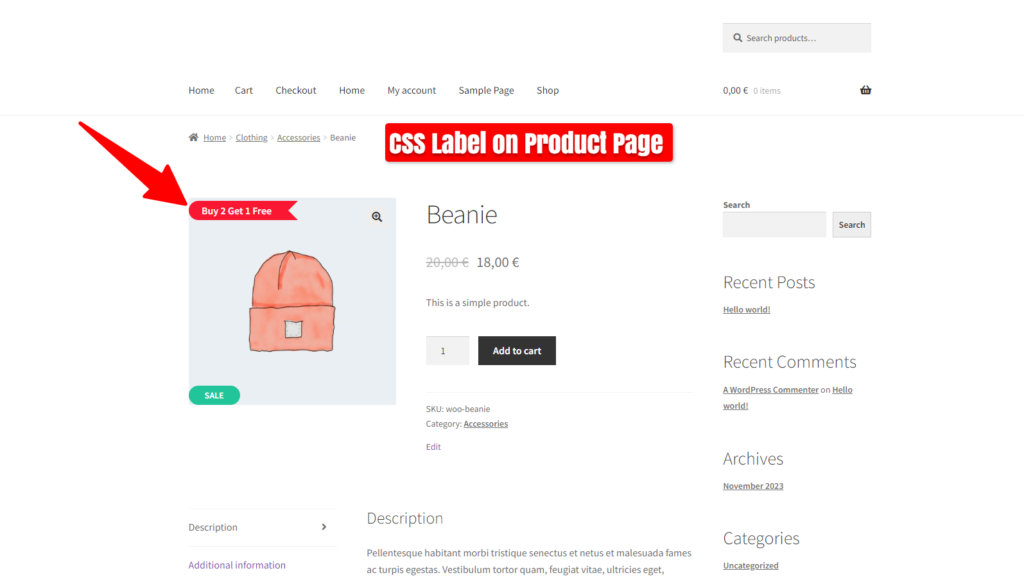
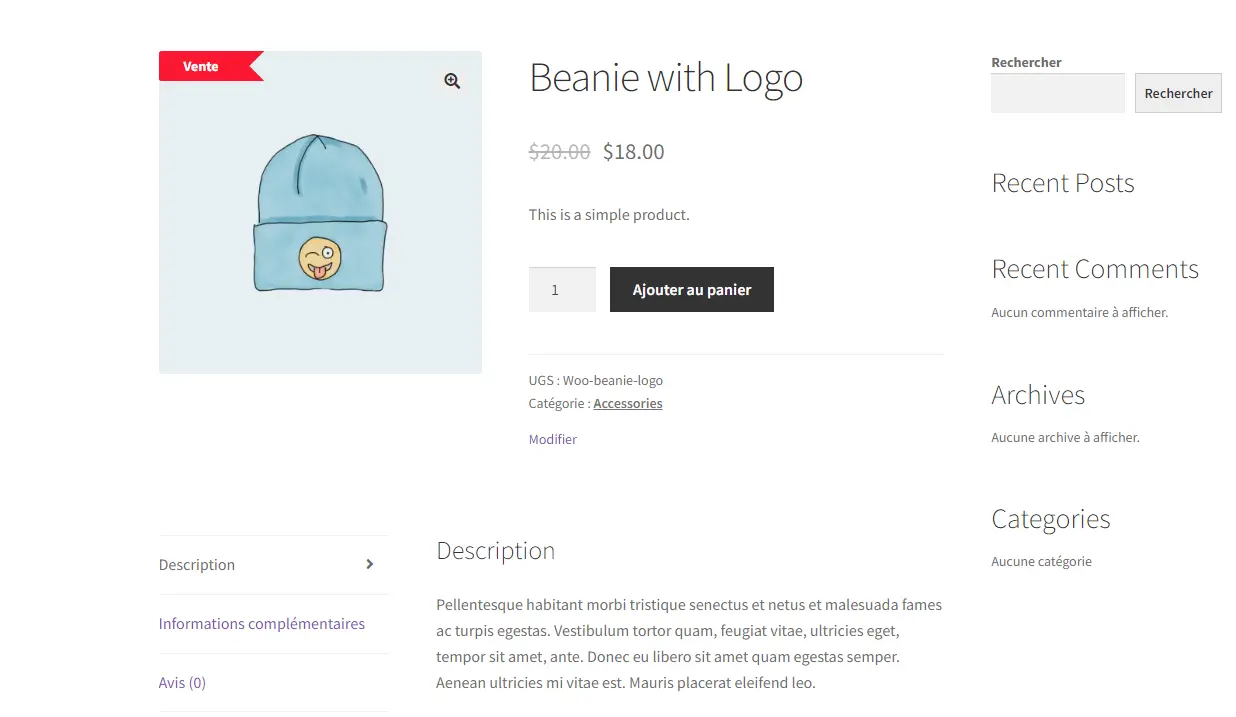
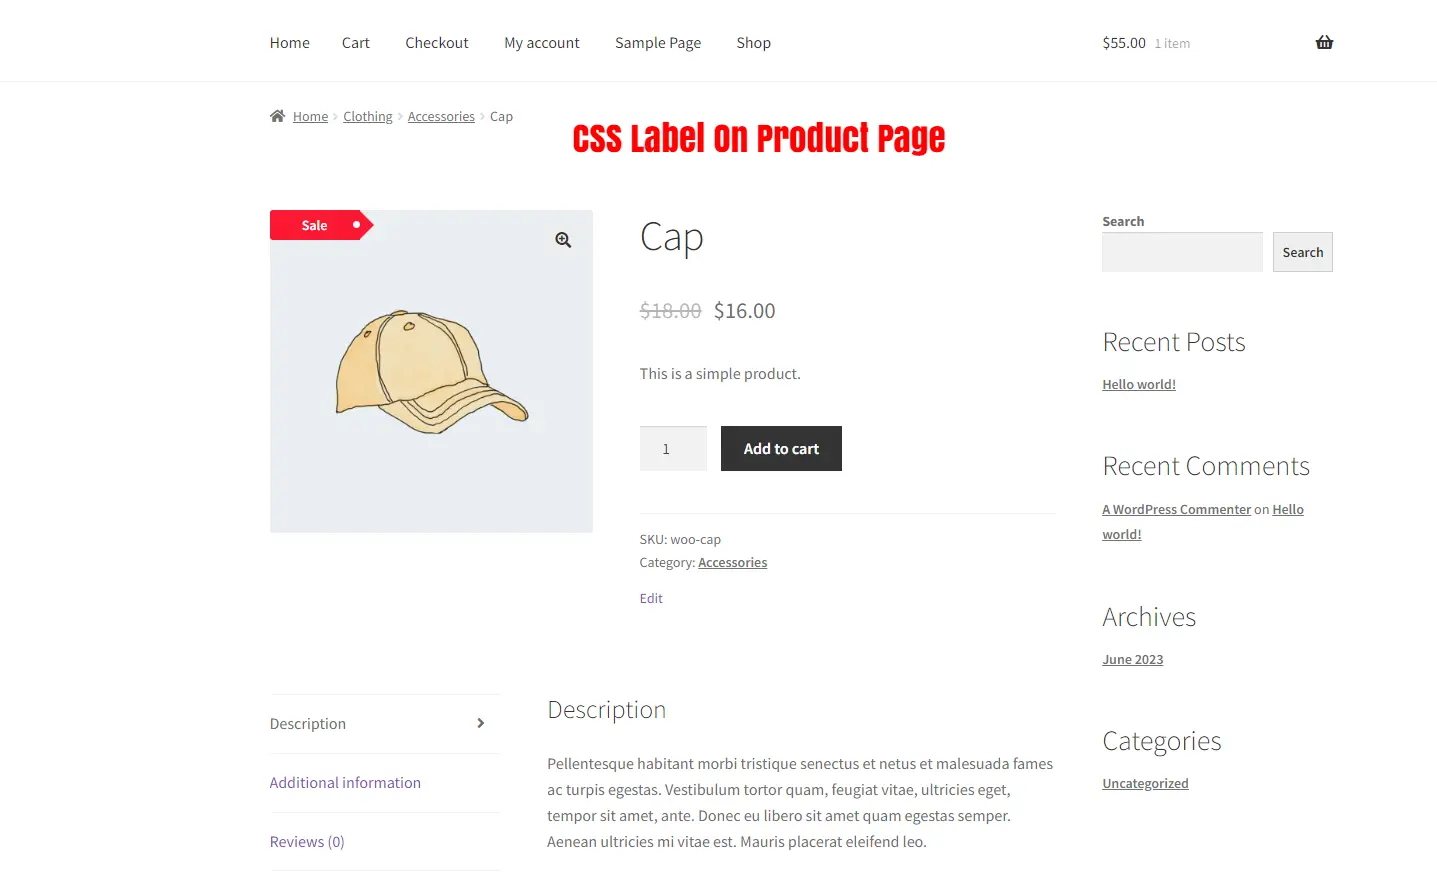
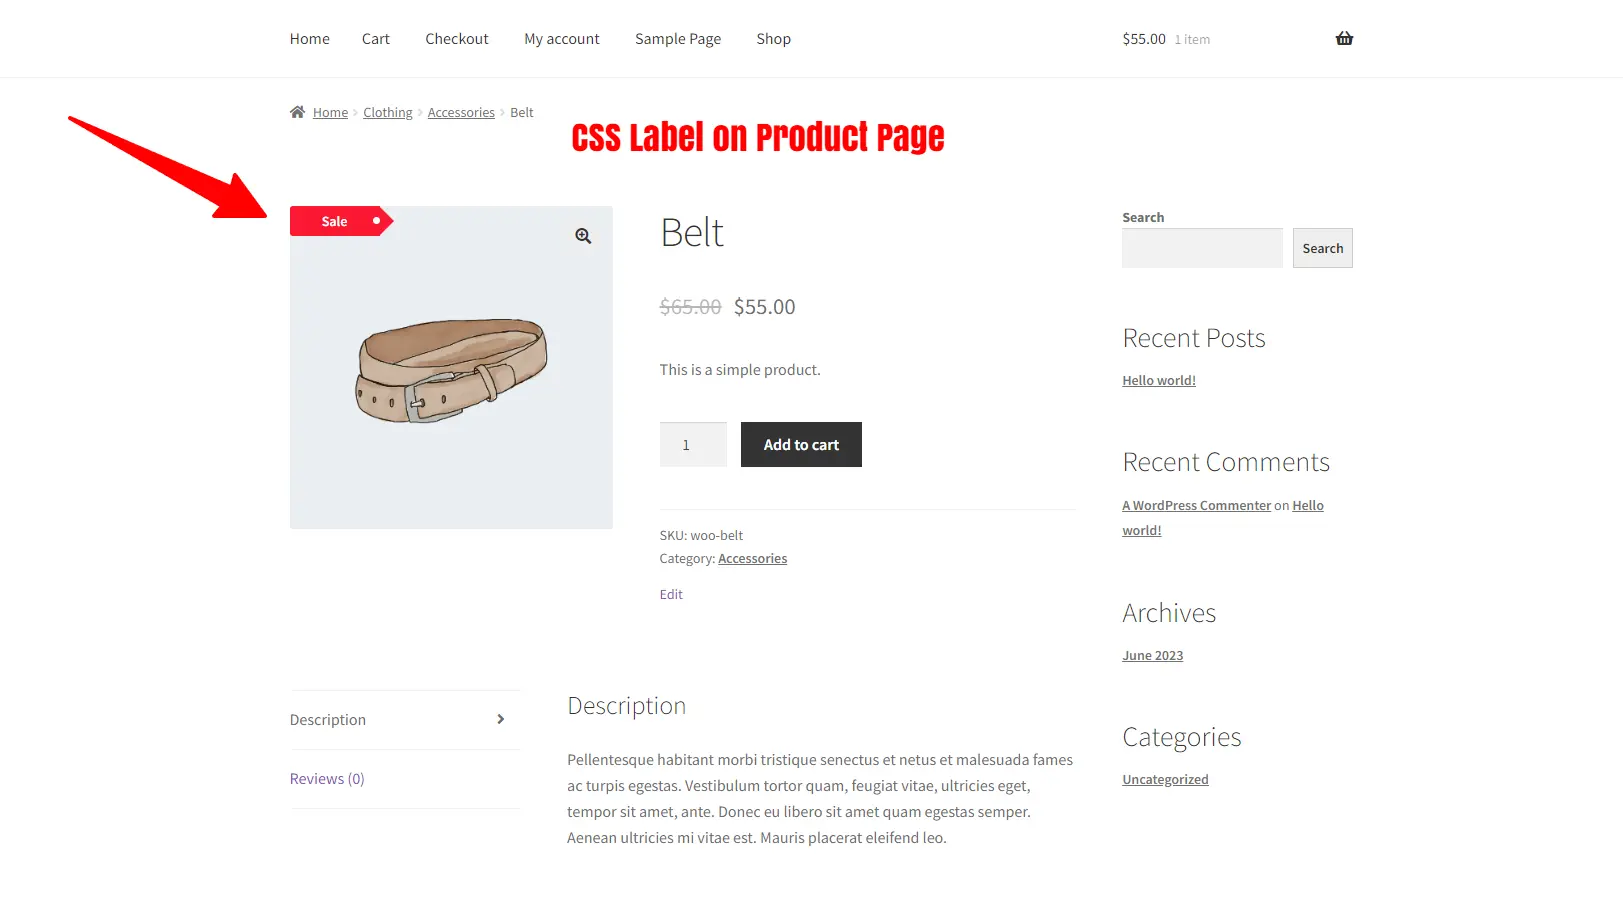
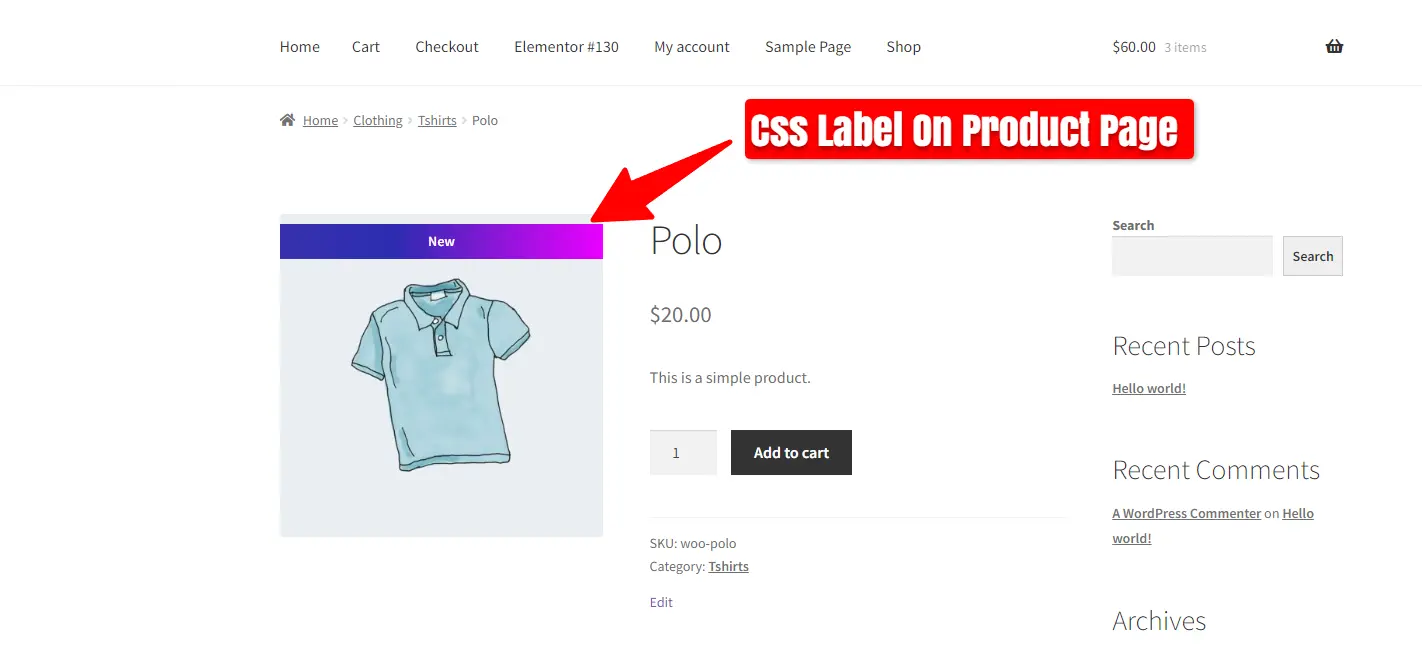
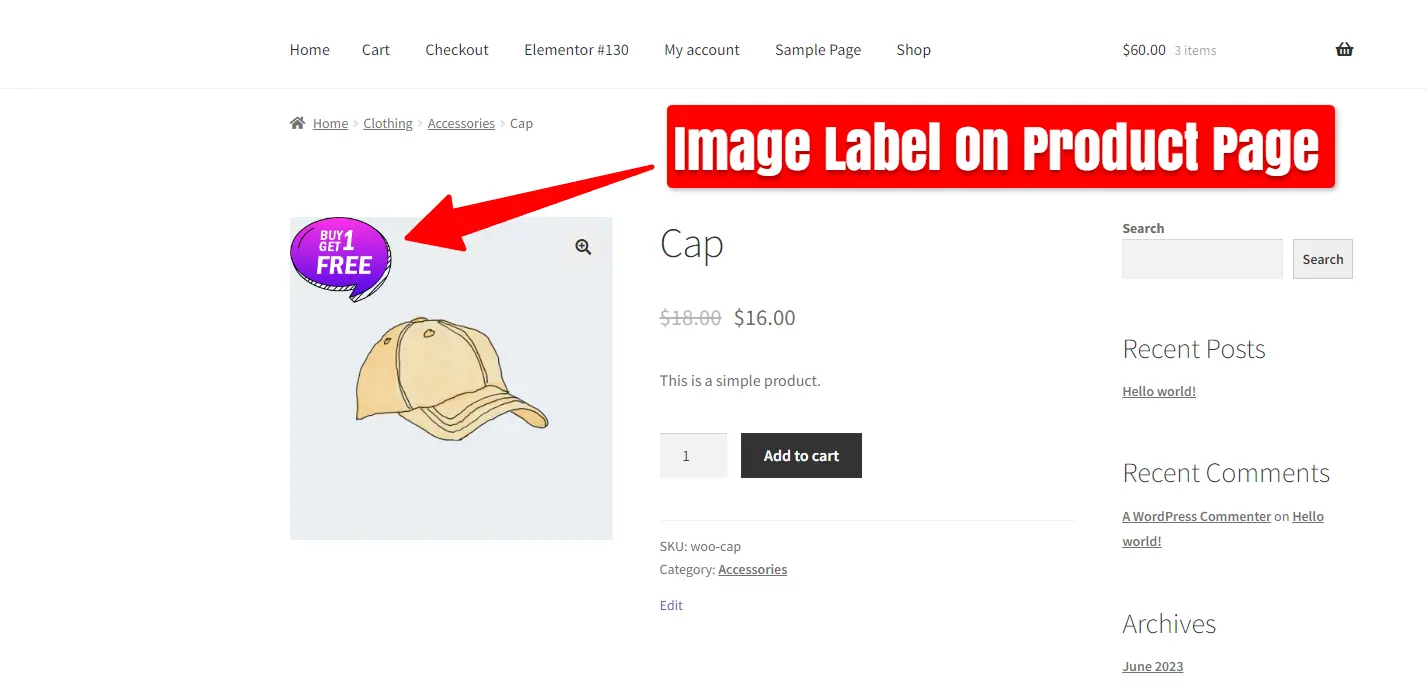
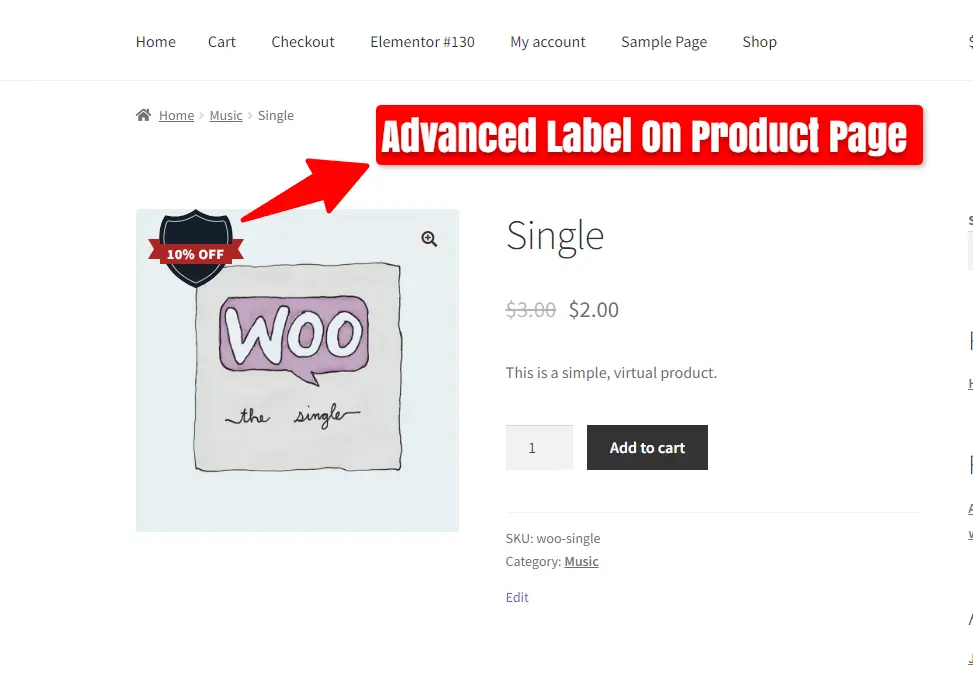
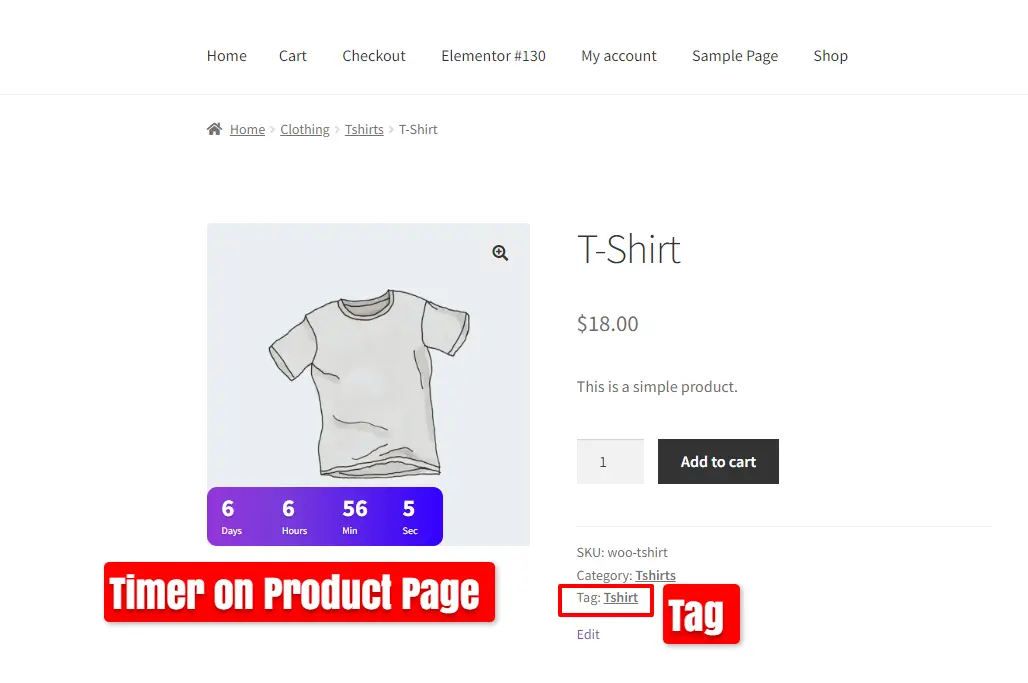
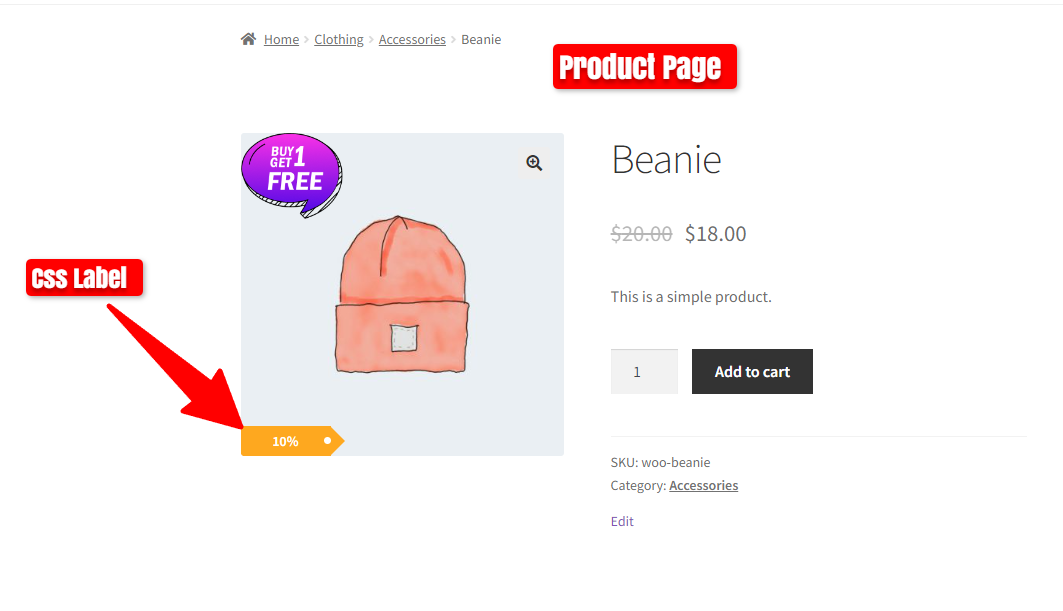
View the Countdown Timer on the Product Page.
Add Countdown Timer to Products in WooCommerce
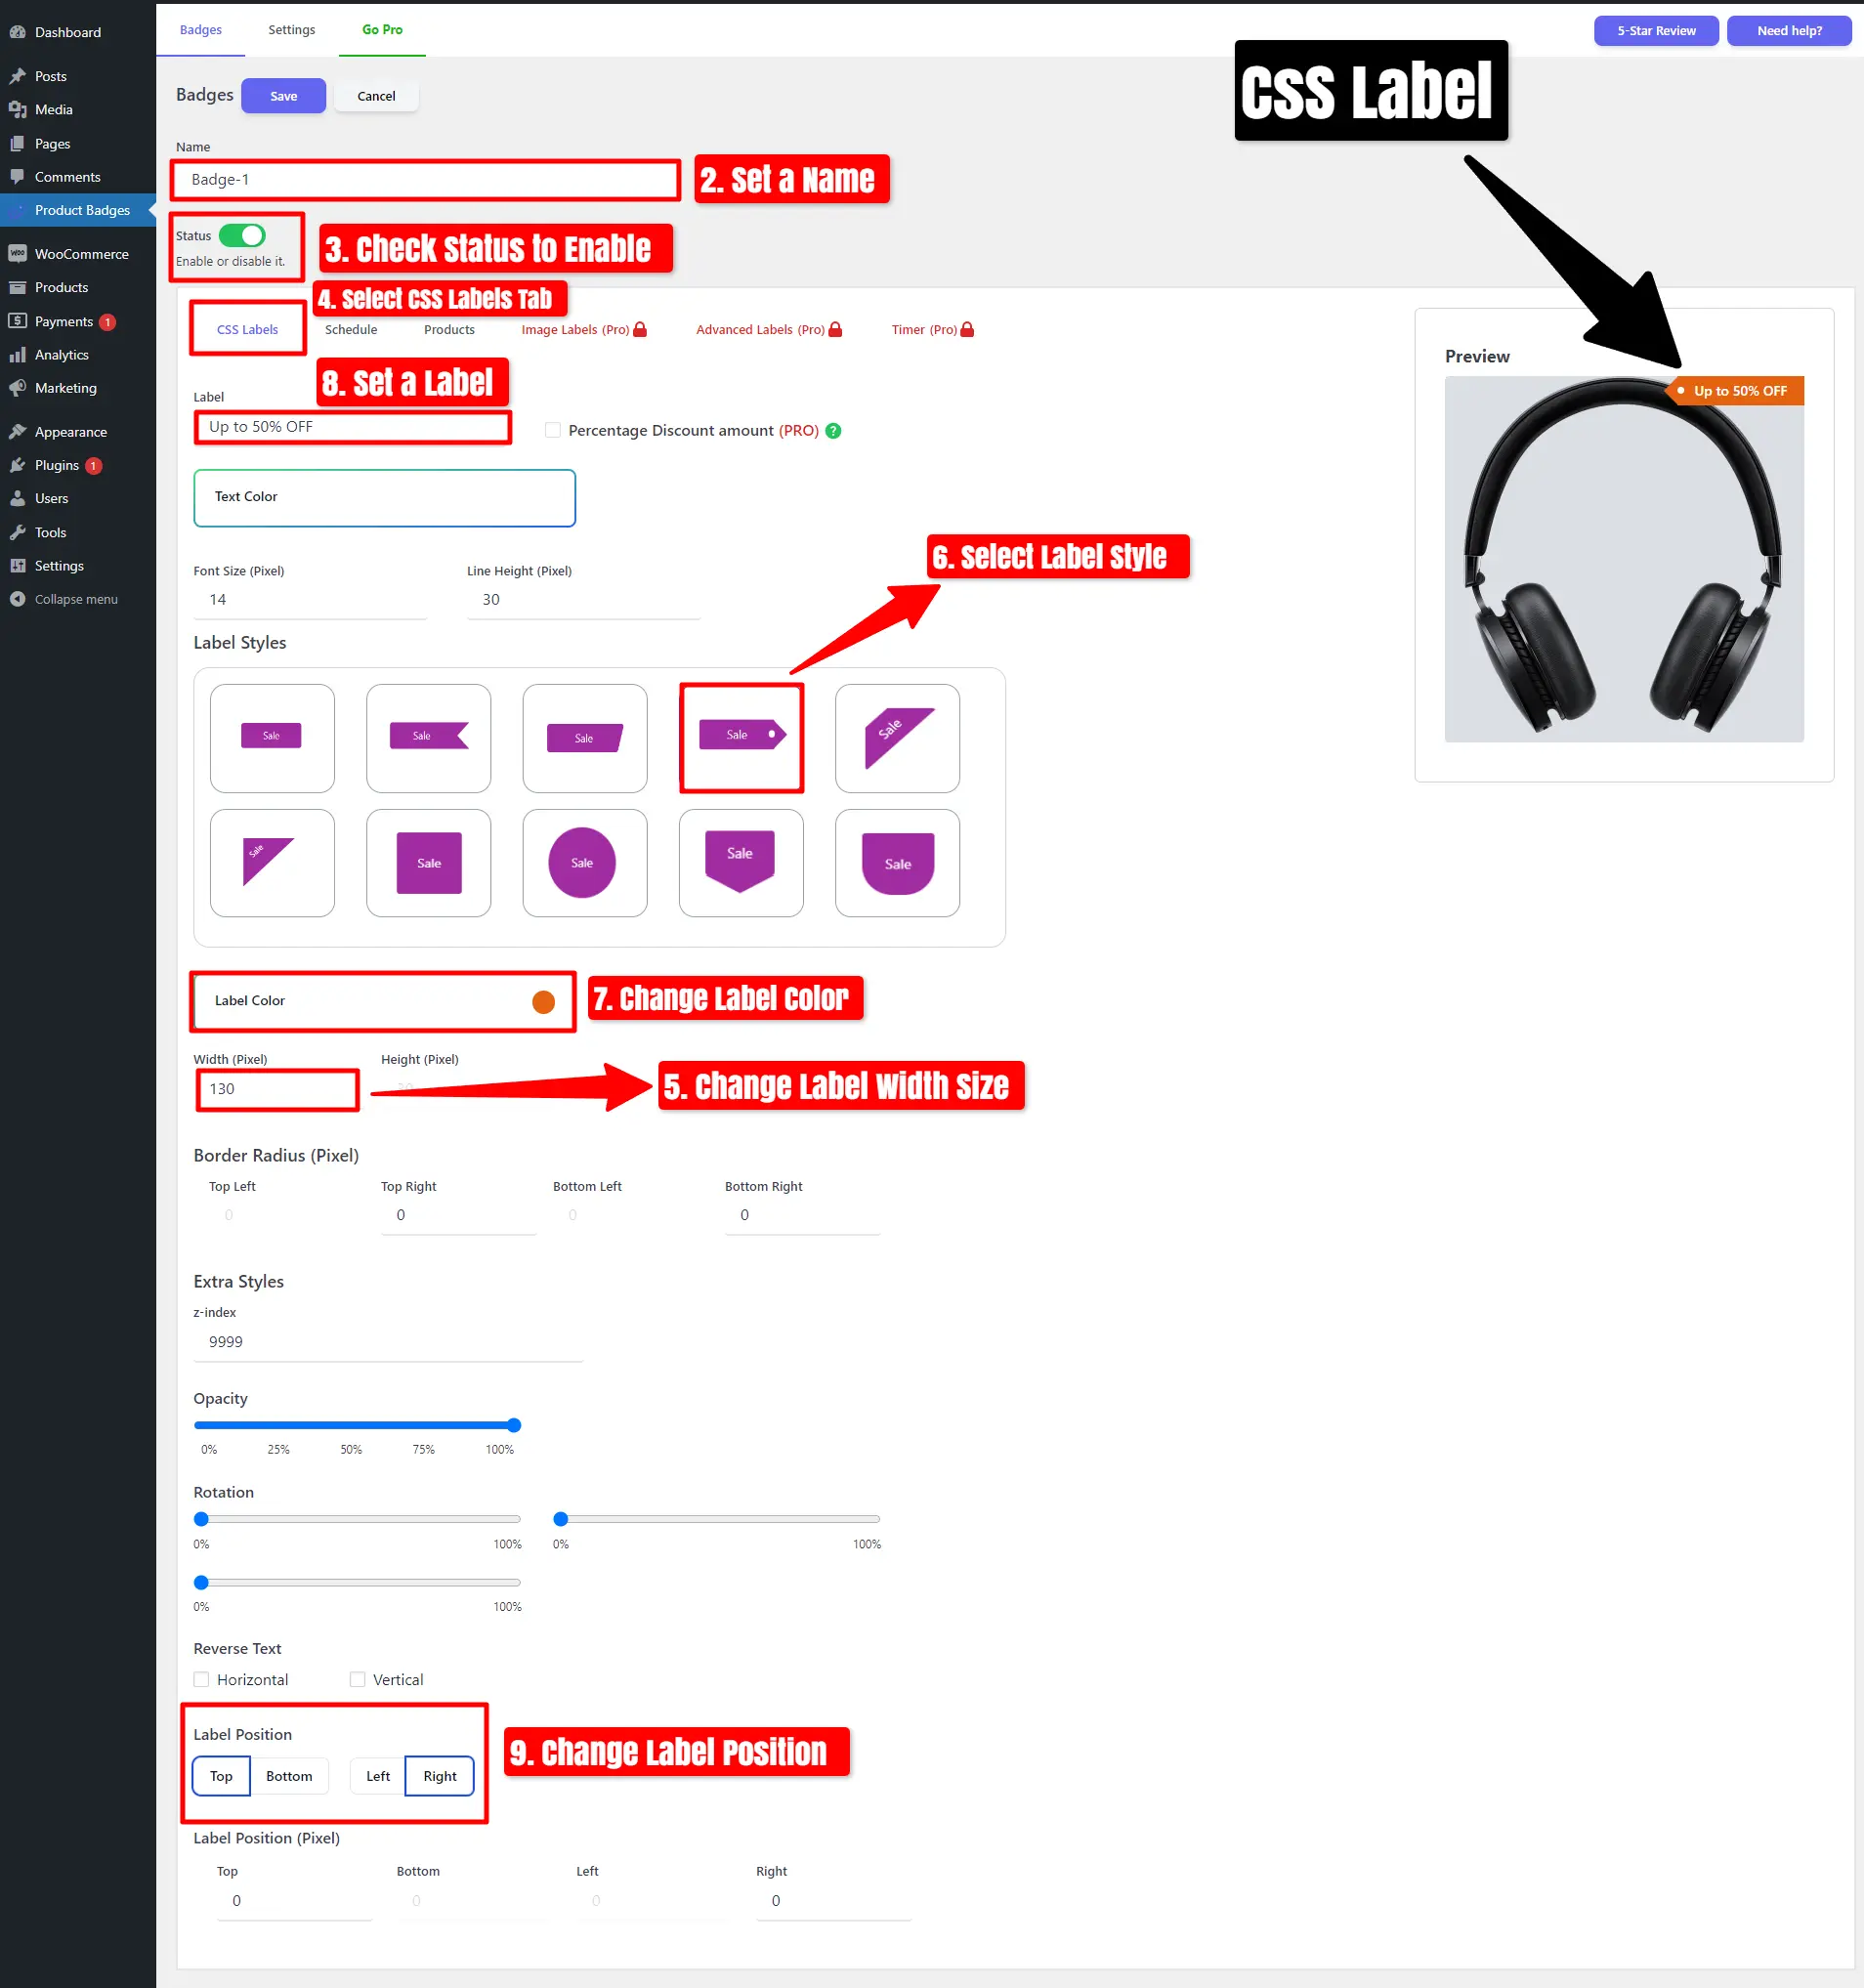
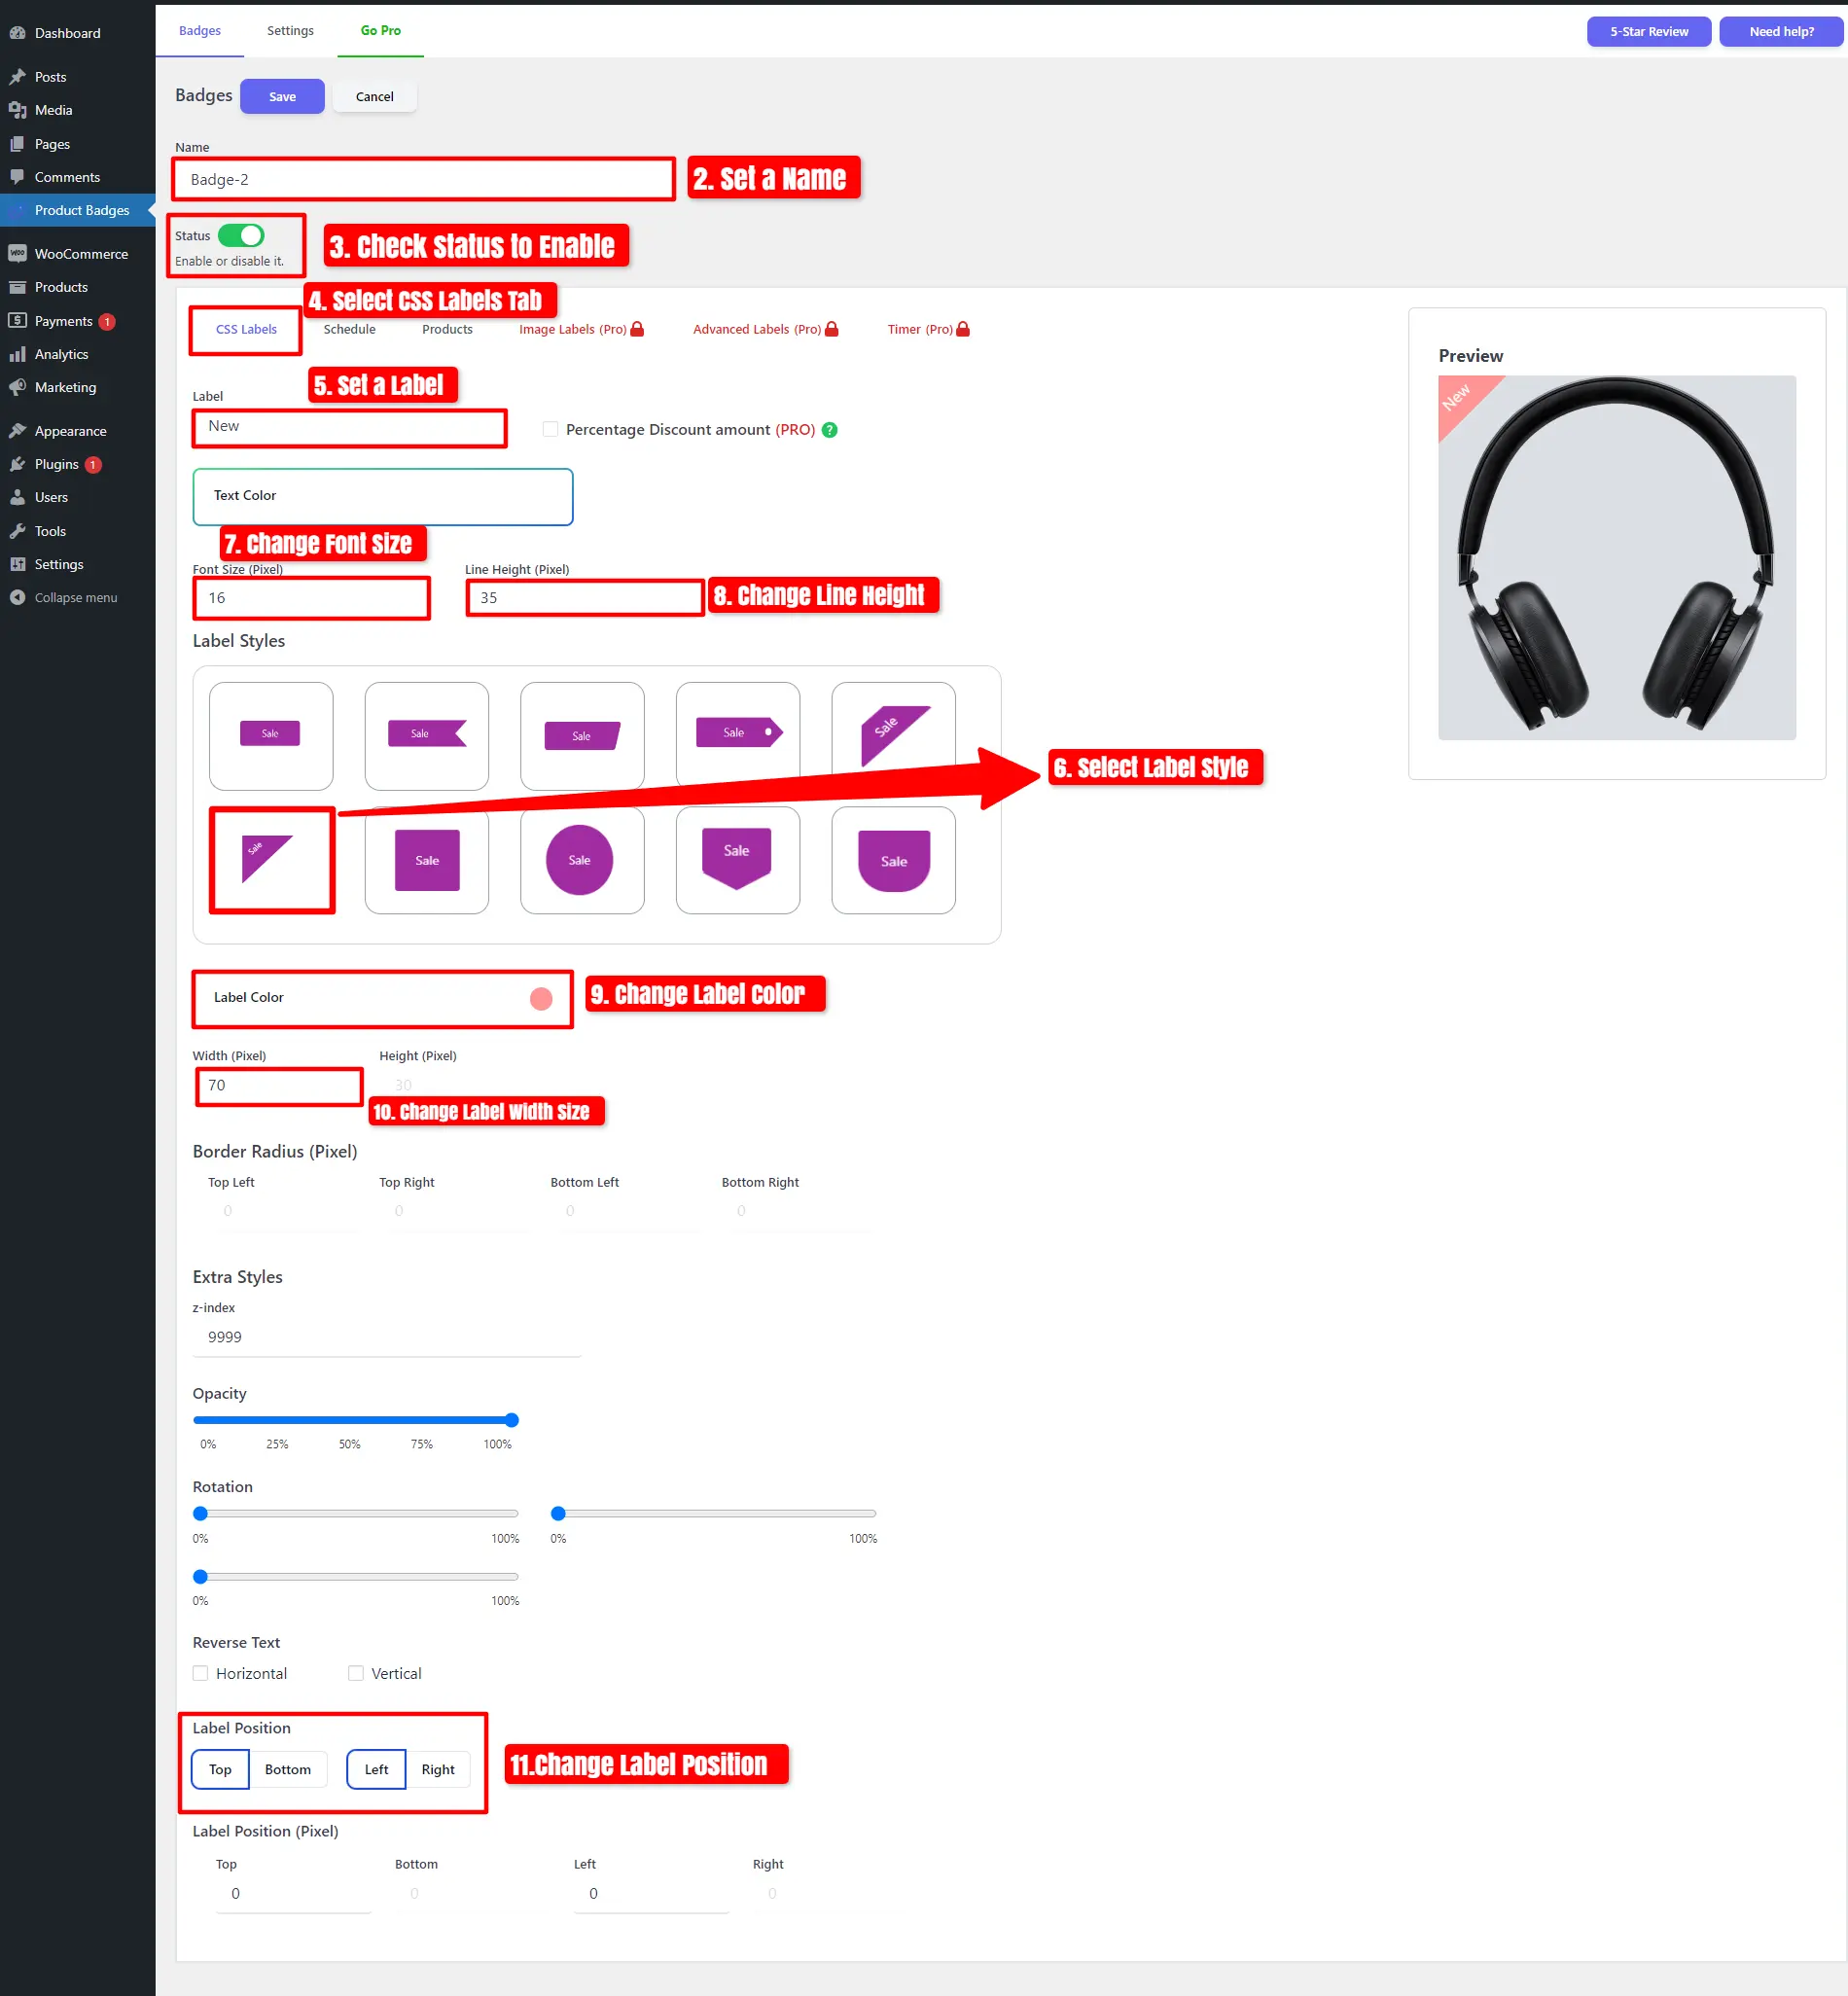
Disable Status and Click on Add New.
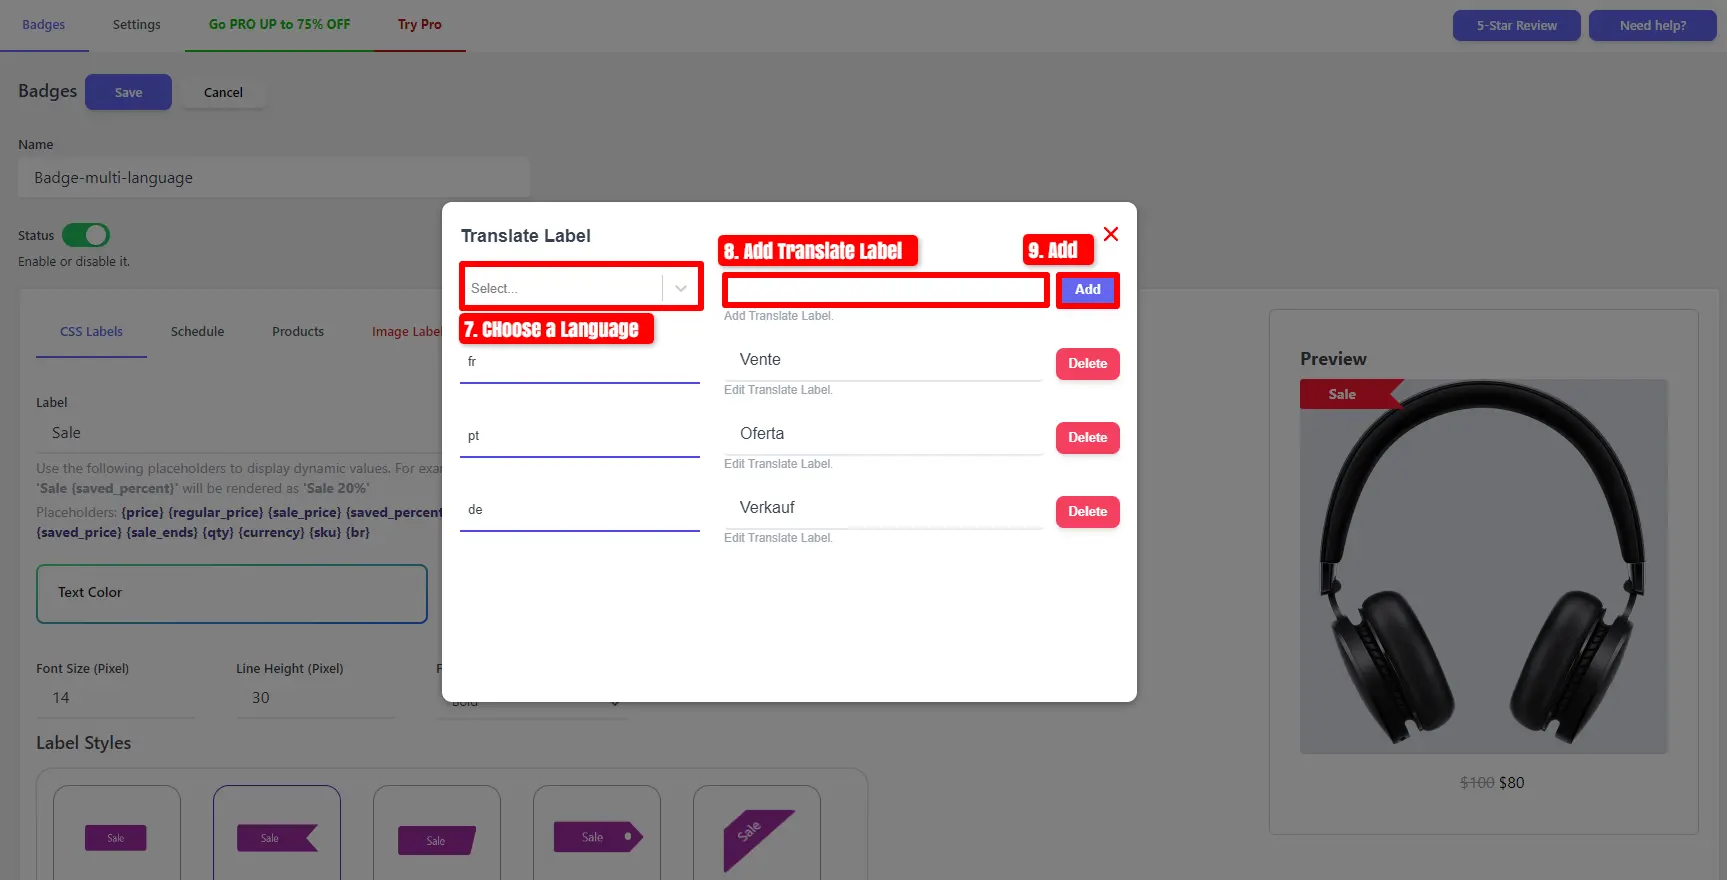
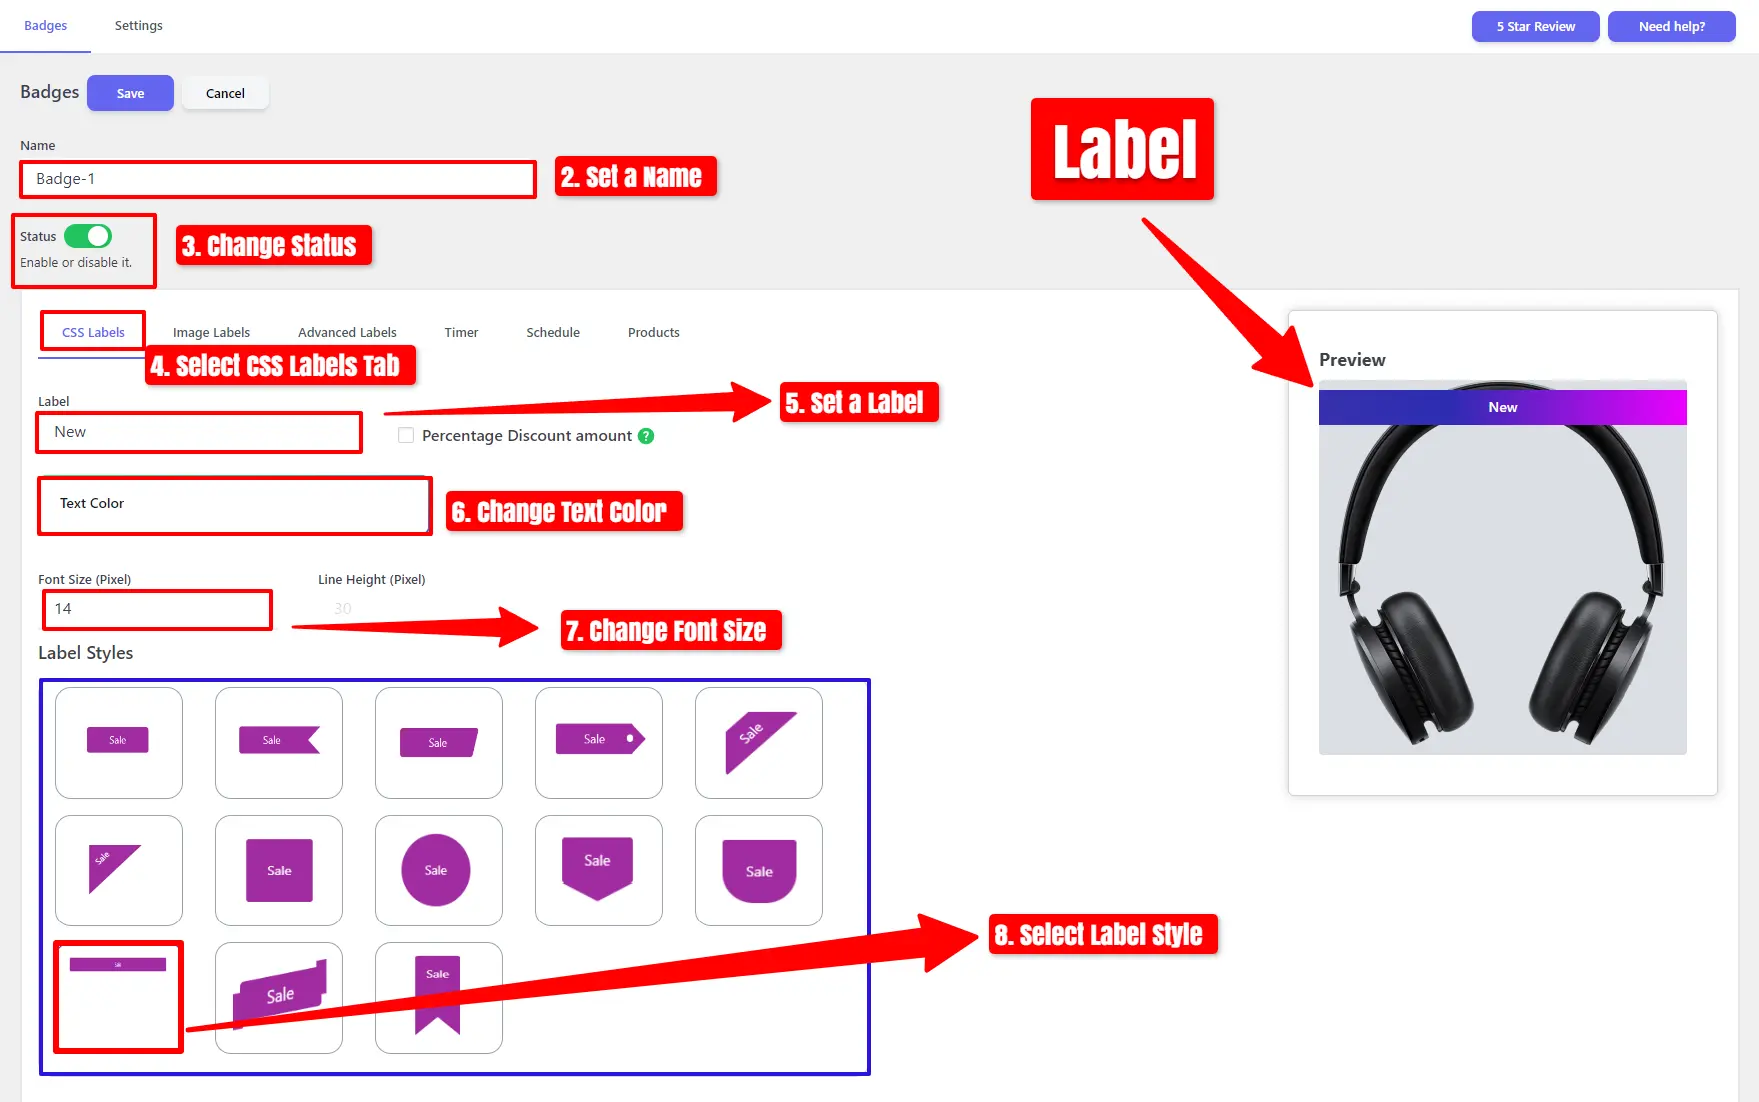
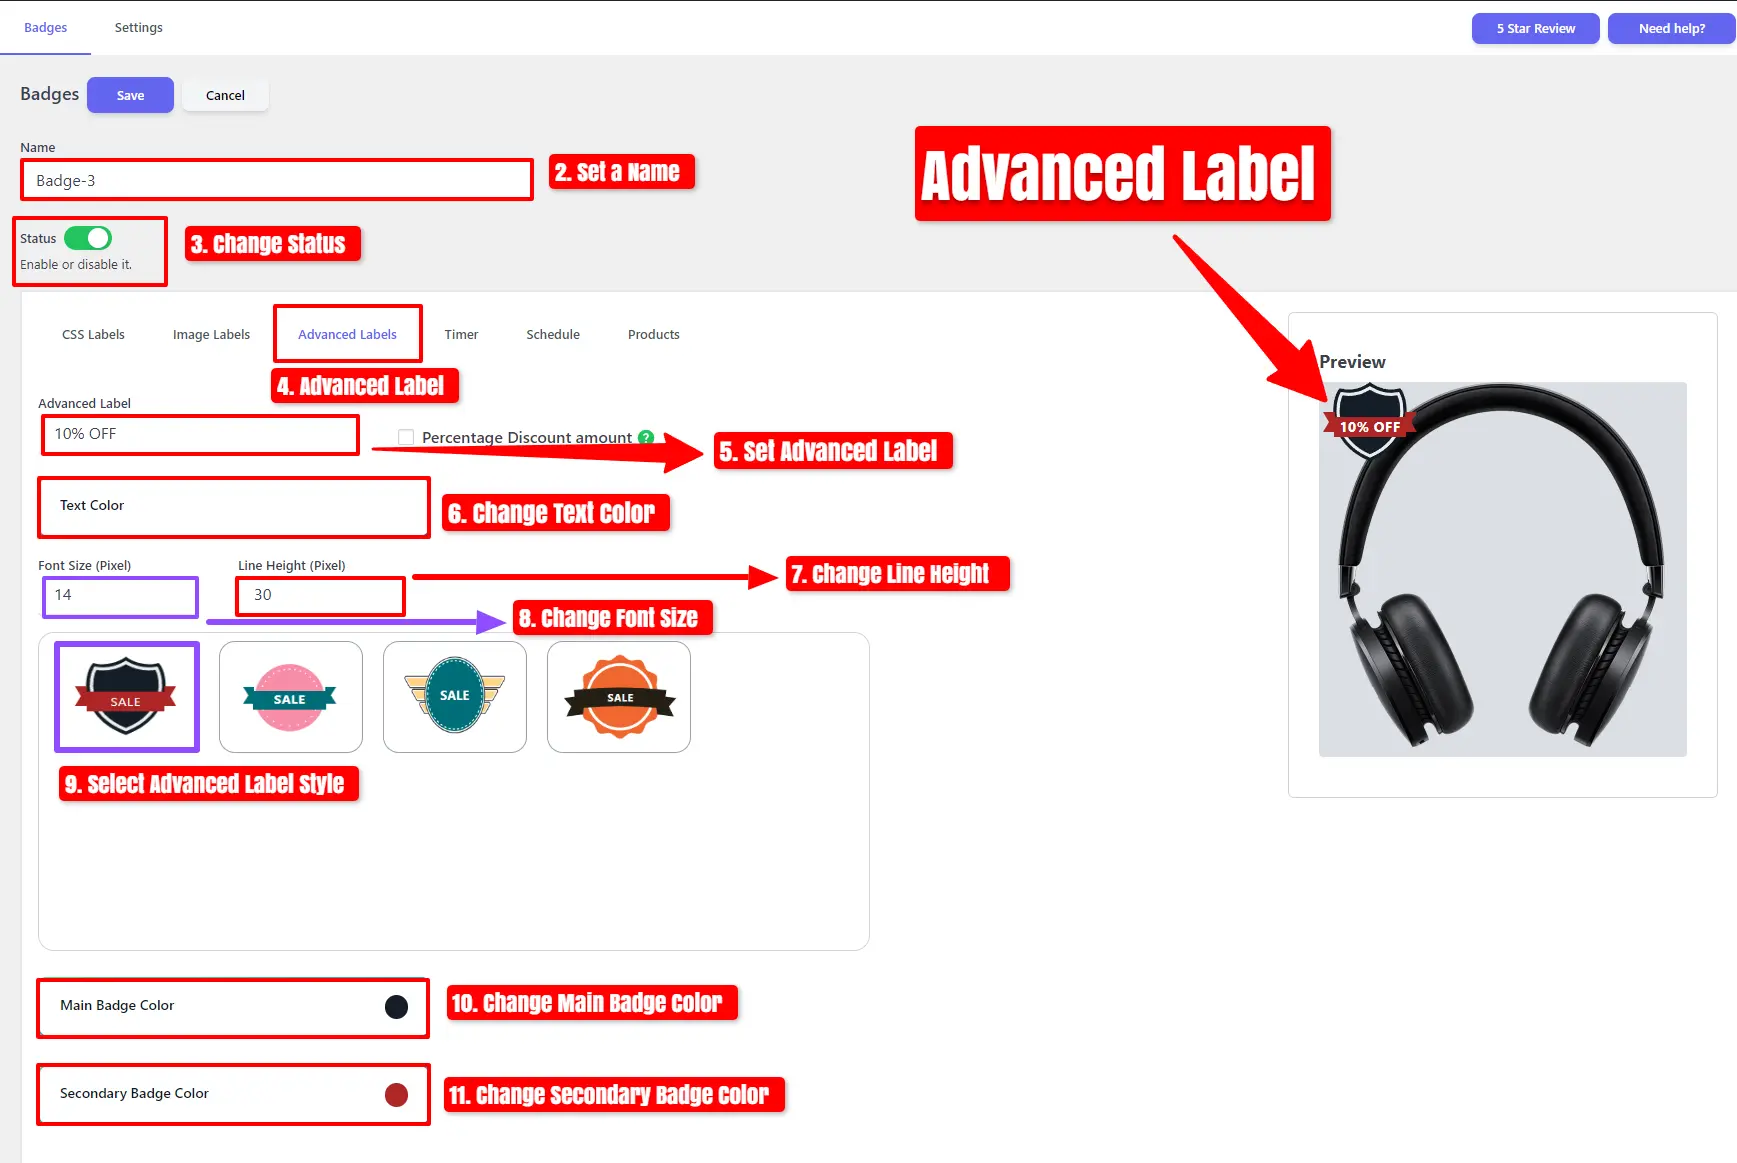
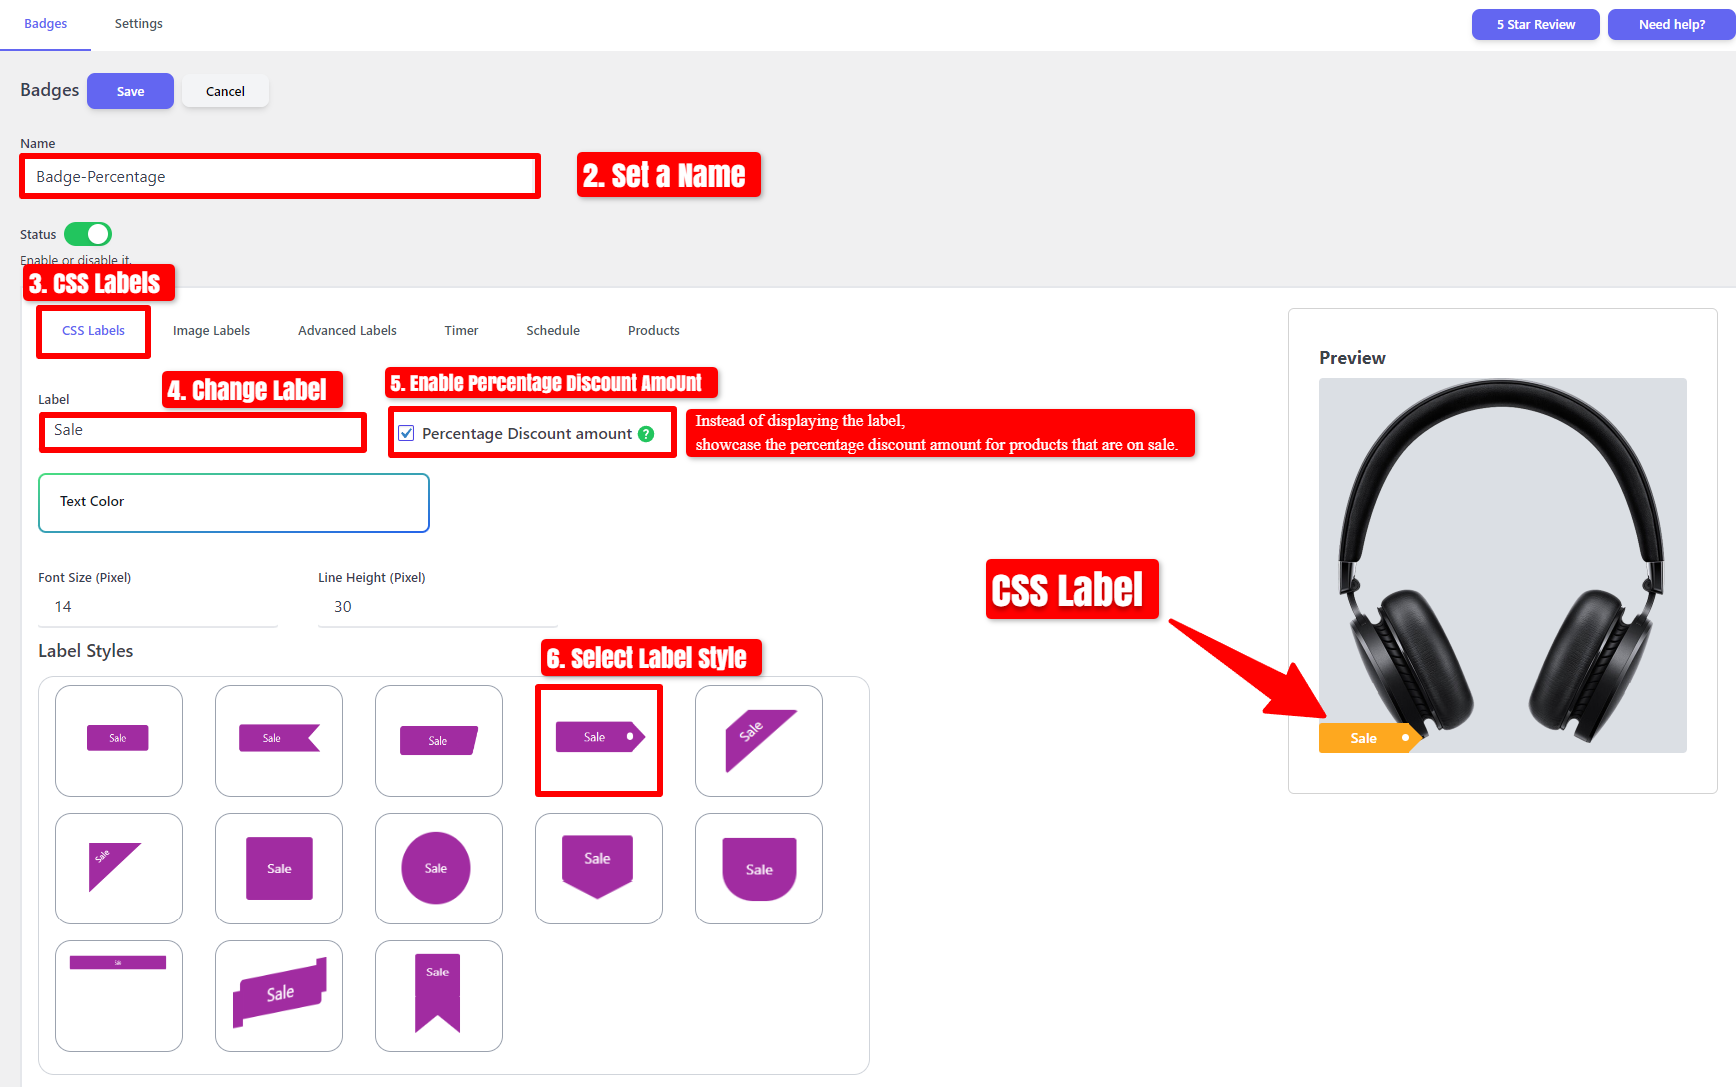
- Set a name, and you can enable or disable the status.
- Begin by clicking on the ‘Timer‘ tab.
- Enable the Timer Status and choose your preferred Timer Style.
- Set the ‘From Date/Time‘ and ‘To Date/Time.’
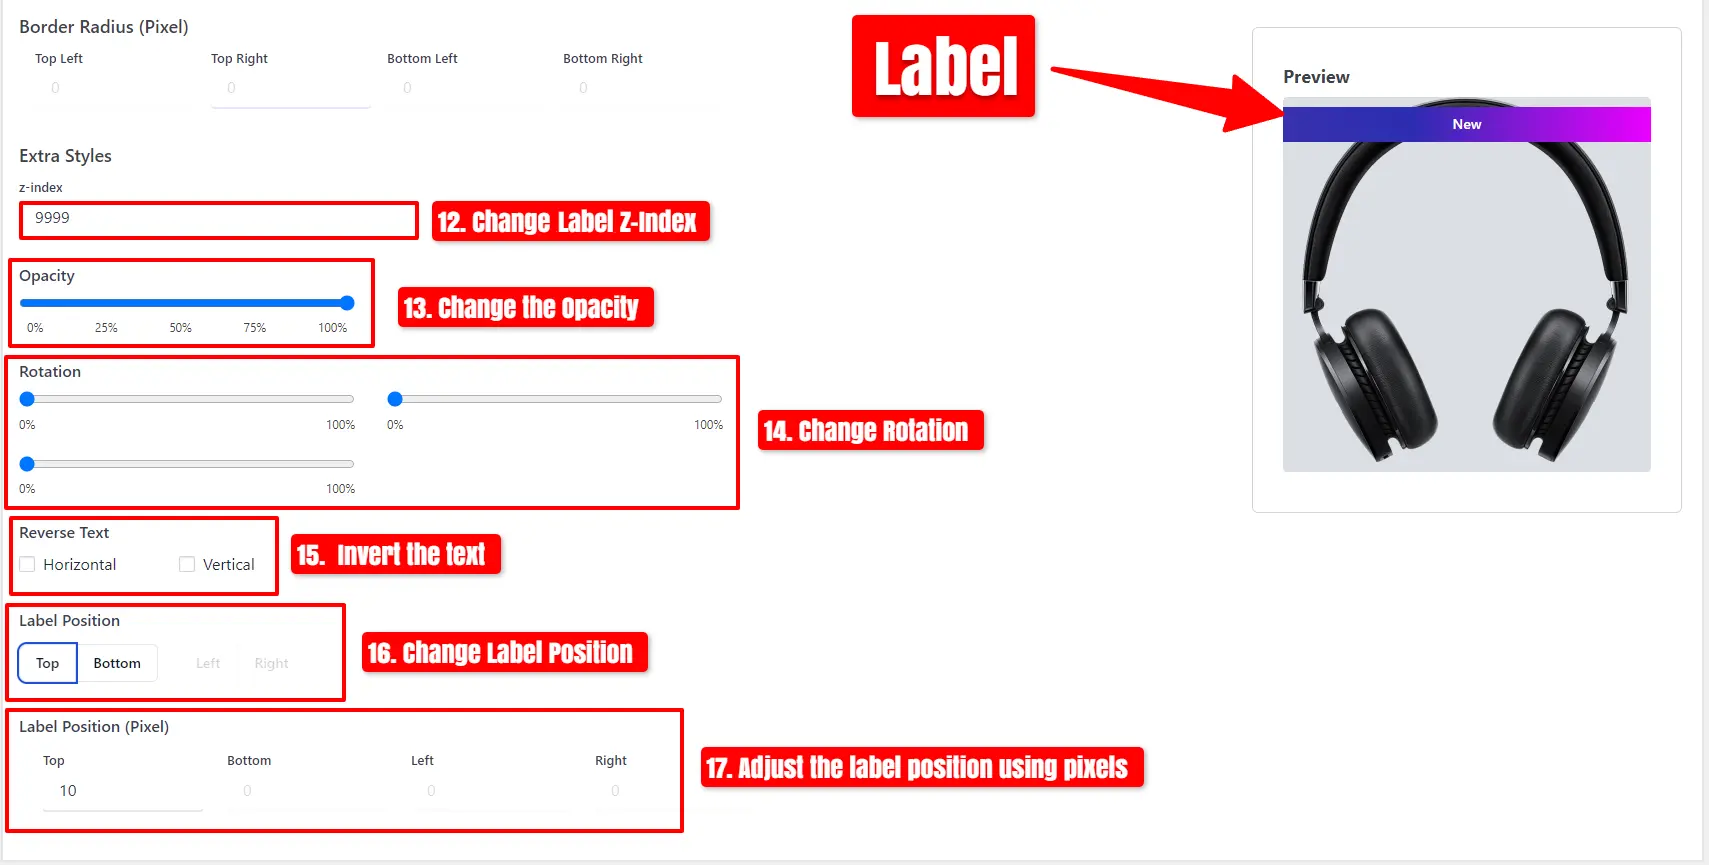
- Customize the Background Color and adjust the Timer Width.
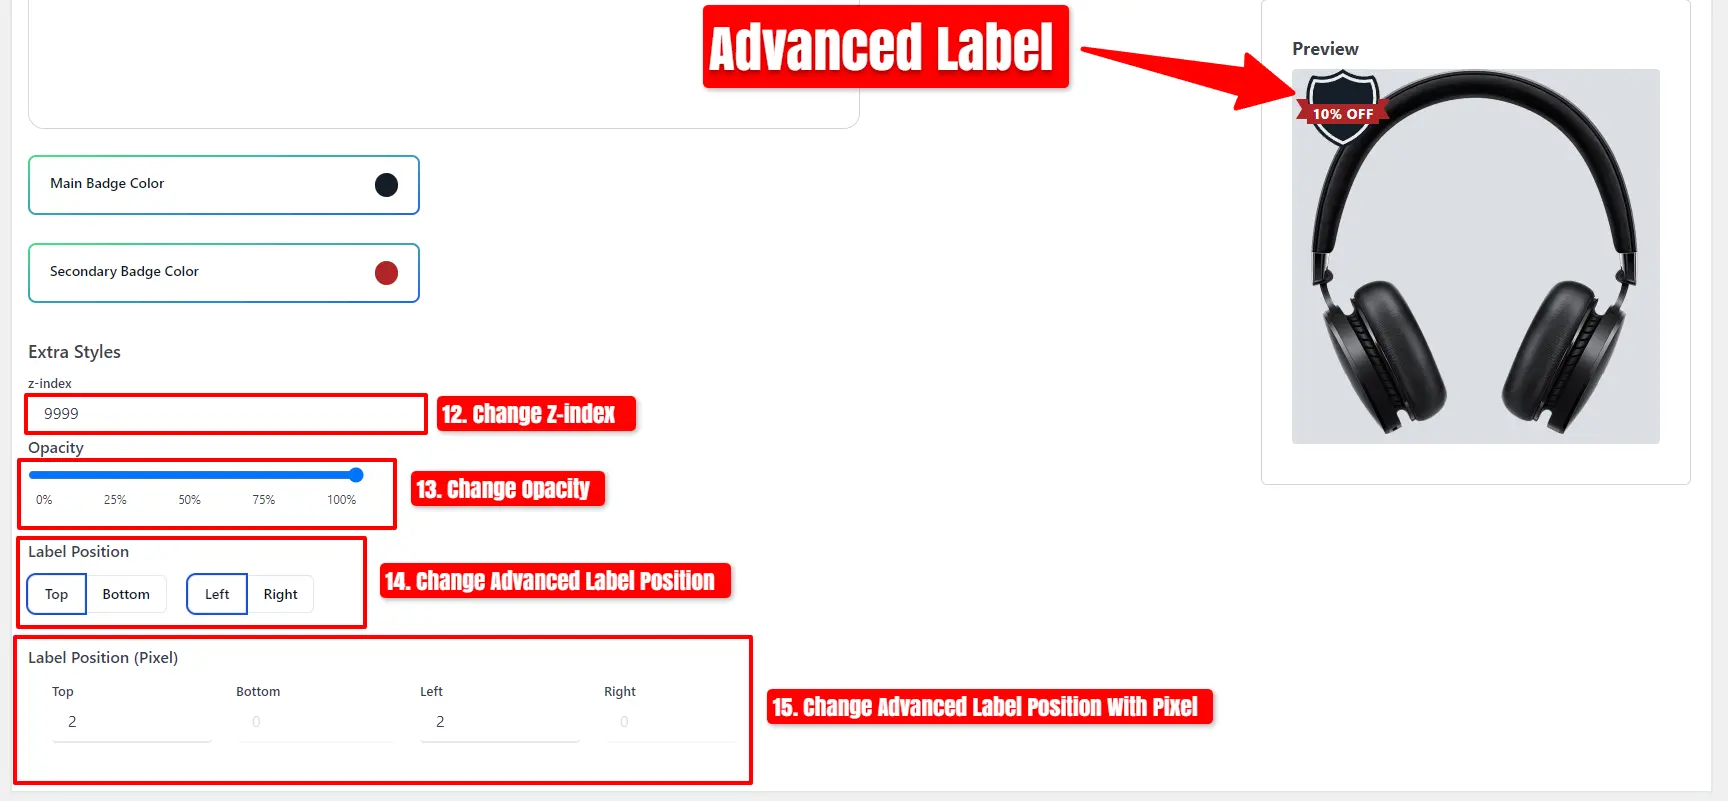
- Alter the Timer Position as needed.
After enabling the Timer and making modifications.
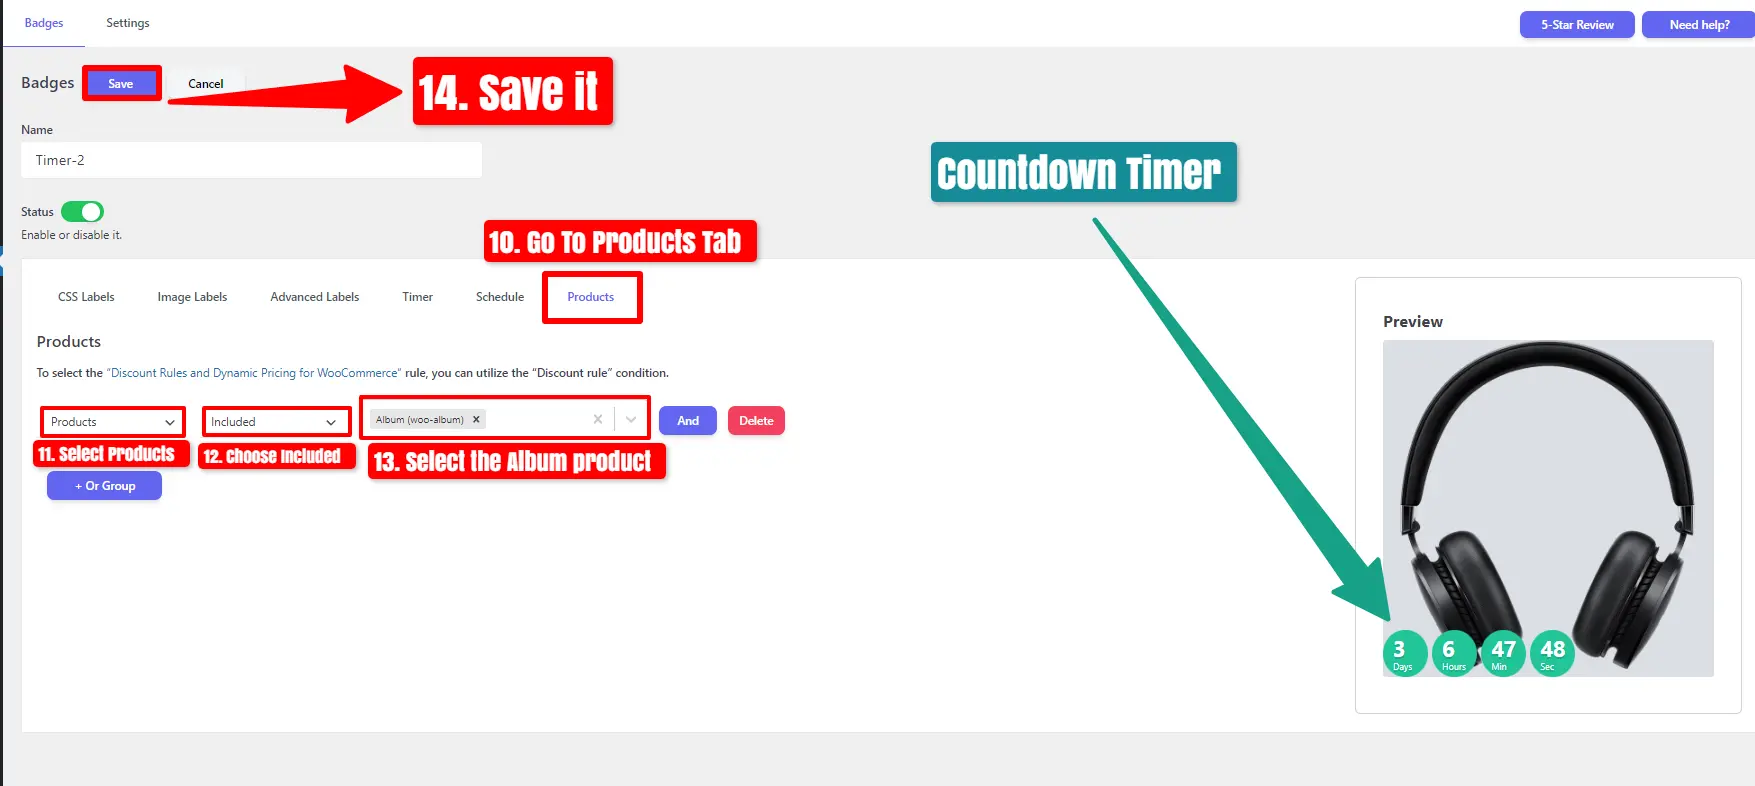
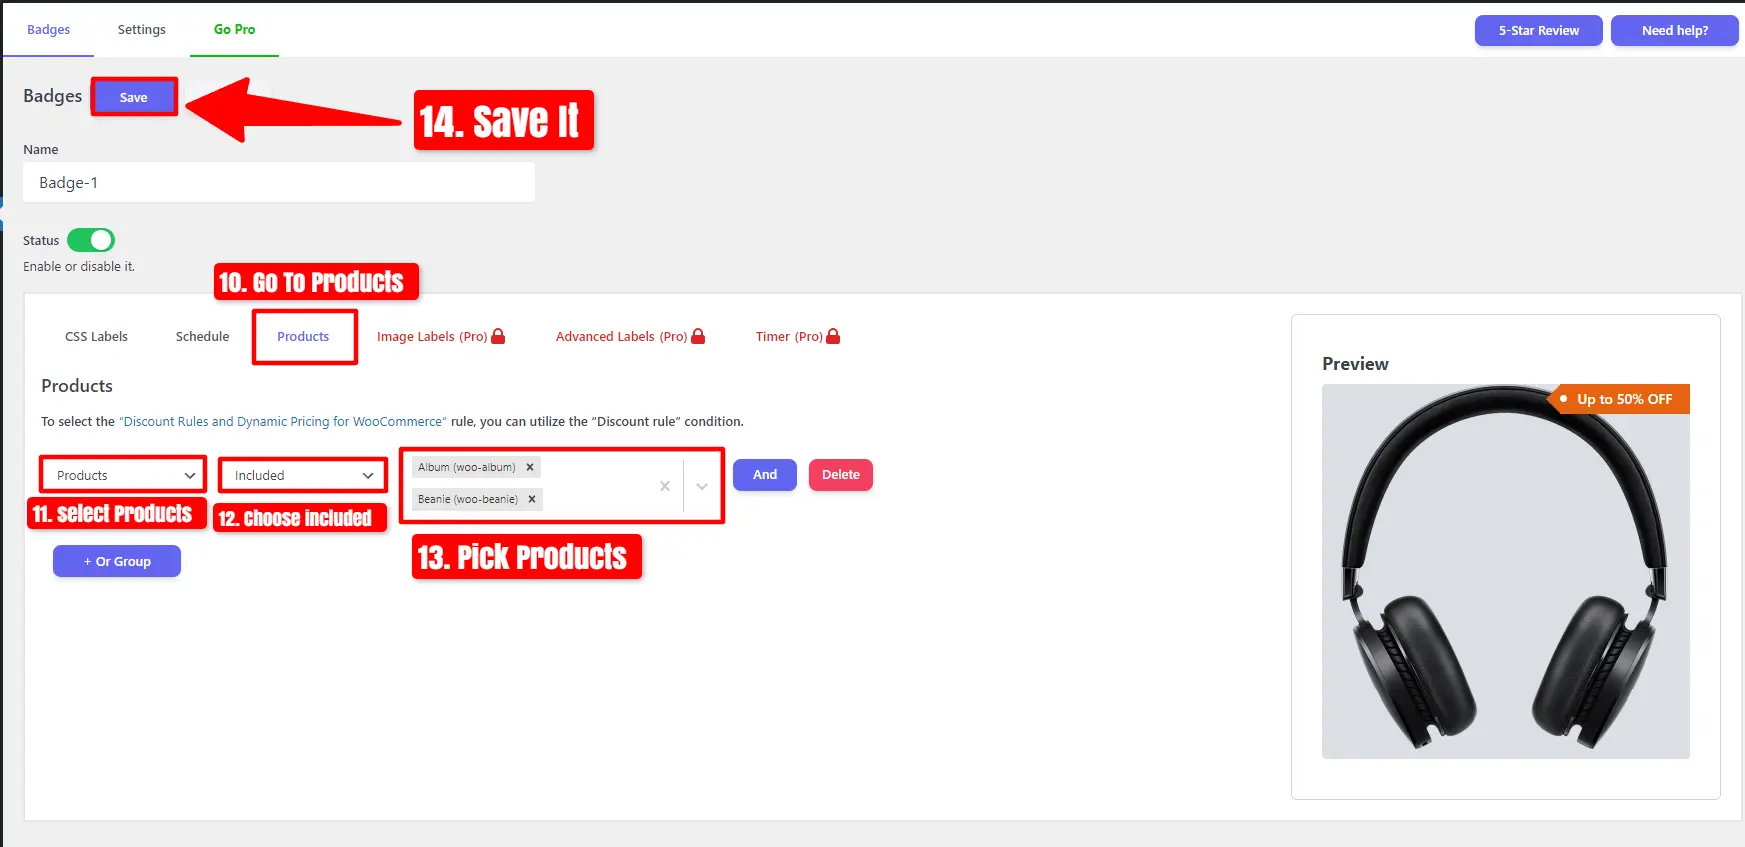
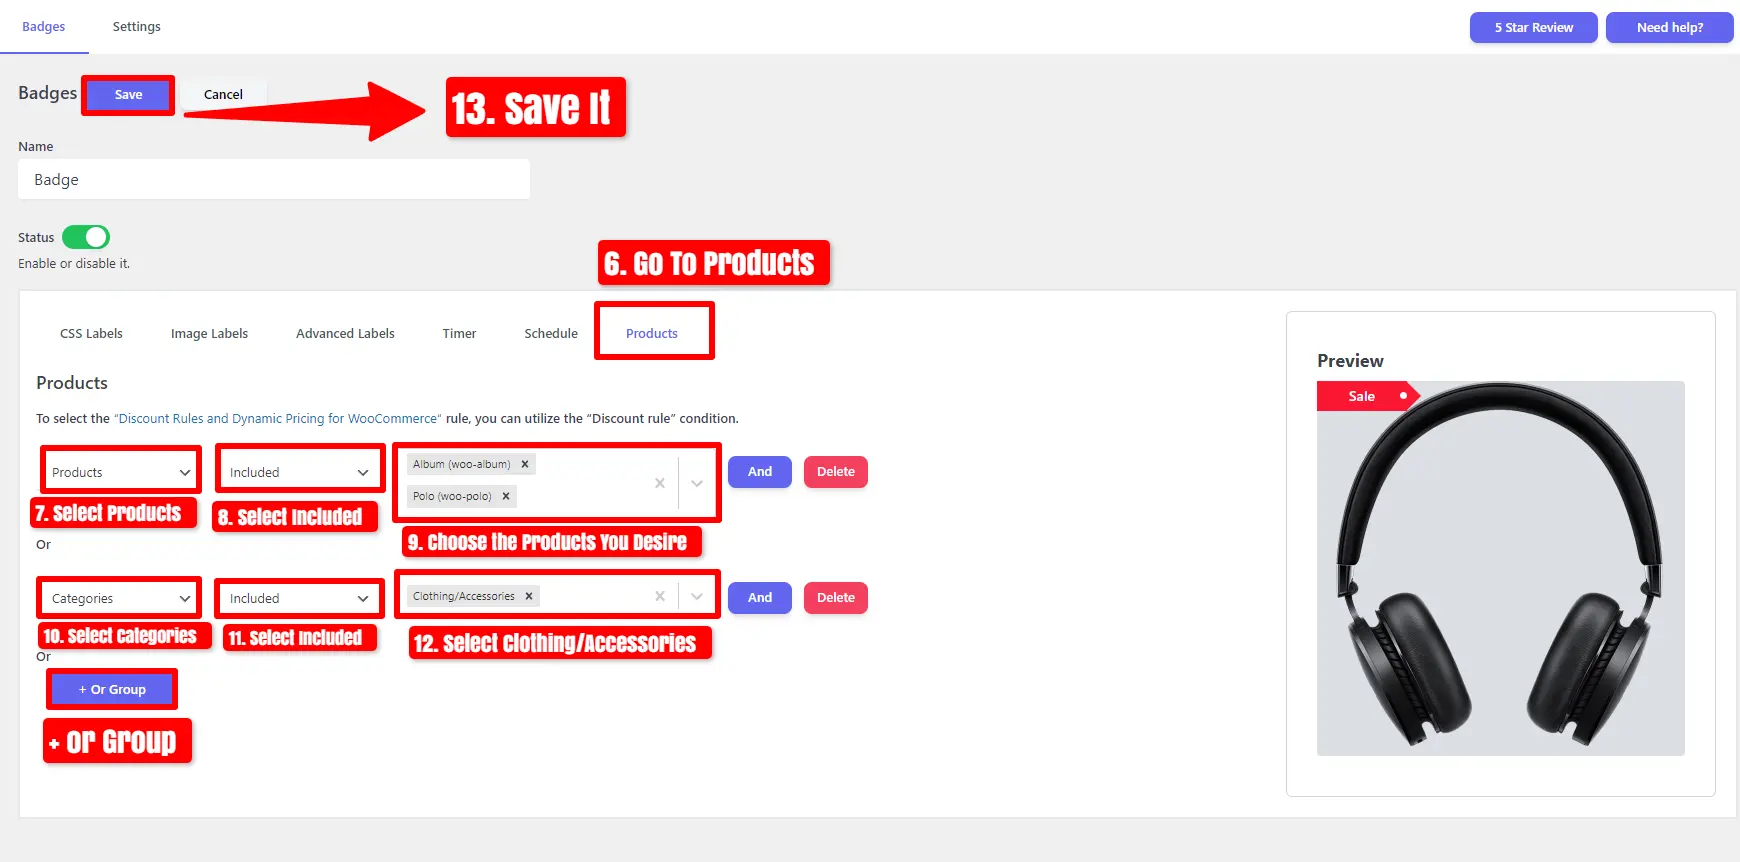
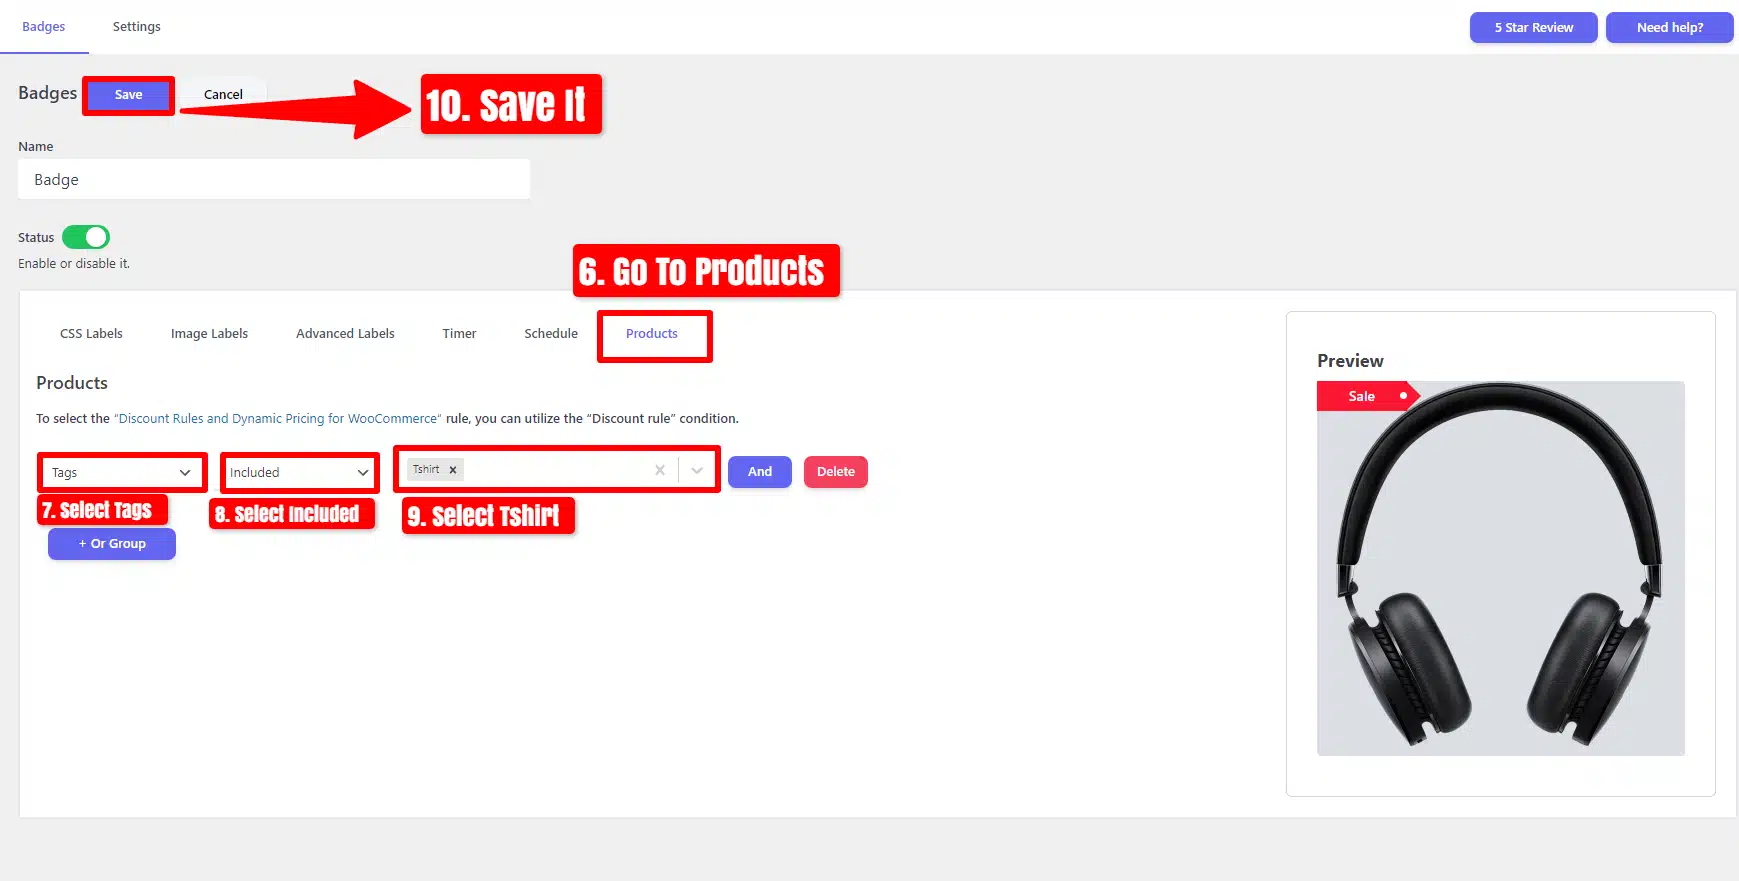
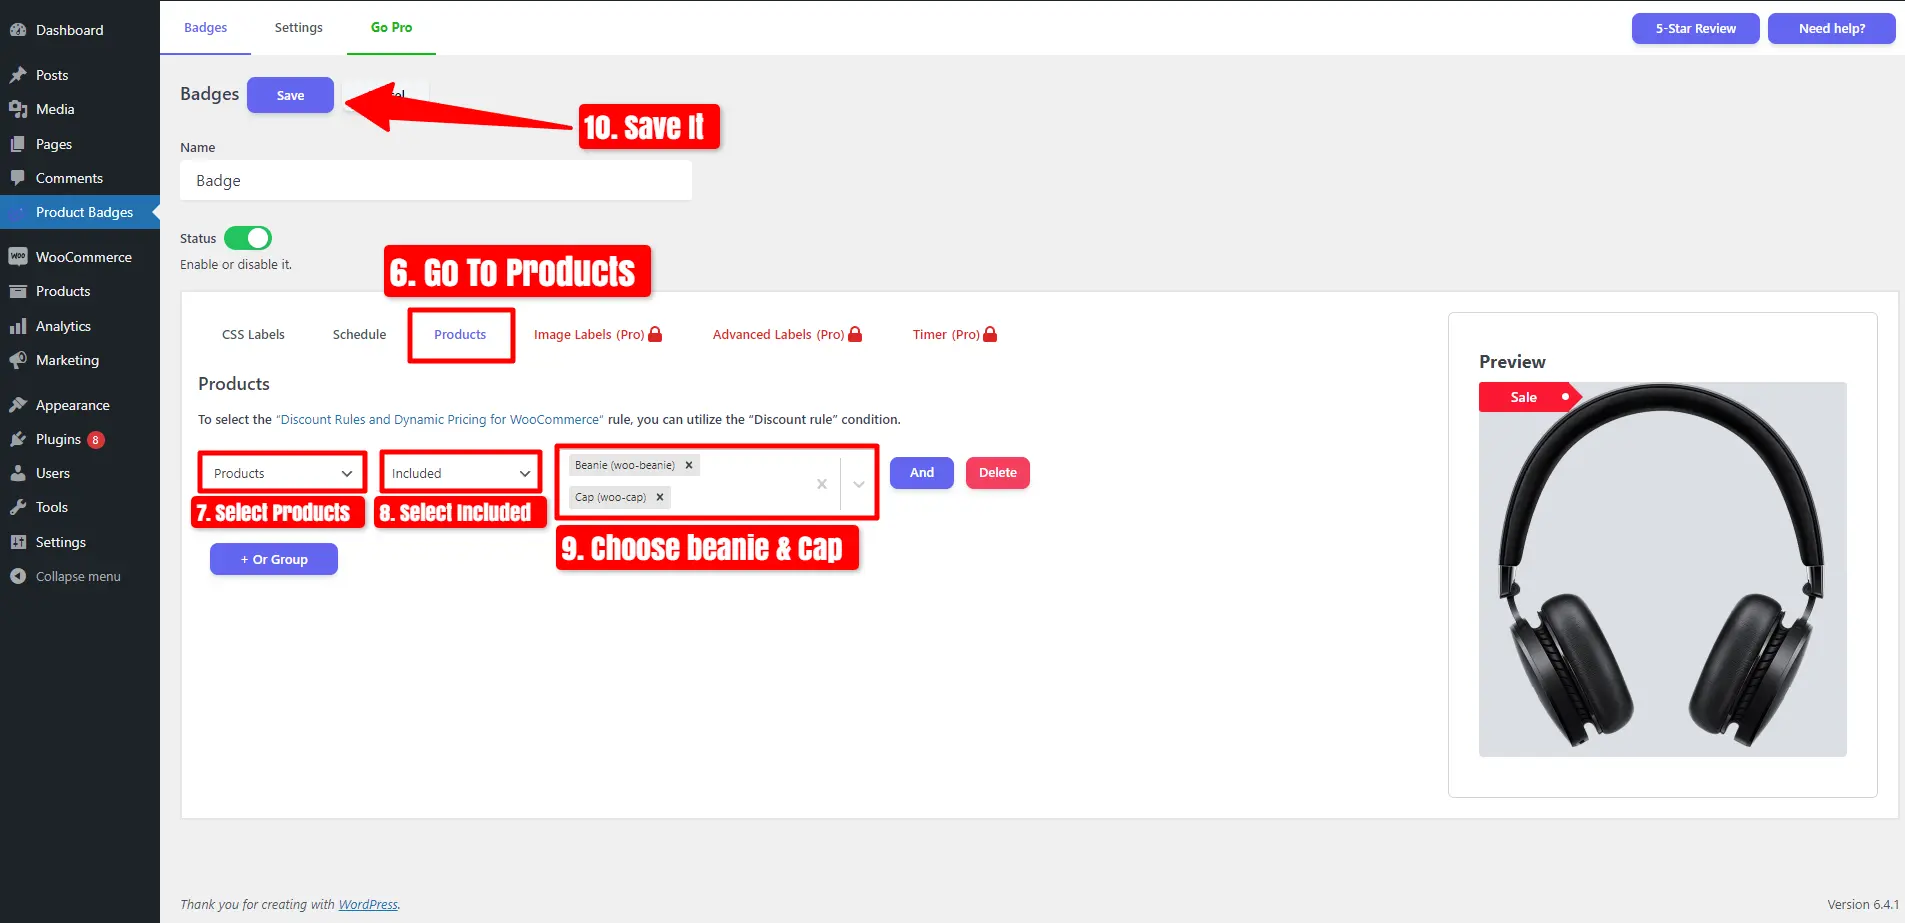
- Navigate to the ‘Products‘ tab.
- Select ‘Products‘ and choose ‘Included.’
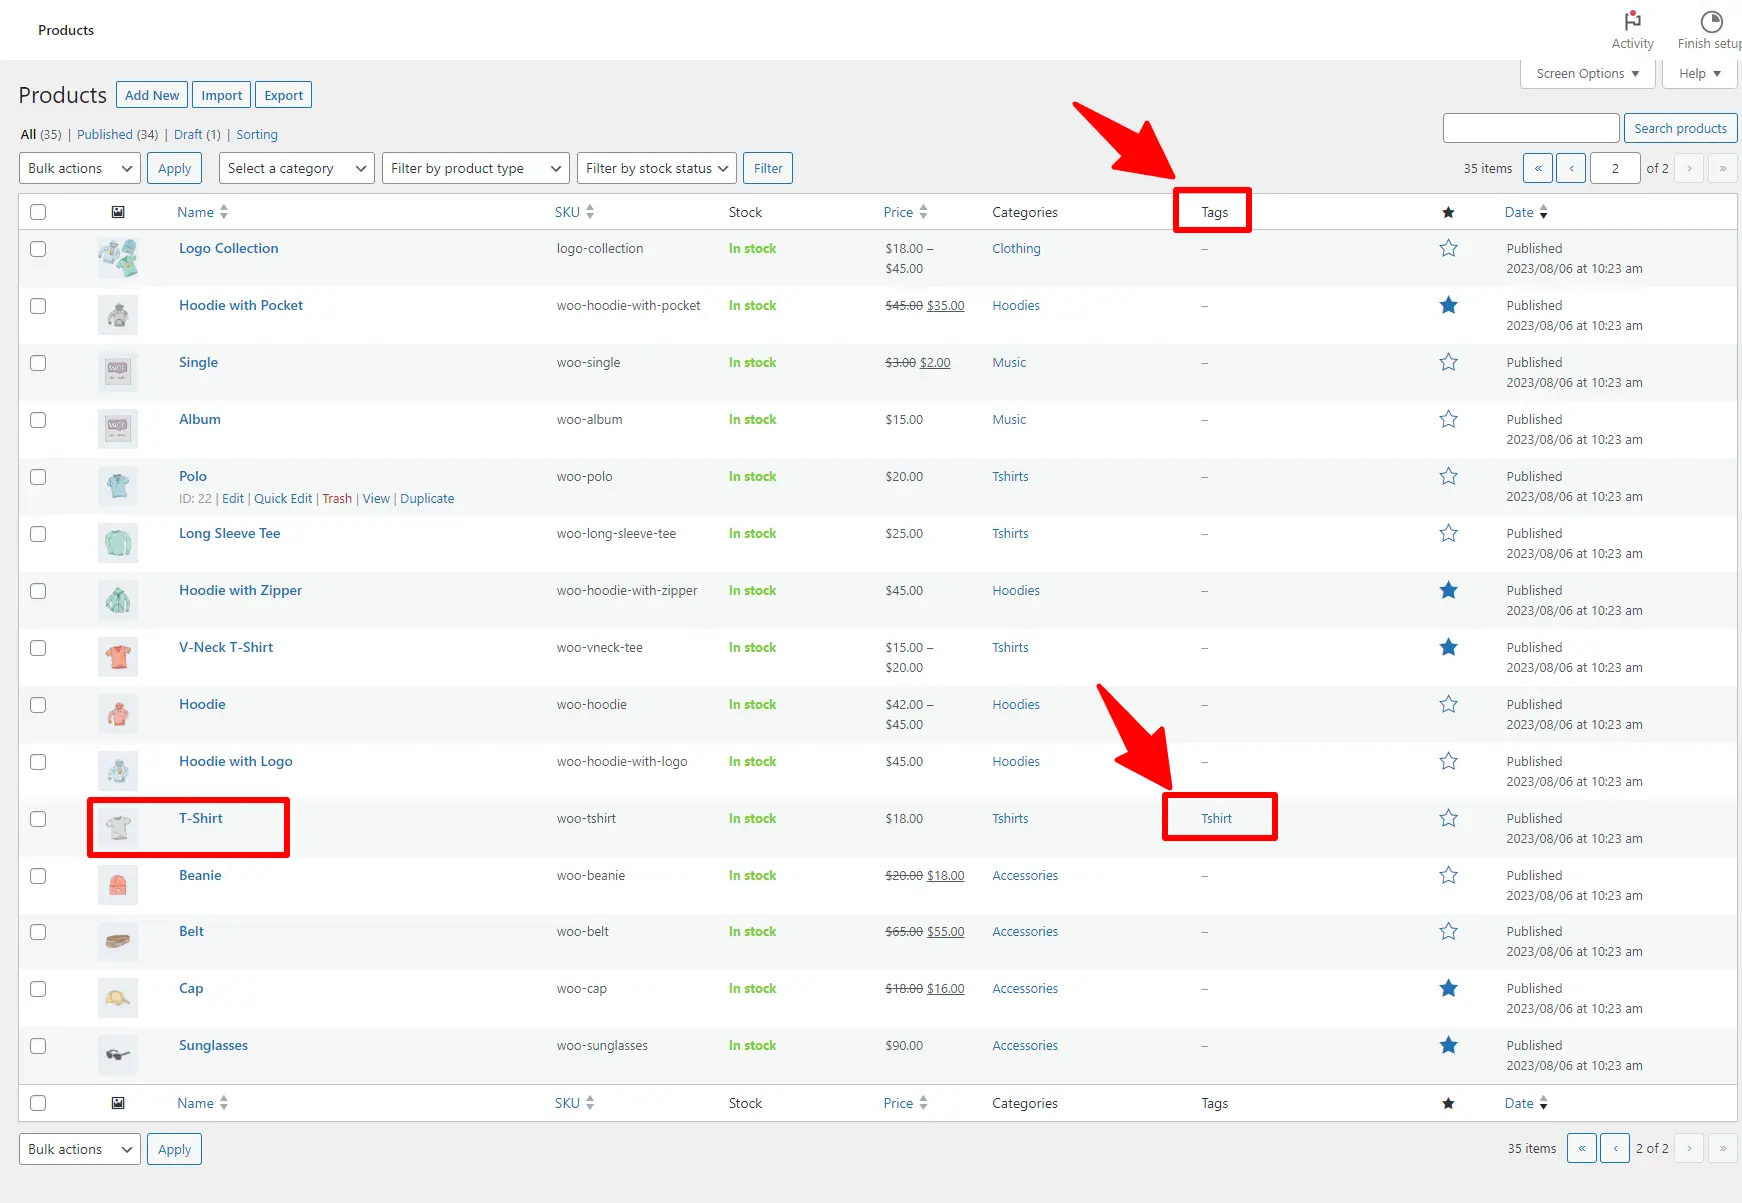
- Pick the desired products, for example: ‘Album (woo-album)‘.
- Save your changes.
Visit the archive page to see the Timer on the Album product.
View the Countdown Timer on the product page.

Add Countdown Timer to Categories Products in WooCommerce
Click on Add New.
- Set a name.
- Start by clicking on the ‘Timer‘ tab.
- Enable the Timer Status and choose your preferred Timer Style.
- Set the ‘From Date/Time‘ and ‘To Date/Time.’
- Customize the Background Color and adjust the Timer Width.
- Adjust the Timer position.

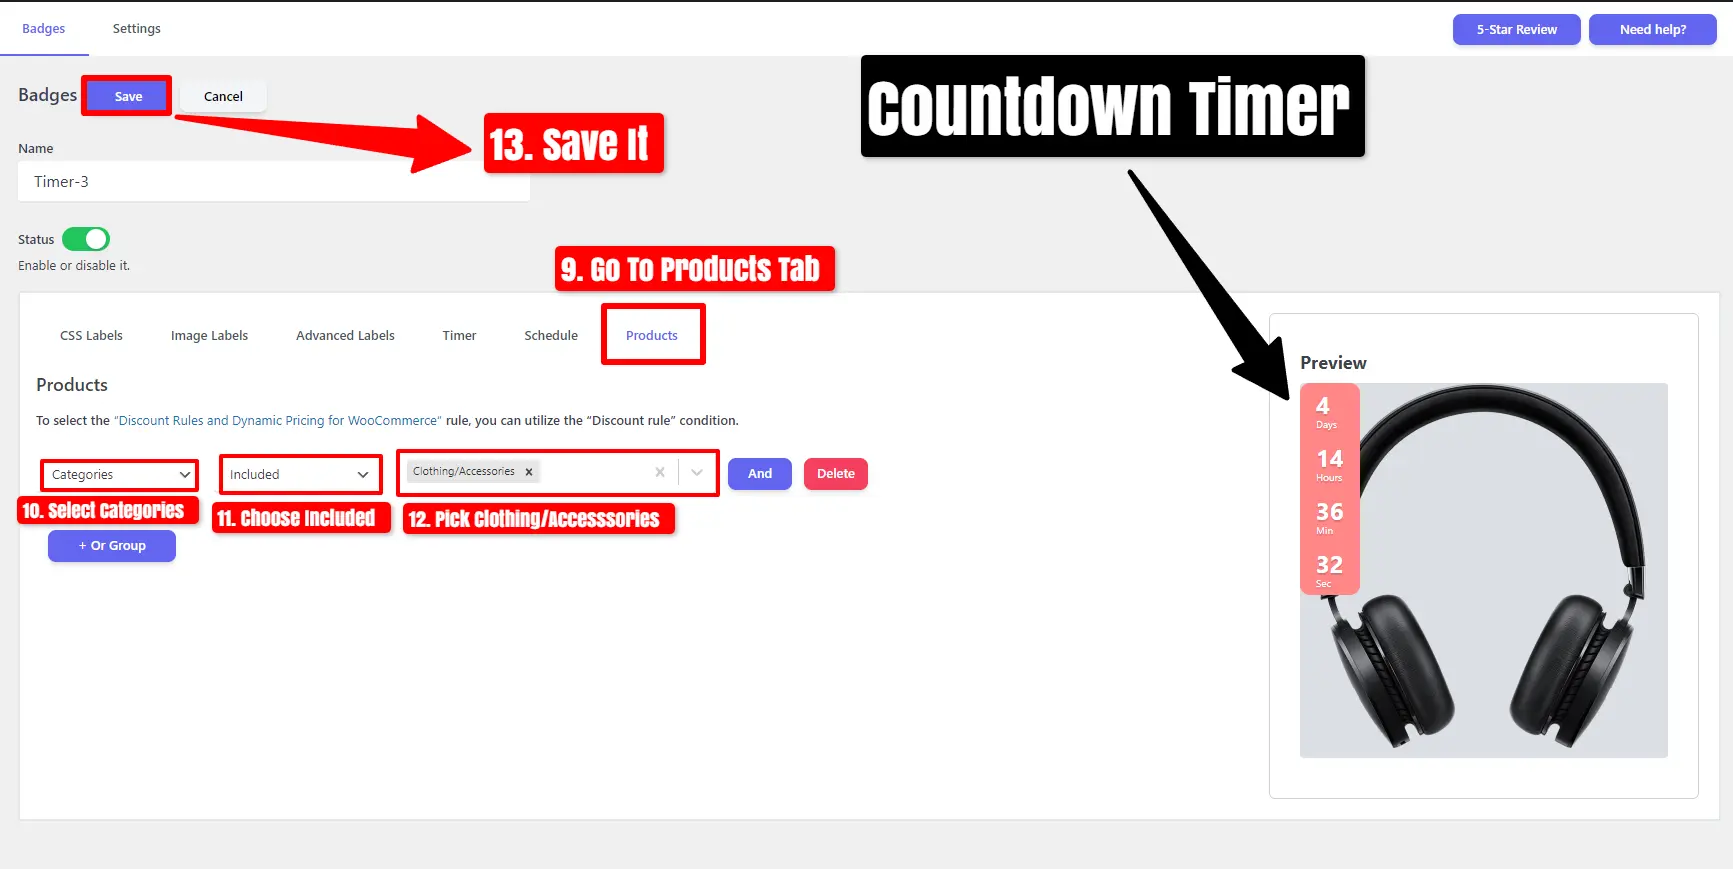
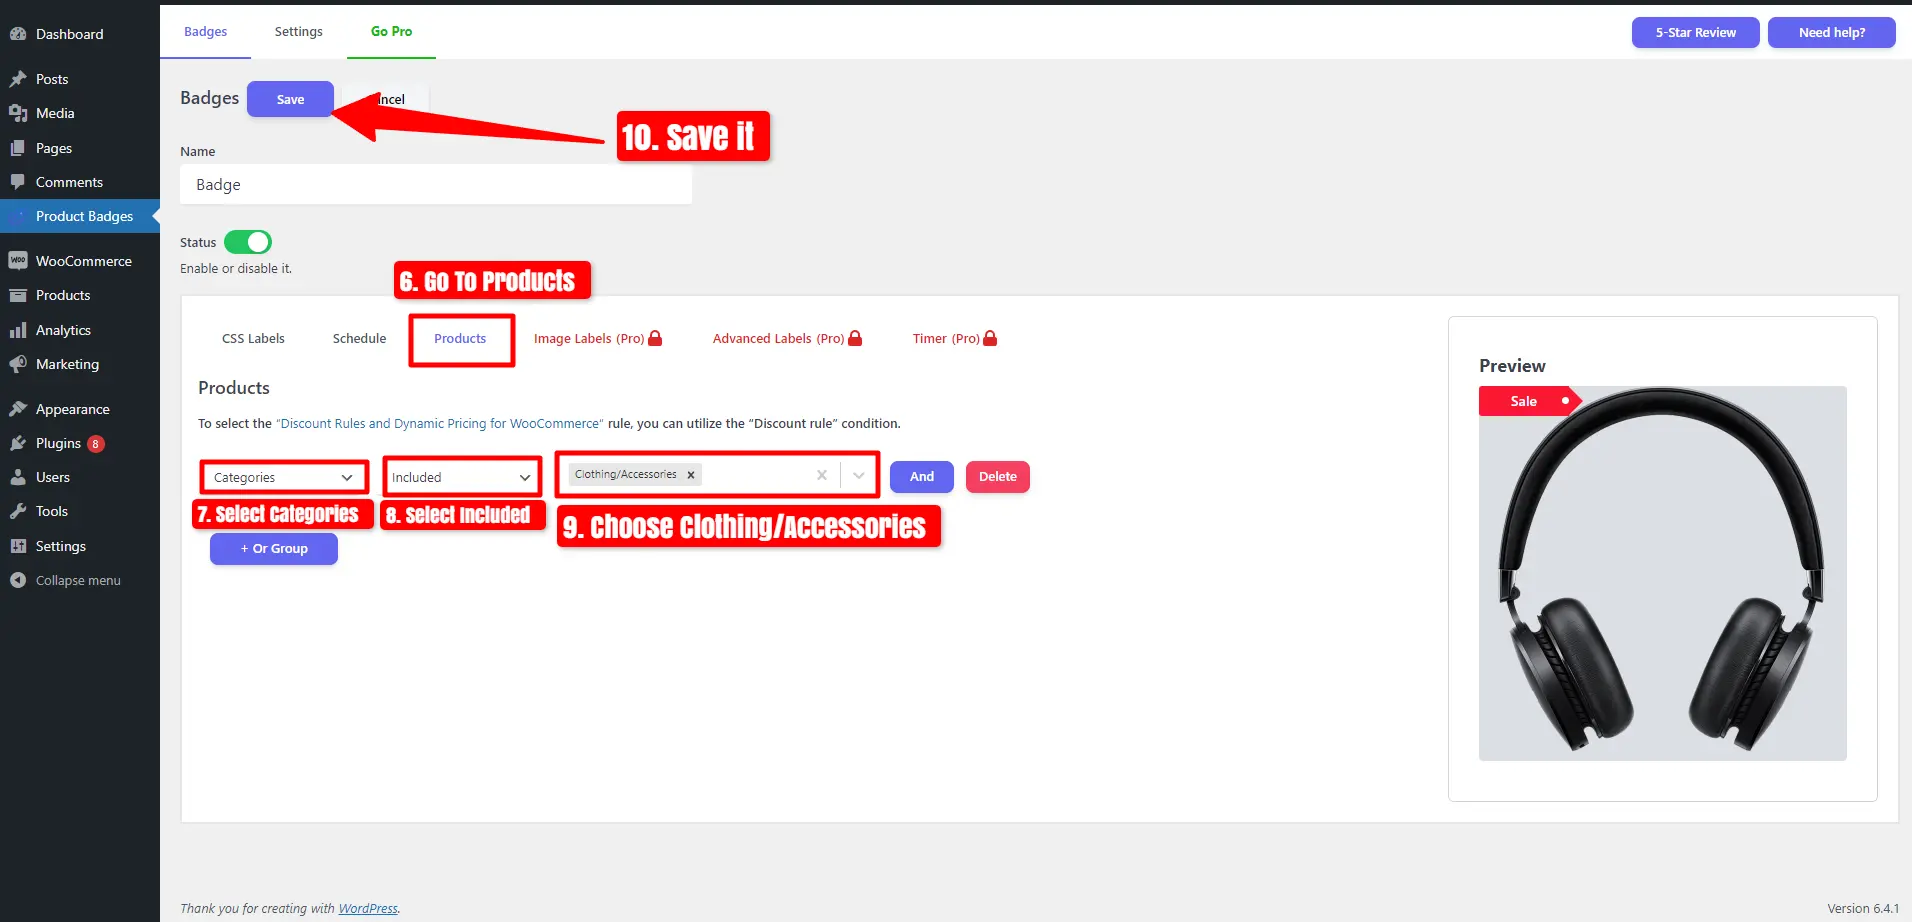
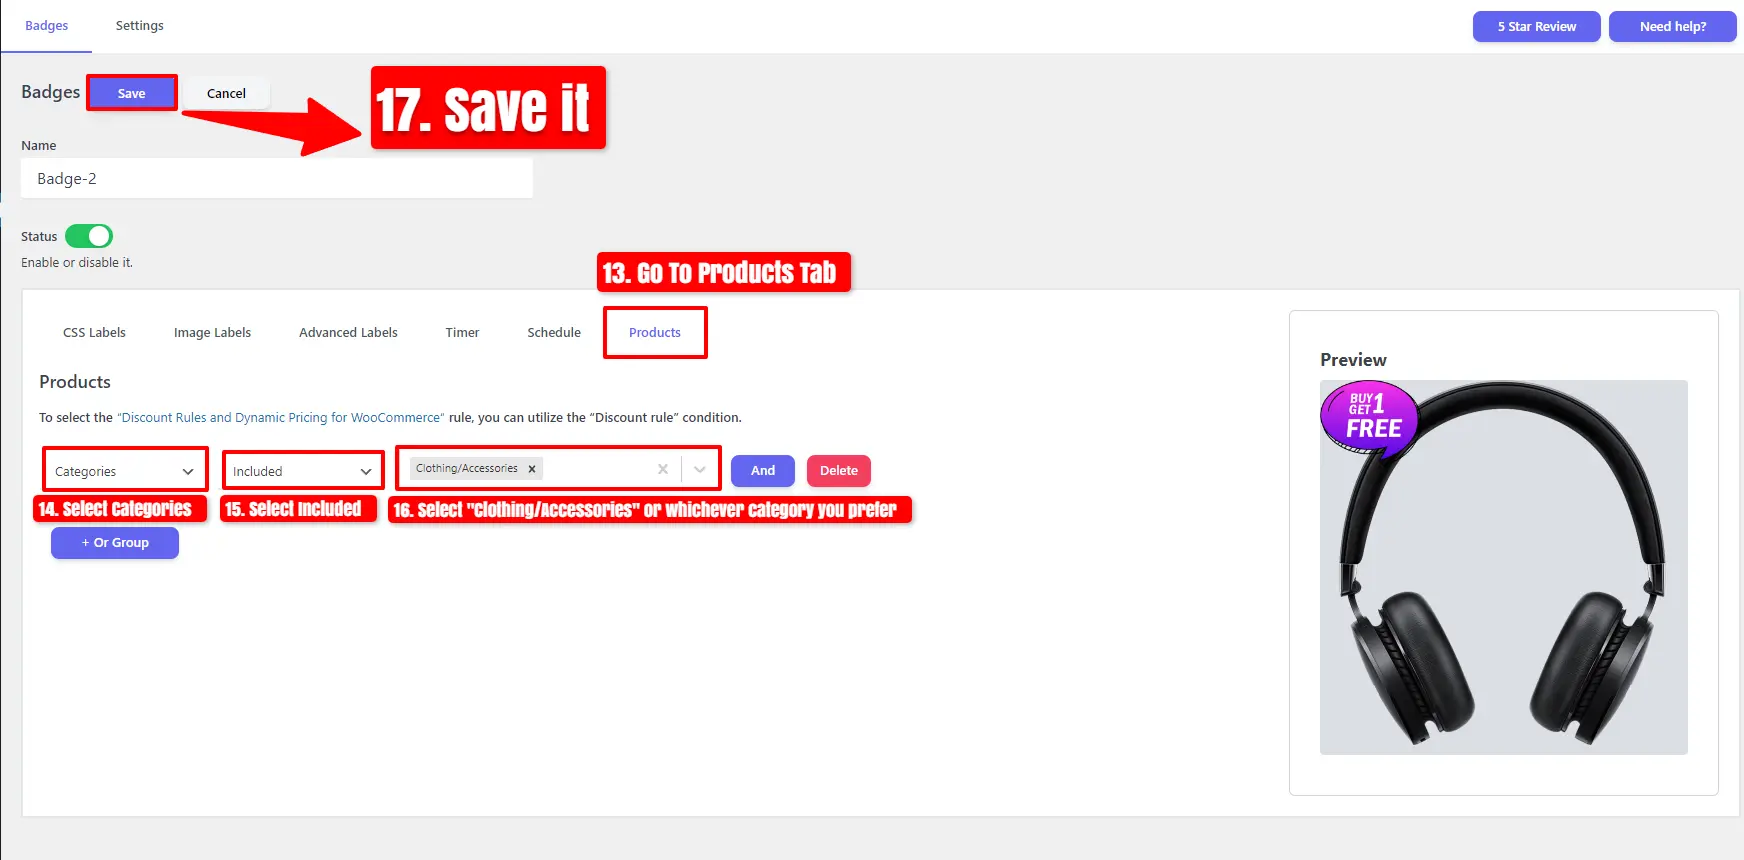
- Navigate to the ‘Products‘ tab.
- Select ‘Categories‘ and choose ‘Included.’
- Choose the categories you desire, for example: ‘Clothing/Accessories.’
- Save your changes.
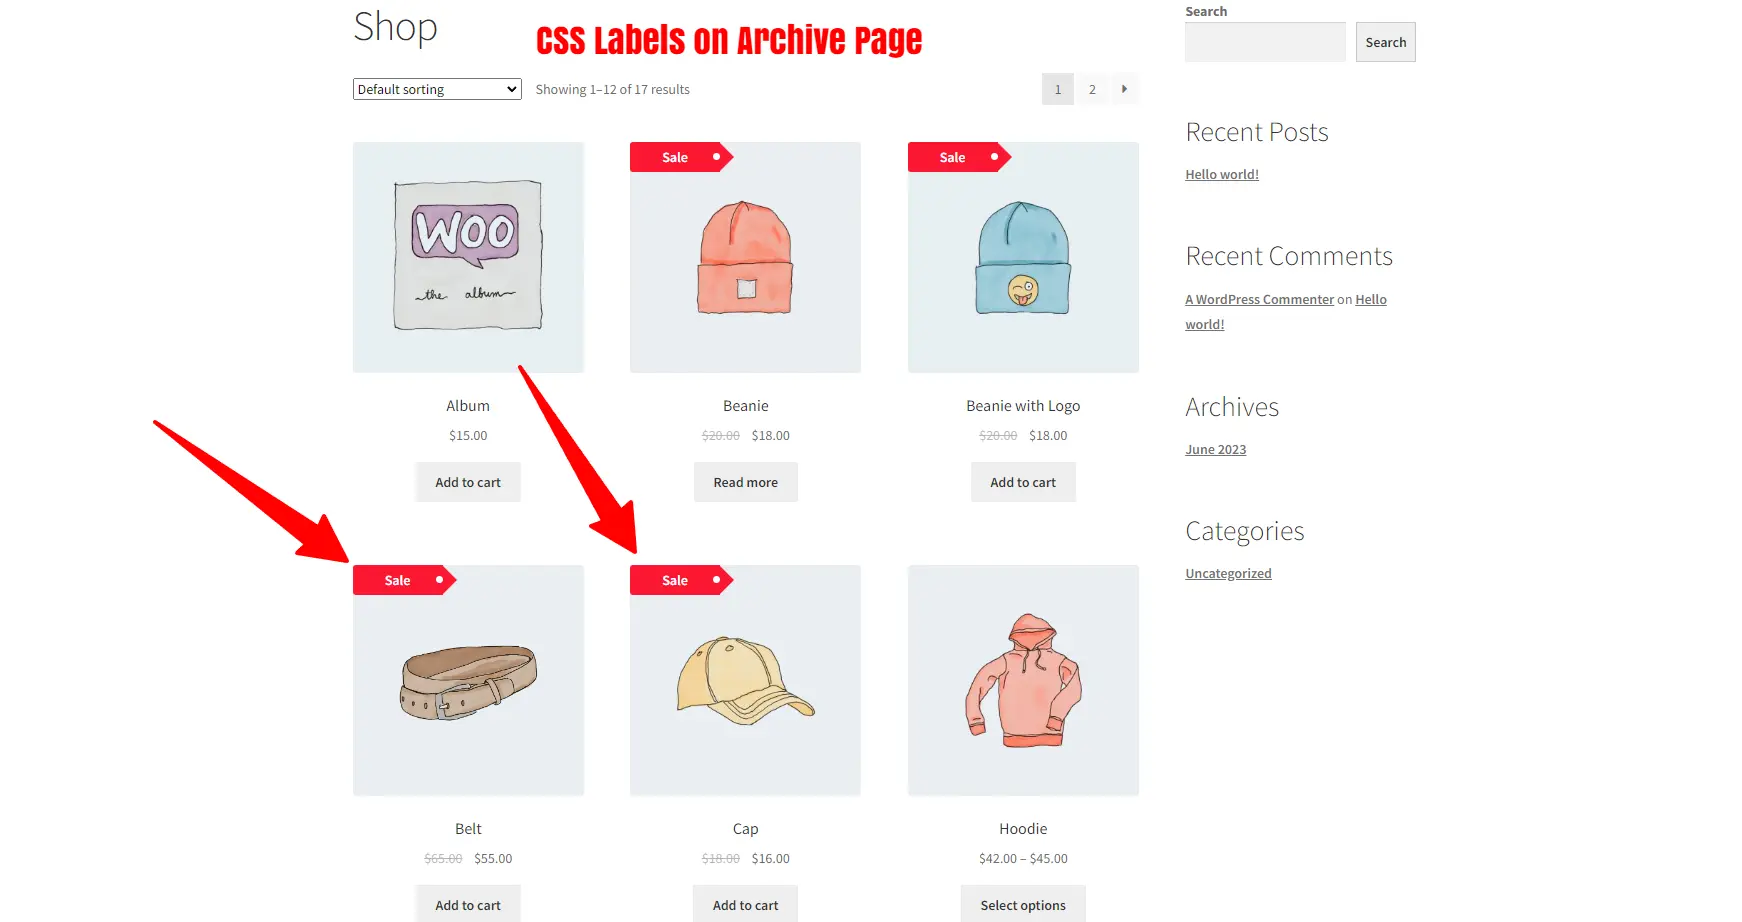
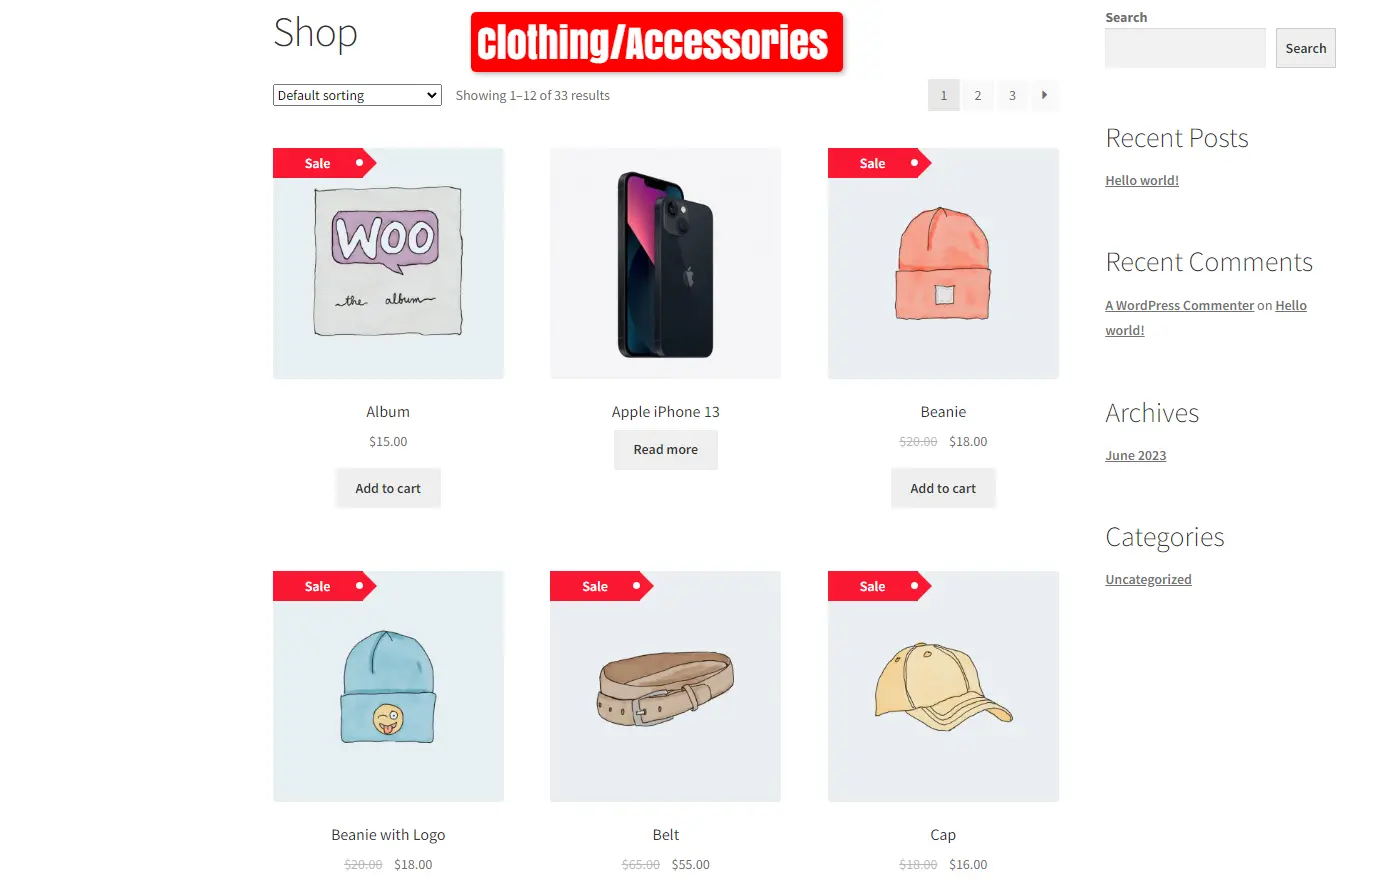
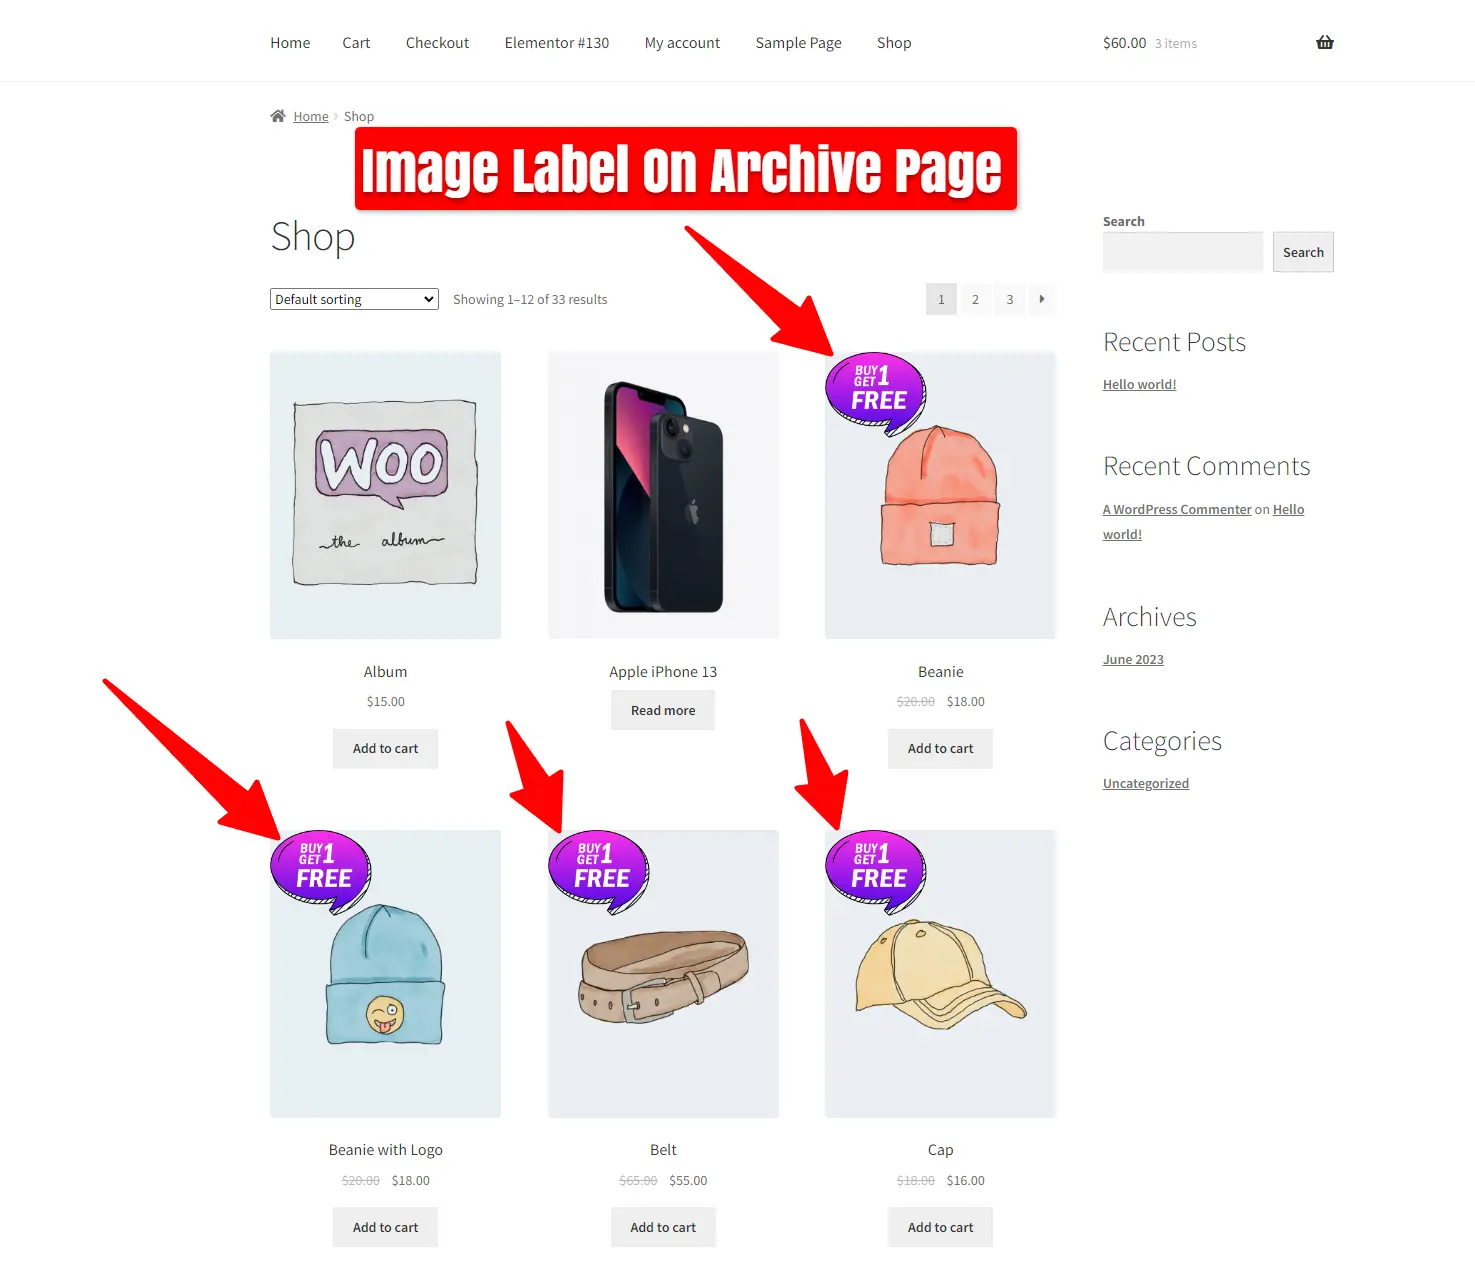
Now you can see the Countdown Timer on the Archive Page.
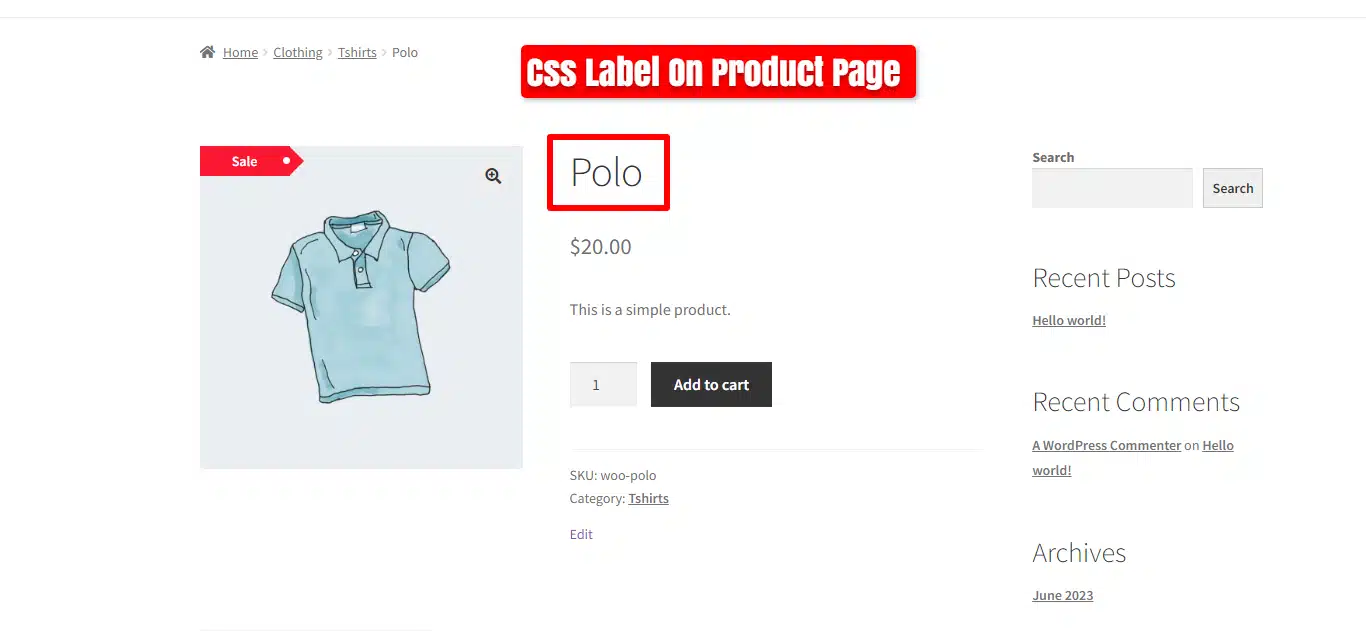
Observe the Countdown Timer on the Product Page.
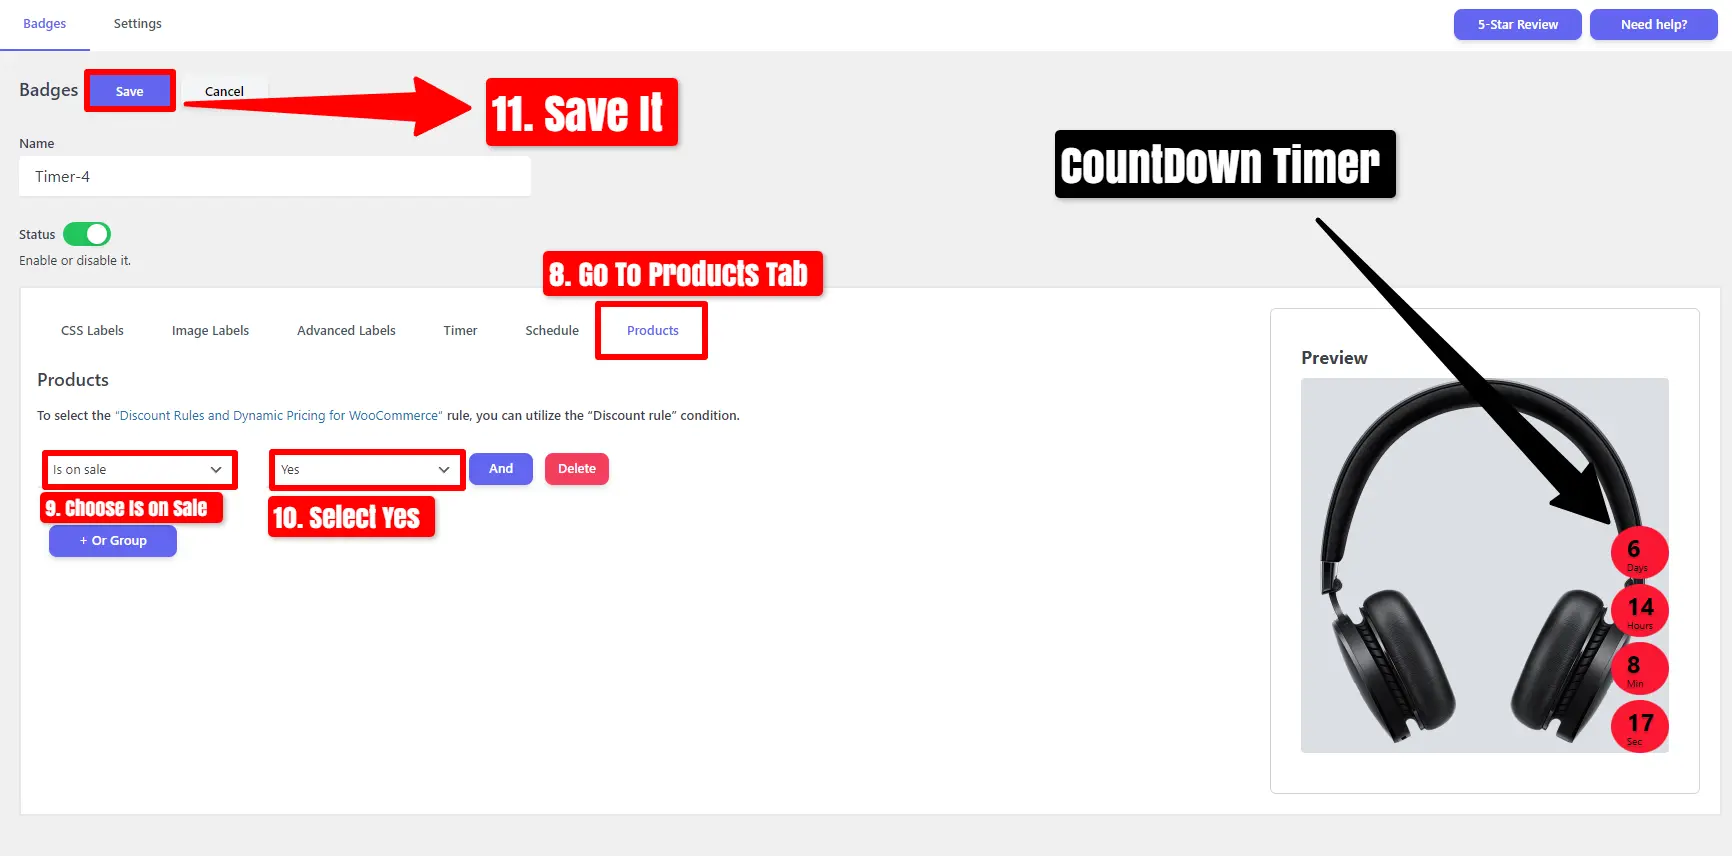
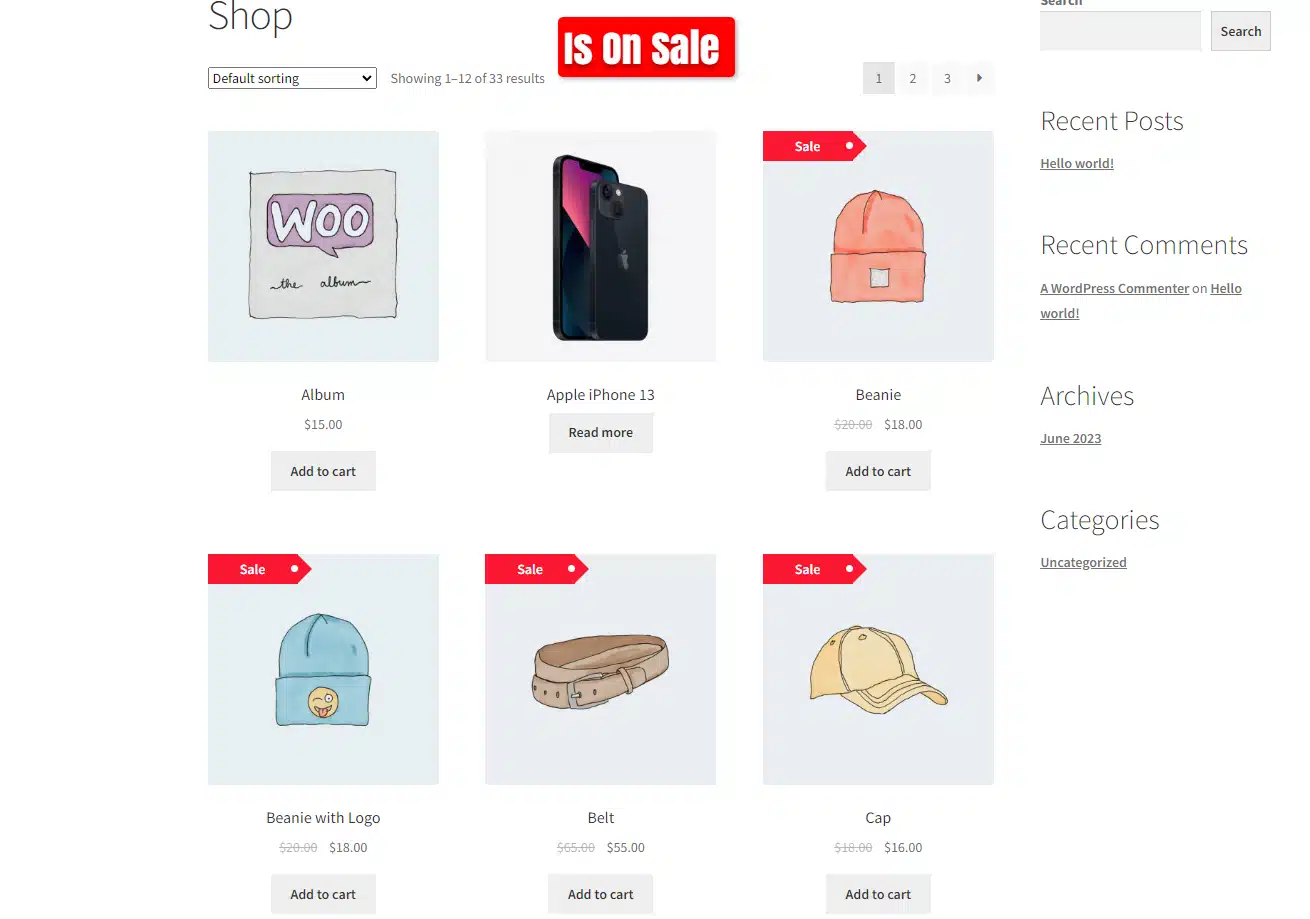
Add Countdown Timer to On Sale Products in WooCommerce
Disable Status and Click on Add New.
- Set a name.
- Begin by clicking on the ‘Timer‘ tab.
- choose your preferred Timer Style.
- Set the ‘From Date/Time‘ and ‘To Date/Time.’
- Customize the Background Color and Text Color.
- Alter the Timer Position as needed.
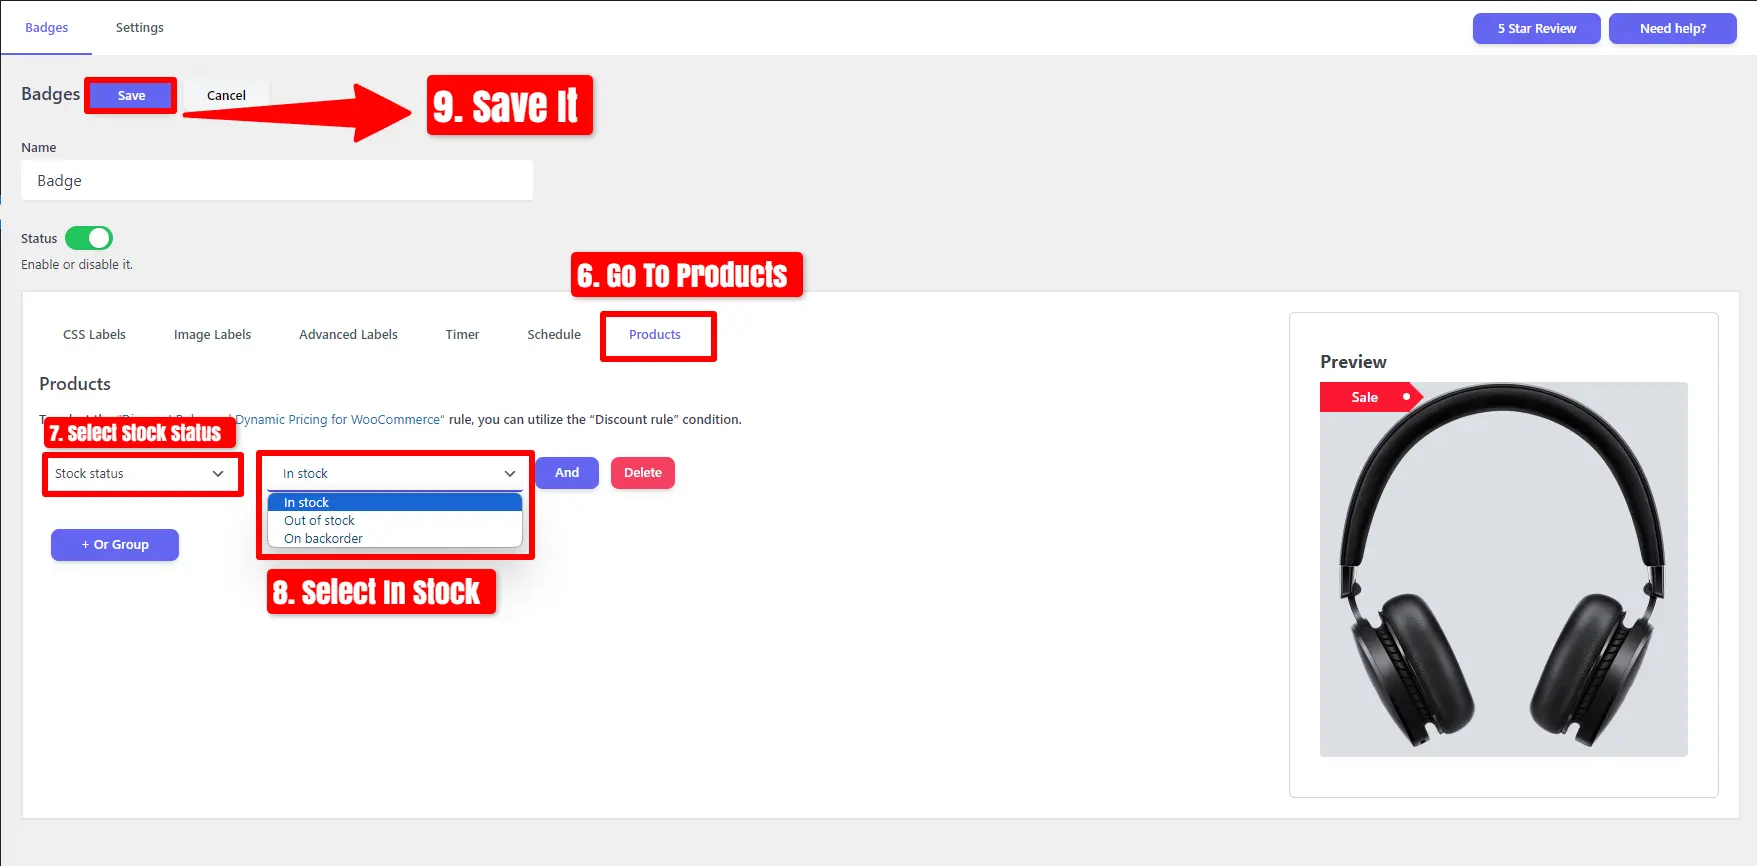
- Navigate to the ‘Products‘ tab.
- Select ‘Is on Sale‘ and choose ‘Yes‘.
- Save your changes.
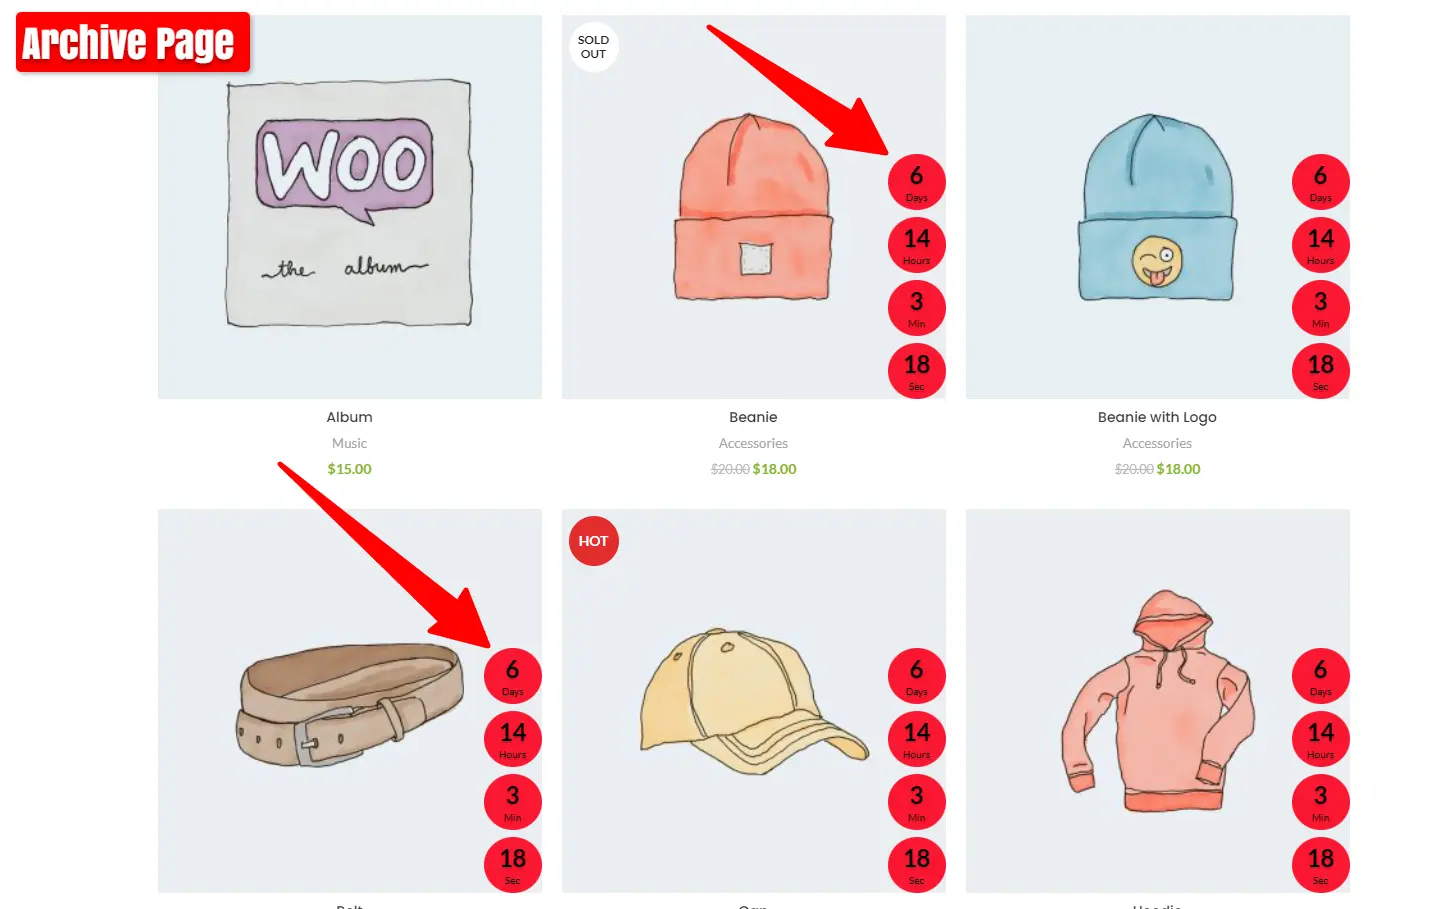
Now you can see the Timer on the Archive Page.
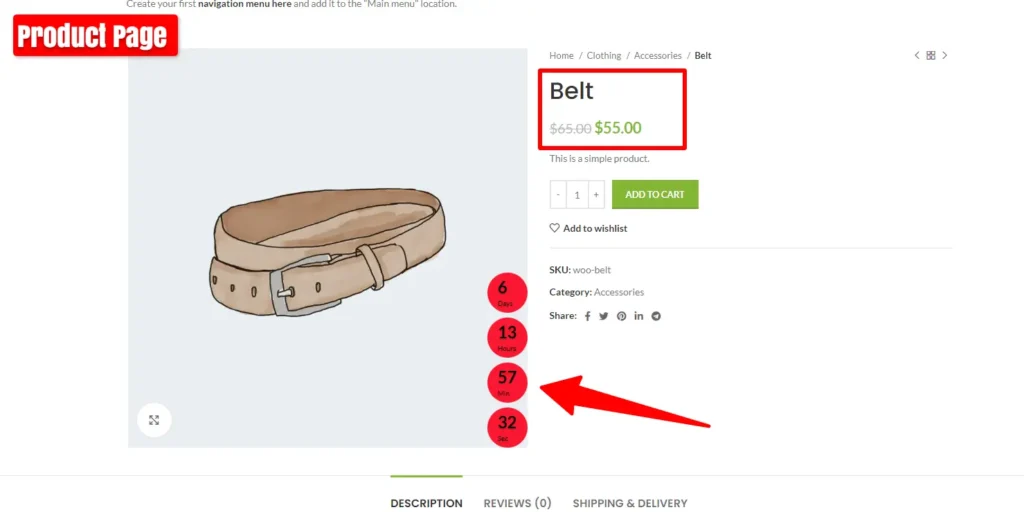
Observe the Countdown Timer on the Product Page.
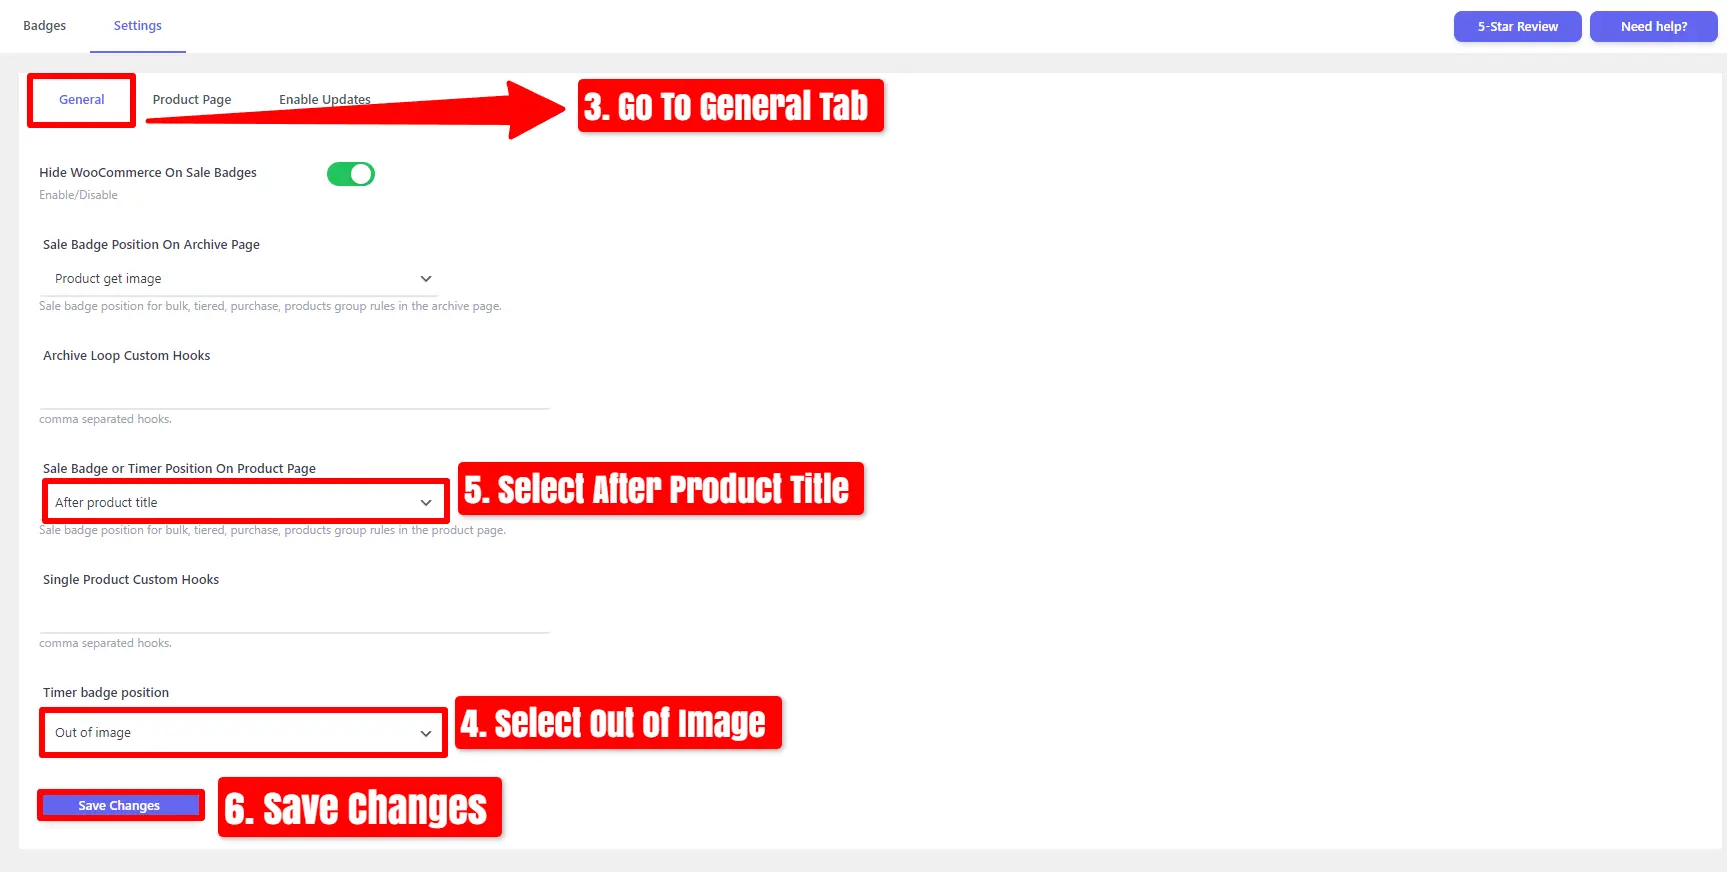
Add Countdown Timer to Out of Image in WooCommerce
If you want to display the Countdown Timer outside of the image on the Product Page, follow these steps :
- Enable Status
- Go to the ‘Settings‘ tab.
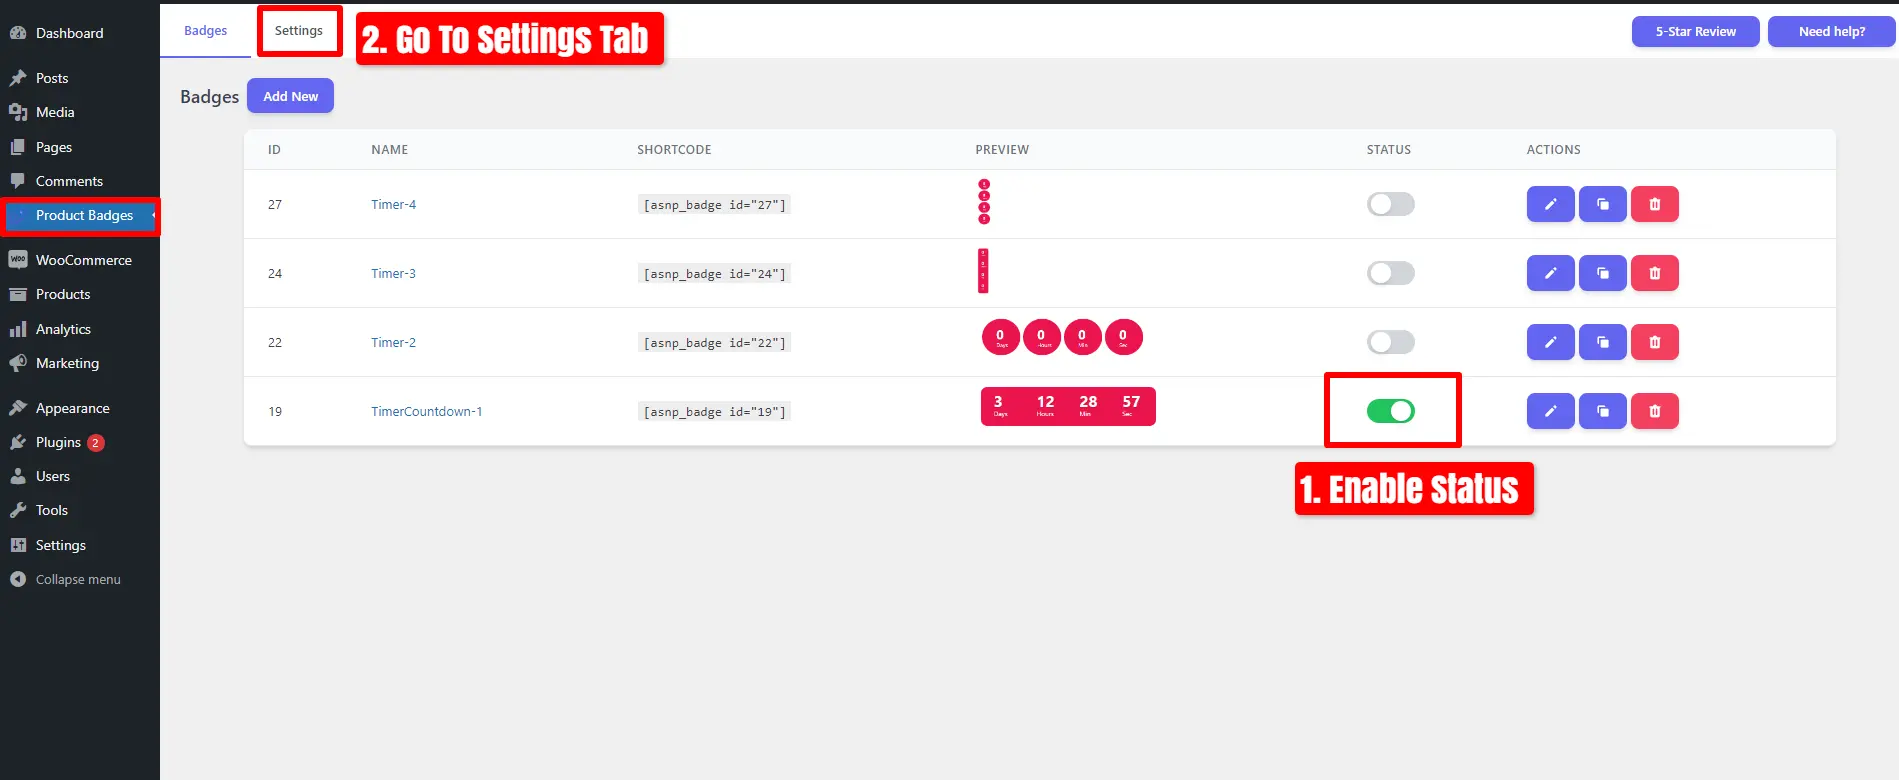
- Select General Tab
- Change the Timer Position.
- Select “Out of Image “.
- Save Changes.
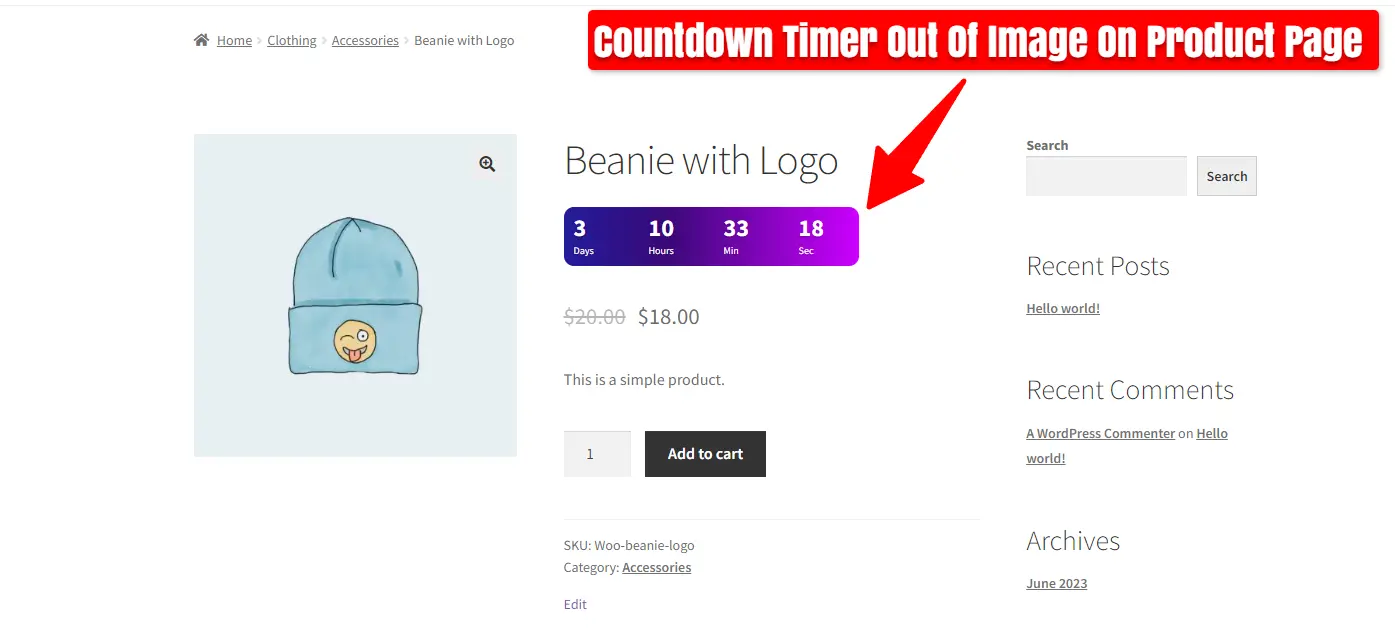
View the Countdown Timer Out of Image on the Product Page.

Shortcodes
Sale Badges And Product Labels Plugin To Woocommerce has the below shortcodes.
- [asnp_badge hide="1"] to use on the product page.
- [asnp_badge] to use on the archive product or product listing page.
If you would like to show a specific product sale badges, then use the below shortcodes.
- [asnp_badge product_id=”7″ hide=”1″] to use on the product page, replace “7” with your product ID.
- [asnp_badge product_id=”7″] to use on the archive product or product listing page, replace “7” with your product ID.


